Saltar al contenido principal

Asus ZenBook Flip UX360C Screen Replacement

Qué necesitas

  1. Asus ZenBook Flip UX360C Screen Replacement, Screen: paso 1, imagen 1 de 2 Asus ZenBook Flip UX360C Screen Replacement, Screen: paso 1, imagen 2 de 2
    • Use a spudger to pry out the two rubber grommets from the front of the screen.

    • Remove the two 4mm Phillips Head #1 screws behind the grommets.

  2. Asus ZenBook Flip UX360C Screen Replacement: paso 2, imagen 1 de 1
    • Use a large plastic opening tool to work around the outside of the screen and gently separate the two halves.

  3. Asus ZenBook Flip UX360C Screen Replacement: paso 3, imagen 1 de 1
    • Remove the two 2 mm Phillips #00 camera screws.

    • Remove the 2 mm Phillips #0 upper circuit board screw.

    • Remove the 2 mm Phillips #0 lower circuit board screw.

  4. Asus ZenBook Flip UX360C Screen Replacement: paso 4, imagen 1 de 2 Asus ZenBook Flip UX360C Screen Replacement: paso 4, imagen 2 de 2
    • Use tweezers to unplug the two ribbon cables from the top half of the screen.

    • Detach the upper circuit board cable using the same method.

  5. Asus ZenBook Flip UX360C Screen Replacement: paso 5, imagen 1 de 3 Asus ZenBook Flip UX360C Screen Replacement: paso 5, imagen 2 de 3 Asus ZenBook Flip UX360C Screen Replacement: paso 5, imagen 3 de 3
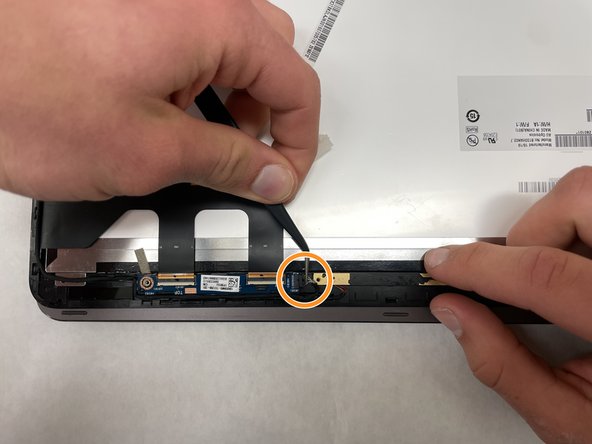
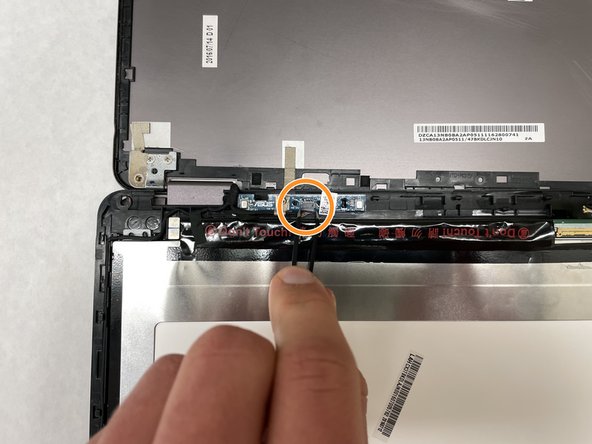
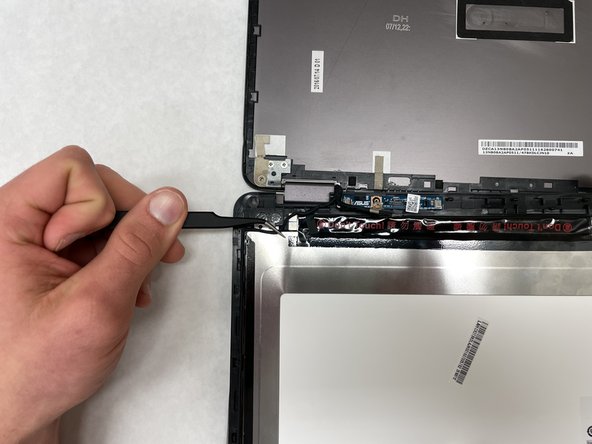
    • On the bottom half of the screen remove the screen connection.

    • Disconnect the lower circuit board cable.

    • Separate the wiring from the casing, and remove the screen.

Conclusión

To reassemble your device, follow these instructions in reverse order.

Equipo

IUPUI, Team 1-4, Harley Spring 2022 Miembro de IUPUI, Team 1-4, Harley Spring 2022

IUPUI-HARLEY-S22S1G4

3 Miembros

3 Guías creadas

0 comentarios

Agregar Comentario

Ver Estadísticas:

Ultimas 24 horas: 0

Ultimos 7 días: 6

Ultimos 30 días: 44

Todo El Tiempo: 1,802