Saltar al contenido principal

Asus Q524U Daughterboard Replacement

Qué necesitas

  1. Asus Q524U Daughterboard Replacement, Back Panel: paso 1, imagen 1 de 2 Asus Q524U Daughterboard Replacement, Back Panel: paso 1, imagen 2 de 2
    • Remove ten 3 mm screws using a Phillips #0 screwdriver.

  2. Asus Q524U Daughterboard Replacement: paso 2, imagen 1 de 1
    • Lift up the back panel and set it to the side.

  3. Asus Q524U Daughterboard Replacement, Battery: paso 3, imagen 1 de 2 Asus Q524U Daughterboard Replacement, Battery: paso 3, imagen 2 de 2
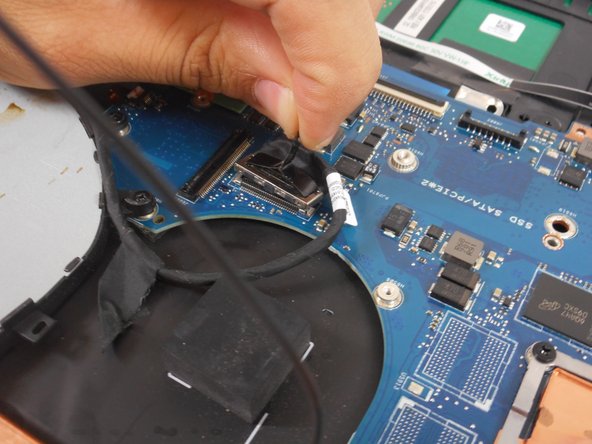
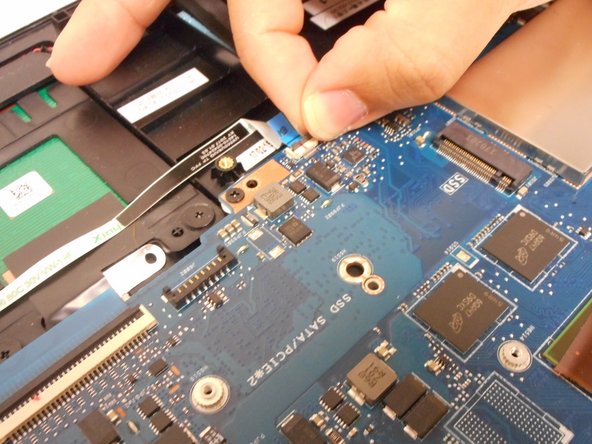
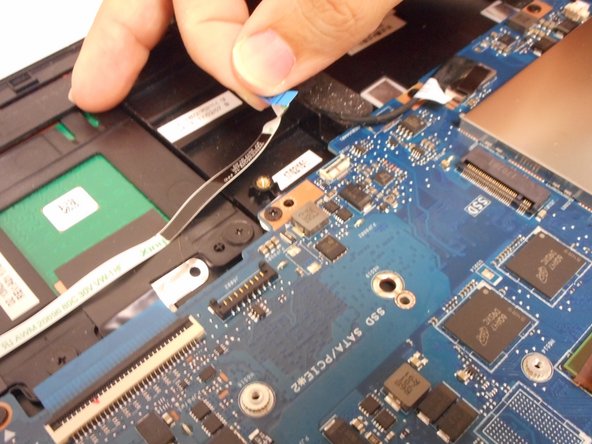
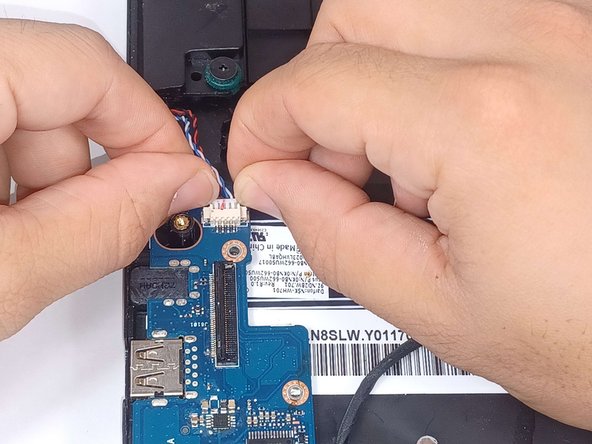
    • Using your fingers, grip onto both sides of the wire harness and push it upwards.

  4. Asus Q524U Daughterboard Replacement: paso 4, imagen 1 de 2 Asus Q524U Daughterboard Replacement: paso 4, imagen 2 de 2
    • Remove the five 3 mm screws holding the battery in place using a Phillips #0 screwdriver.

  5. Asus Q524U Daughterboard Replacement: paso 5, imagen 1 de 3 Asus Q524U Daughterboard Replacement: paso 5, imagen 2 de 3 Asus Q524U Daughterboard Replacement: paso 5, imagen 3 de 3
    • Tilt the small black tab up which will allow the blue tape to be slid out.

  6. Asus Q524U Daughterboard Replacement: paso 6, imagen 1 de 1
    • Simply lift the battery up and out of its holding area.

  7. Asus Q524U Daughterboard Replacement, Fan Assembly: paso 7, imagen 1 de 1
    • Remove the four 3 mm screws holding the fan in place using a Phillips #0 screwdriver.

  8. Asus Q524U Daughterboard Replacement: paso 8, imagen 1 de 2 Asus Q524U Daughterboard Replacement: paso 8, imagen 2 de 2
    • Remove five 3 mm screws holding the heat sink in place using a Phillips #0 screwdriver.

  9. Asus Q524U Daughterboard Replacement: paso 9, imagen 1 de 3 Asus Q524U Daughterboard Replacement: paso 9, imagen 2 de 3 Asus Q524U Daughterboard Replacement: paso 9, imagen 3 de 3
    • Pull up fan connector tab by using the plastic handle.

  10. Asus Q524U Daughterboard Replacement: paso 10, imagen 1 de 2 Asus Q524U Daughterboard Replacement: paso 10, imagen 2 de 2
    • Unwind the cable wrapped around the fan casing.

  11. Asus Q524U Daughterboard Replacement: paso 11, imagen 1 de 1
    • Disconnect the small cable from the fan.

  12. Asus Q524U Daughterboard Replacement: paso 12, imagen 1 de 1
    • After all screws and cables are unsecured, lift the fan assembly out of the laptop.

  13. Asus Q524U Daughterboard Replacement, Wi-Fi Card: paso 13, imagen 1 de 2 Asus Q524U Daughterboard Replacement, Wi-Fi Card: paso 13, imagen 2 de 2
    • Disconnect the black and white wires by pulling them up.

  14. Asus Q524U Daughterboard Replacement: paso 14, imagen 1 de 2 Asus Q524U Daughterboard Replacement: paso 14, imagen 2 de 2
    • Unscrew the single 3 mm screw using a Phillips #0 screwdriver.

  15. Asus Q524U Daughterboard Replacement: paso 15, imagen 1 de 2 Asus Q524U Daughterboard Replacement: paso 15, imagen 2 de 2
    • Slide the Wi-Fi card out of its slot.

  16. Asus Q524U Daughterboard Replacement, Motherboard: paso 16, imagen 1 de 2 Asus Q524U Daughterboard Replacement, Motherboard: paso 16, imagen 2 de 2
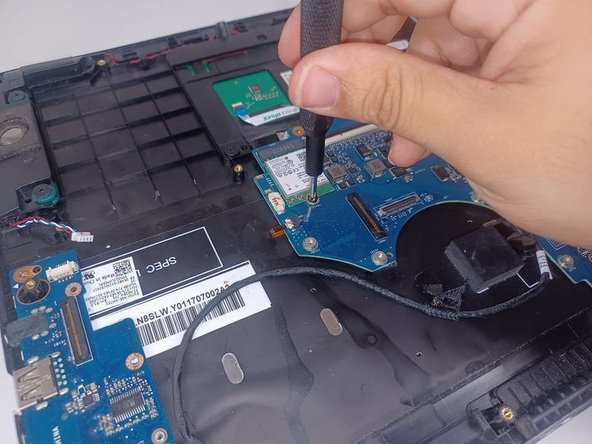
    • Remove the seven screws attached to the motherboard using a Phillips #0 screwdriver.

  17. Asus Q524U Daughterboard Replacement: paso 17, imagen 1 de 3 Asus Q524U Daughterboard Replacement: paso 17, imagen 2 de 3 Asus Q524U Daughterboard Replacement: paso 17, imagen 3 de 3
    • Using your finger flip the tab holding this light blue ribbon cable and move it out of the way.

  18. Asus Q524U Daughterboard Replacement: paso 18, imagen 1 de 2 Asus Q524U Daughterboard Replacement: paso 18, imagen 2 de 2
    • Using your fingers lift this tab up and pull out the blue ribbon cable.

  19. Asus Q524U Daughterboard Replacement: paso 19, imagen 1 de 3 Asus Q524U Daughterboard Replacement: paso 19, imagen 2 de 3 Asus Q524U Daughterboard Replacement: paso 19, imagen 3 de 3
    • Flip up the orange tab beneath the Wi-Fi card and pull out the wire.

  20. Asus Q524U Daughterboard Replacement: paso 20, imagen 1 de 3 Asus Q524U Daughterboard Replacement: paso 20, imagen 2 de 3 Asus Q524U Daughterboard Replacement: paso 20, imagen 3 de 3
    • Using your fingers, disconnect this wire harness by pushing it out from both sides.

  21. Asus Q524U Daughterboard Replacement: paso 21, imagen 1 de 2 Asus Q524U Daughterboard Replacement: paso 21, imagen 2 de 2
    • With your fingers, pull this tab up to disconnect the wire from the motherboard.

    • With this tab out of the way you can now pull the motherboard out.

  22. Asus Q524U Daughterboard Replacement, Daughterboard: paso 22, imagen 1 de 2 Asus Q524U Daughterboard Replacement, Daughterboard: paso 22, imagen 2 de 2
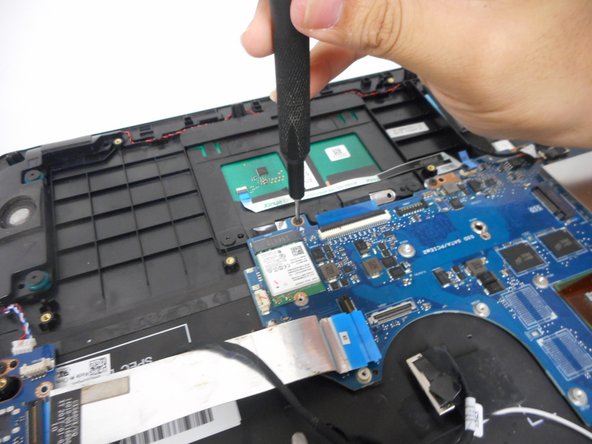
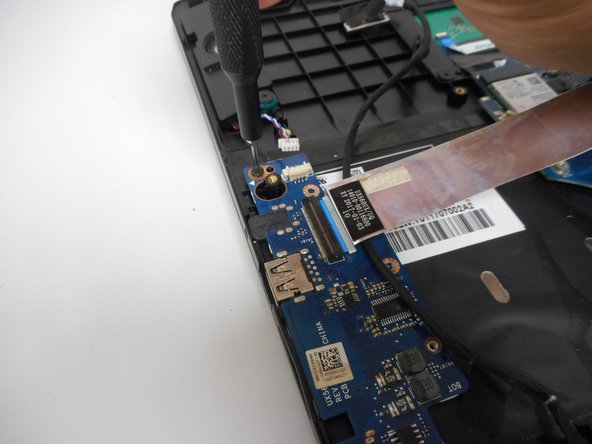
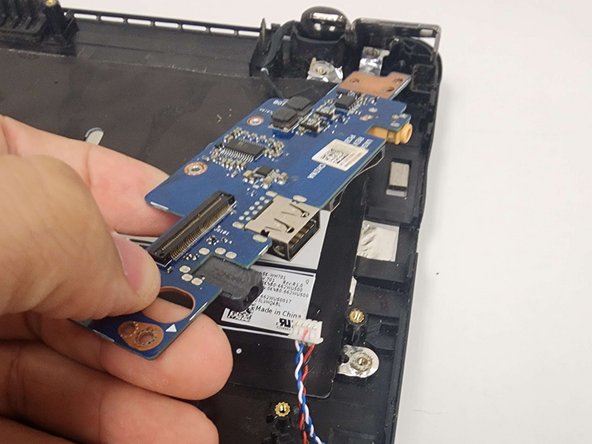
    • Remove the five screws from the daughterboard using a Phillips #0 screwdriver.

  23. Asus Q524U Daughterboard Replacement: paso 23, imagen 1 de 3 Asus Q524U Daughterboard Replacement: paso 23, imagen 2 de 3 Asus Q524U Daughterboard Replacement: paso 23, imagen 3 de 3
    • Open the laptop slightly in order for this hinge to open up.

  24. Asus Q524U Daughterboard Replacement: paso 24, imagen 1 de 2 Asus Q524U Daughterboard Replacement: paso 24, imagen 2 de 2
    • Remove the daughterboard from the laptop.

Conclusión

To reassemble your device, follow these instructions in reverse order.

Kristen Gismondi

Miembro Desde 11/12/14

84,914 Reputación

215 Guías creadas

Equipo

iFixit Miembro de iFixit

Staff

141 Miembros

17,911 Guías creadas

0 comentarios

Agregar Comentario

Ver Estadísticas:

Ultimas 24 horas: 0

Ultimos 7 días: 1

Ultimos 30 días: 4

Todo El Tiempo: 59