Esta versión puede contener ediciones incorrectas. Cambie a la última instantánea verificada.
Qué necesitas
-
Este paso está sin traducir. Ayuda a traducirlo
-
Power down the Chromebook and disconnect the power adapter.
-
-
Este paso está sin traducir. Ayuda a traducirlo
-
Place the chromebook bottom side up on a flat surface.
-
Remove the thirteen 7 mm screws with a Phillips #0 screwdriver.
-
-
Este paso está sin traducir. Ayuda a traducirlo
-
Insert the plastic opening tool into the slit near the hinges and pry upwards to lift the back panel.
-
-
Este paso está sin traducir. Ayuda a traducirlo
-
Flip up the clip holding down the white cable using the spudger.
-
Pull the cable outwards towards the battery.
-
-
Este paso está sin traducir. Ayuda a traducirlo
-
Flip up the clip holding down the white cable using the flat end of the spudger.
-
Pull the cable outwards towards the battery.
-
-
Este paso está sin traducir. Ayuda a traducirlo
-
Flip up the white clip holding down the connector labelled "MB" using the flat end of the spudger.
-
Remove the connector by pulling out towards the battery.
-
-
-
Este paso está sin traducir. Ayuda a traducirlo
-
Unplug the white 8-wire battery connector from the motherboard by using a spudger to push the two L-shaped indentations towards the battery.
-
-
Este paso está sin traducir. Ayuda a traducirlo
-
Unplug the black connector attached to the motherboard at the top right of the battery by using a spudger to push the two L-shaped indentations towards the battery.
-
-
Este paso está sin traducir. Ayuda a traducirlo
-
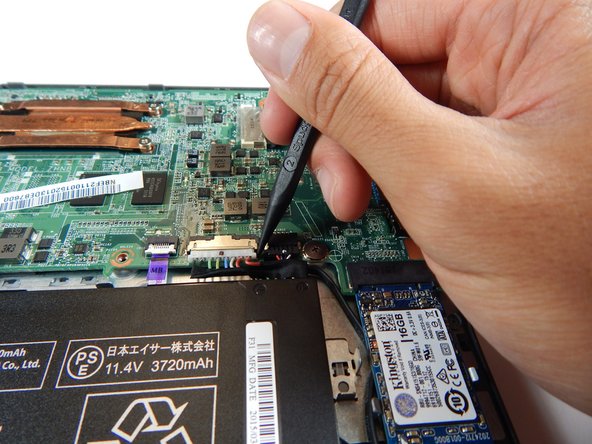
Peel back the tape covering the white connector at the top-right of the motherboard.
-
Remove the connector from its fitting by pulling outwards.
-
-
Este paso está sin traducir. Ayuda a traducirlo
-
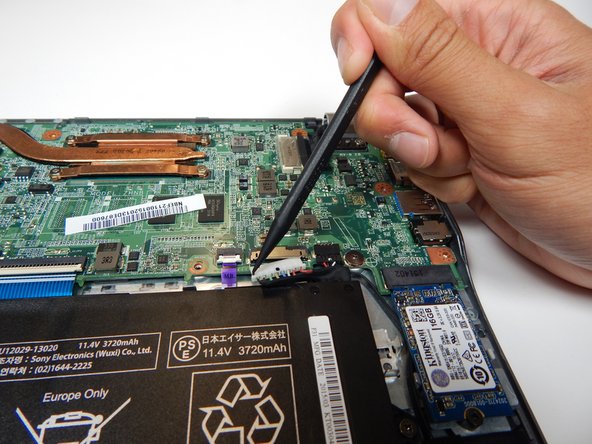
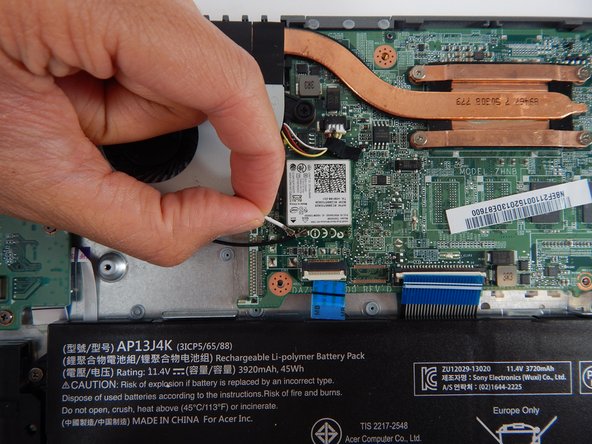
Unplug the white connector attached to the right of the fan with the spudger by applying force towards the battery on the two L-shaped indentations.
-
-
Este paso está sin traducir. Ayuda a traducirlo
-
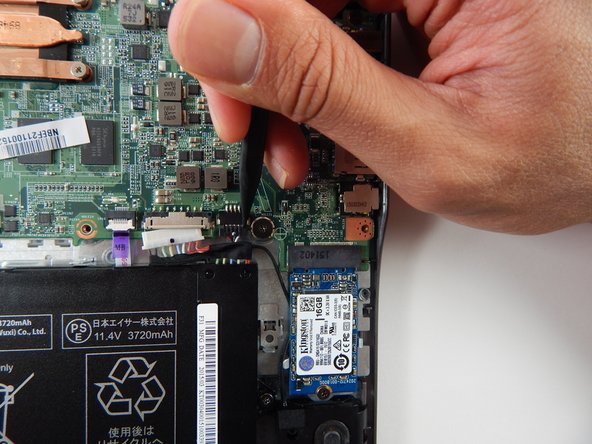
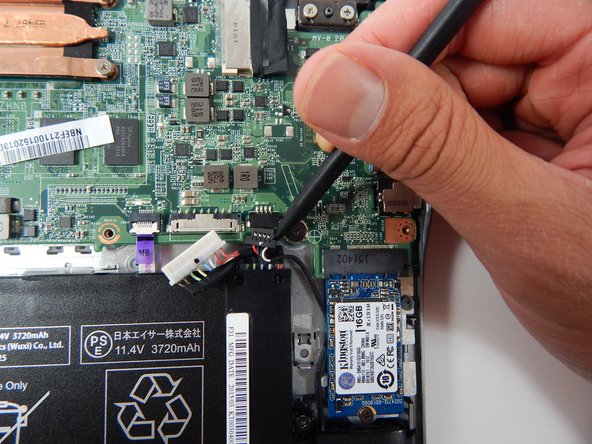
Disconnect the two white and black wires by holding close to the metal snap-on caps and pulling upwards.
-
-
Este paso está sin traducir. Ayuda a traducirlo
-
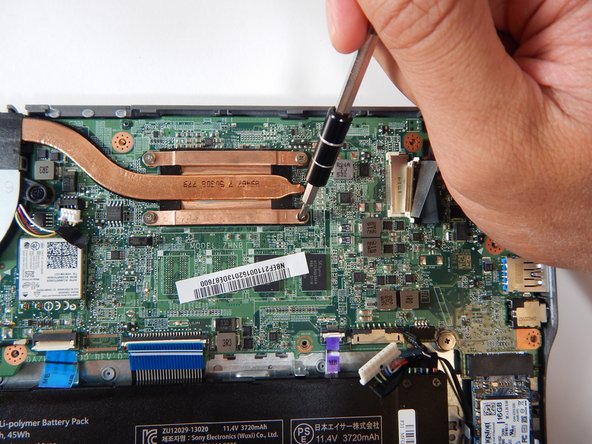
Remove the four 3.7 mm screws with a Phillips #0 screwdriver.
-
-
Este paso está sin traducir. Ayuda a traducirlo
-
Loosen the two black screws with a Phillips #0 screwdriver.
-
Lift the heatsink fan and rotate it away from the mother board to set down outside the laptop.
-
-
Este paso está sin traducir. Ayuda a traducirlo
-
Remove the 3.63 mm screw in the top right near the hinge with a Phillips #0 screwdriver.
-
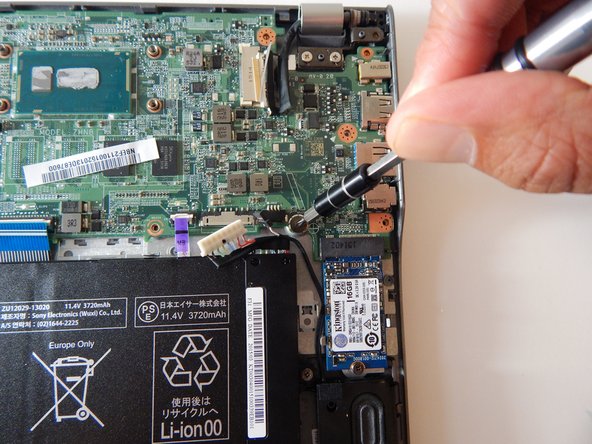
Remove the 3.75 mm screw near the top right corner of the battery with a Phillips #0 screwdriver.
-
-
Este paso está sin traducir. Ayuda a traducirlo
-
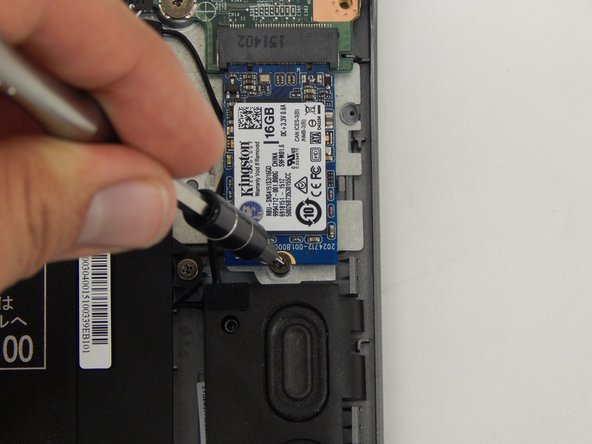
Remove the 3.75 mm screw with a Phillips #0 screwdriver.
-
-
Este paso está sin traducir. Ayuda a traducirlo
-
Carefully lift the motherboard away from the laptop with two hands.
-


Cancelar: No complete esta guía.
4 personas más completaron esta guía.
Equipo

Cal Poly, Team S22-G2, Livingston Spring 2017 Miembro de Cal Poly, Team S22-G2, Livingston Spring 2017
CPSU-LIVINGSTON-S17S22G2
4 Miembros
12 Guías creadas