Esta versión puede contener ediciones incorrectas. Cambie a la última instantánea verificada.
Qué necesitas
-
Este paso está sin traducir. Ayuda a traducirlo
-
Keeping it closed, turn the laptop upside down.
-
With the Phillips #0 screwdriver, remove the twelve 5 mm screws that hold the laptop together.
-
Insert the plastic opening tool between the plastic casings to pull the bottom lid of the laptop up.
-
-
Este paso está sin traducir. Ayuda a traducirlo
-
Locate the six cables that are connected to the motherboard. The cable with the white strip is located underneath the cable with the orange strip.
-
Using the plastic opening tool on one side and your fingernail on the other, wedge each cable out of its socket.
-
-
Este paso está sin traducir. Ayuda a traducirlo
-
With the Phillips #0 screwdriver, remove the two 5 mm screws that are located above the long black piece of the battery.
-
-
-
Este paso está sin traducir. Ayuda a traducirlo
-
Locate the two speakers for this laptop that are connected above the battery by a thin red cord.
-
Using the Phillips #0 screwdriver, remove the two 3 mm screws holding the left speaker in place.
-
Pull the left speaker up along with the red cord and leave it off to the right side.
-
-
Este paso está sin traducir. Ayuda a traducirlo
-
Without bending it, lift the entire battery (both the long black piece and the rectangular blue piece) straight up. Place it off to one side.
-
-
Este paso está sin traducir. Ayuda a traducirlo
-
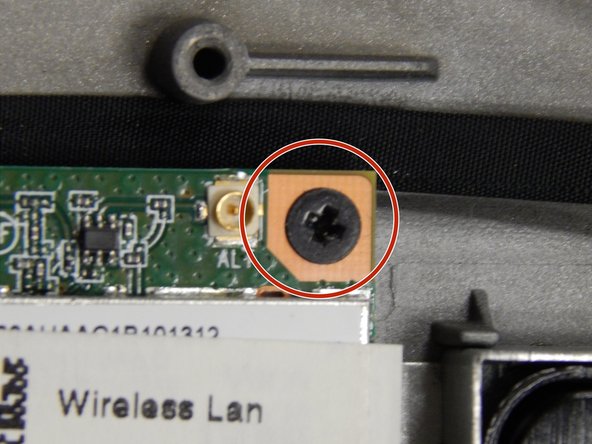
Locate the Wi-Fi card (it is near the black rectangular hard drive).
-
-
Este paso está sin traducir. Ayuda a traducirlo
-
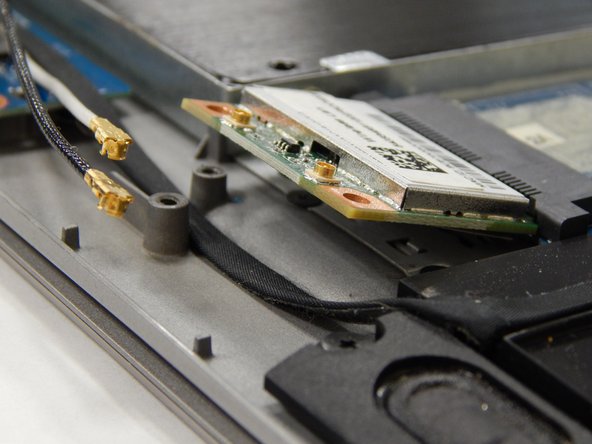
Lift up and remove the two cables attached to the Wi-Fi card (one is white and one is black) with the spudger tool.
-
-
Este paso está sin traducir. Ayuda a traducirlo
-
Remove the single 3 mm screw located on the top-right side of the Wi-Fi card using the Phillips #0 screwdriver.
-


Equipo

UW Tacoma, Team S1-G1, Rose Fall 2018 Miembro de UW Tacoma, Team S1-G1, Rose Fall 2018
UWT-ROSE-F18S1G1
4 Miembros
5 Guías creadas