Saltar al contenido principal

Acer Aspire ES1-332 LCD Screen Replacement

Qué necesitas

Resumen del Video

  1. Acer Aspire ES1-332 LCD Screen Replacement, LCD Screen: paso 1, imagen 1 de 3 Acer Aspire ES1-332 LCD Screen Replacement, LCD Screen: paso 1, imagen 2 de 3 Acer Aspire ES1-332 LCD Screen Replacement, LCD Screen: paso 1, imagen 3 de 3
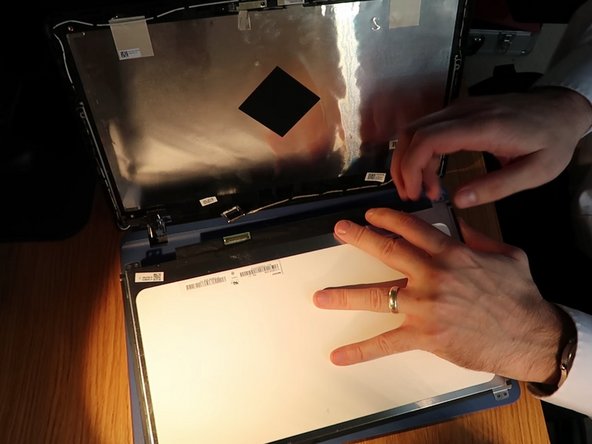
    • Grab a spudger and work your way around the outer edge of the screen

    • Lean the screen all the way back to remove the plastic frame from the hinges at the bottom

  2. Acer Aspire ES1-332 LCD Screen Replacement: paso 2, imagen 1 de 2 Acer Aspire ES1-332 LCD Screen Replacement: paso 2, imagen 2 de 2
    • Unscrew the 4 screws around the edge of the screen

    • Lean the screen all the way forward on to the keyboard

  3. Acer Aspire ES1-332 LCD Screen Replacement: paso 3, imagen 1 de 2 Acer Aspire ES1-332 LCD Screen Replacement: paso 3, imagen 2 de 2
    • Peal up the sticky tape next to the screen connector

    • Pull the connector down carefully away from the screen and disconnect it

  4. Acer Aspire ES1-332 LCD Screen Replacement: paso 4, imagen 1 de 3 Acer Aspire ES1-332 LCD Screen Replacement: paso 4, imagen 2 de 3 Acer Aspire ES1-332 LCD Screen Replacement: paso 4, imagen 3 de 3
    • connect the new screen and screw back in place

    • Turn on the screen to test before putting the screen frame back on

    • Tilt the screen all the way back and push the frame back on hinges 1st.

    • Finally lean the laptop on its edge and clip the back on the hinges back in place.

Linea de Meta

Una persona más ha completado esta guía.

Nick Myers

Miembro Desde 04/15/18

3,398 Reputación

21 Guías creadas

0 comentarios

Agregar Comentario

Ver Estadísticas:

Ultimas 24 horas: 1

Ultimos 7 días: 2

Ultimos 30 días: 4

Todo El Tiempo: 675