Saltar al contenido principal

Qué necesitas

Este desmontaje no es una guía de reparación. Para reparar tu Dreamcast VMU, utiliza nuestros manuales de servicio .

  1. Dreamcast VMU Teardown, battery cover: paso 1, imagen 1 de 2 Dreamcast VMU Teardown, battery cover: paso 1, imagen 2 de 2
    • Remove the silver screw and batteries

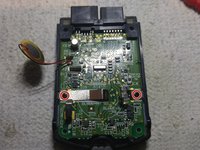
  2. Dreamcast VMU Teardown, Rear shell: paso 2, imagen 1 de 3 Dreamcast VMU Teardown, Rear shell: paso 2, imagen 2 de 3 Dreamcast VMU Teardown, Rear shell: paso 2, imagen 3 de 3
    • Remove the four black screws

    • Be careful of the speaker wire

    • Carefully peel the speaker away from the shell with a Spudger

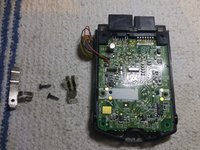
  3. Dreamcast VMU Teardown, Battery terminals: paso 3, imagen 1 de 2 Dreamcast VMU Teardown, Battery terminals: paso 3, imagen 2 de 2
    • Remove the two battery terminal screws

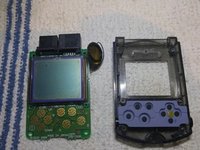
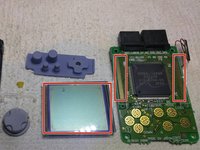
  4. Dreamcast VMU Teardown, Motherboard: paso 4, imagen 1 de 3 Dreamcast VMU Teardown, Motherboard: paso 4, imagen 2 de 3 Dreamcast VMU Teardown, Motherboard: paso 4, imagen 3 de 3
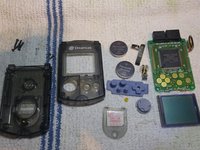
    • Lift the main board from the shell

    • Remove the screen from the motherboard

    • Remove the screen stay, D-pad and rubber buttons from the shell

    • And you're done!

Caleb

Miembro Desde 03/22/17

121 Reputación

1 Guía escrita

3 comentarios

Great! Now I can open my VMU without fear.

Wellington - Contestar

Agregar Comentario

Ver Estadísticas:

Ultimas 24 horas: 2

Ultimos 7 días: 28

Ultimos 30 días: 91

Todo El Tiempo: 6,255