A little iBook gets a charge (again)

Mi Problema
Our daughter reported that her six-year-old Apple iBook G4 12" was no longer charging its battery.
After determining the battery and AC power adapter were functioning properly, a Google search suggested that the DC-in board -- a small circuit board that includes the power adapter port (which you stick the adapter plug into) and a cable that plugs into the logic board -- had likely gone bad, probably from mechanical failure.
Mi Solución
Pretty well, thanks to a very thorough and well-illustrated guide from ifixit. I had contacted a local Mac repair shop, but it said it no longer serviced iBook G4s because it couldn't get parts from Apple.
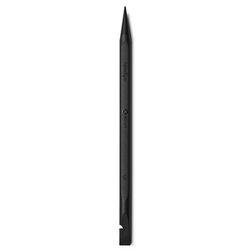
While I've been inside several computers, I had to take a deep breath over the prospect of prying apart the lower case of the iBook with a spudger… and indeed, the ifixit guide cautioned, "Take a deep breath."
It took some patience and care to not crack the plastic case. But gradually, the tabs came apart (the guide was so thorough as to tell us exactly how many "clicks" to expect).
The back side of the lower case didn't come apart quite like the guide described -- we had to use the spudger rather than wiggle it apart -- but come apart it did.
The DC-in board was actually quite simple to replace. Then we re-assembled the iBook. It took just under one hour.
But it still wouldn't charge. Eventually, we realized a mistake we had made: We had inserted one of the two screws for the DC-in board into the hole for one of the iBook's feet instead by mistake. Not only could we not attach the foot, but the laptop wouldn't charge.
So we disassembled the laptop a second time, inserted the screw into the proper hole (near the outer edge of the laptop), and reassembled the laptop (this time, the whole process took just 20 minutes).
The laptop now charges the battery properly … and the feet are all in place. High five, bay-bee!
Mi Consejo
Be patient. Slow down.
Study the illustrations in the guide carefully. Take special note of red circles that have been Photoshopped in to identify exact locations of holes. Did I mention slow down?
I can't say enough how impressed I am with the ifixit guide (and the site's general cheekiness, which helps ratchet down the fear factor).


0 comentarios