Saltar al contenido principal

El Motorola MBP33SBU es un monitor de video para bebés de 2.8 pulgadas con un audio bidireccional que le permite comunicarse de un lado a otro en diferentes habitaciones. El dispositivo incluye visión nocturna, activación de sonido, una pantalla LCD a todo color y un alcance inalámbrico de 590 pies con indicación de fuera de alcance. Motorola también lanzó la versión MBP33XL, que cuenta con una pantalla más grande de 3.5 pulgadas.

Preguntas 6 Ver todo

Motorola MBP33 baby camera disassembly

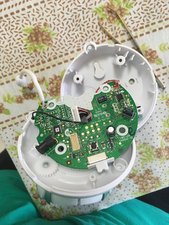
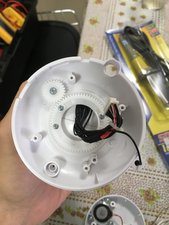
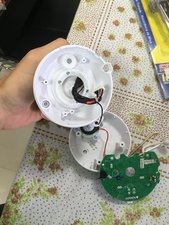
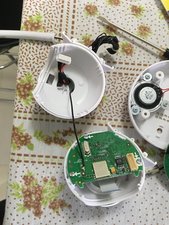
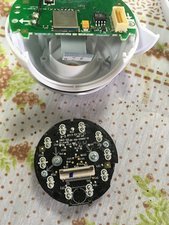
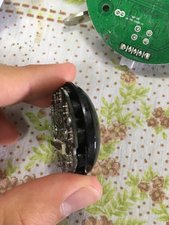
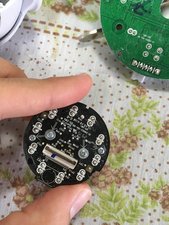
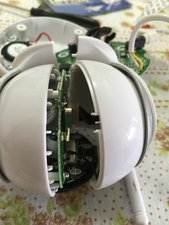
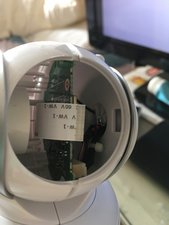
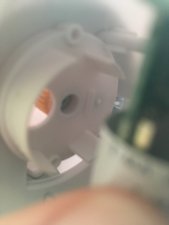
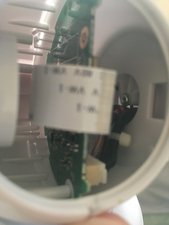
Looking for a guide of how to dismantle the baby camera for a Motorola MBP33 baby monitor please. Found a few for replacing the mic and speaker but I'm hoping to replace some IR led's as only 3 out if 9 work giving a dark image. Have had it apart as much as the base off but wonder if anyone has managed to disconnect the 2 small multicore plugs as they won't disconnect and don't want to over do it and break any thin wires. Looks like the plugs have to disconnect to allow the camera housing to be removed to allow it to be split to get access to the camera led's, so any advice would be much appreciated thanks

Contesta esta pregunta Yo también tengo este problema

Es esta una buena pregunta?

Puntuación 3
1 comentario

I don’t have a solution for you (yet!), but am interested in if you have disassembled as far as splitting apart the camera housing? Mine was dropped and the camera circuit board is loose inside the spherical housing. I need to separate the two halves so I can reseat the camera circuit board. If I can get it apart maybe I’ll see your two multicore plugs and figure out how to disconnect. Thanks.

- de

Agregar un comentario

2 Respuestas

Respuesta Más Útil

I did it! It is working again!

Ok, it is actually pretty simple. You must first disassemble the base (there is a step by step in the product page right here in ifixit - basically there are screws that you need to unscrew in the bottom of the base, hidden underneath four white rubber caps), then disconect the cables that have a little rectangular connector. Then you pass these cables and the antenna through the hole in the middle of the base board. After that, unscrew the four screws that fix a big gear underneath the camera piece. Then, you may open the two halves of the ball and do whatever you need to do inside. There is another rectangular connector inside the ball, it also can be easily disconnected to completely split the ball.

After that, it was easy to reconnect the flat cable of the camera. It is working again, after reassembly.

Here are some pictures of the camera being disassembled, so you may know what to look for.

Block Image

Block Image

Block Image

Block Image

Block Image

Block Image

Block Image

Block Image

Block Image

Fue útil esta respuesta?

Puntuación 1

3 comentarios:

How did you split the ball please? I can separate the supports but can't get into the ball. Thanks

- de

Well, after disconnecting the big gear, you split the ball by pulling each half away from the other. Maybe you just need to pull harder.

- de

How did you disconnect the motor from the main board. I can’t find any connector for it..

Thanks

- de

Agregar un comentario

Mine fell and broke open, such that the camera piece disconected from its flat cable.

I’m trying to reconnect it, but I believe that it is necessary to open the ball in order to do it. I still don’t know how to do that. There seems to be a screw on each side fixing the ball to its side supports. How could I ever use a screwdriver inside the ball? Is there a curved screwdriver?

I’m sending some pictures to see if someone know what to do.

Block Image

Block Image

Block Image

Block Image

Fue útil esta respuesta?

Puntuación 0
Agregar un comentario

Añadir tu respuesta

Andrew Allan estará eternamente agradecido.
Ver Estadísticas:

Ultimas 24 horas: 2

Ultimos 7 días: 17

Ultimos 30 días: 47

Todo El Tiempo: 2,769