Saltar al contenido principal

Modelo A1040 / disco duro de 10, 15, 20, 30 o 40 GB / cuatro botones retroiluminados LED sensibles al tacto sobre la rueda táctil

Preguntas 97 Ver todo

Click wheel electronics transfer or replacement

Hello!

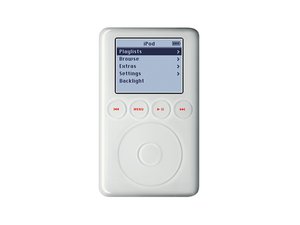
I decided to refurb an old iPod 3rd generation, as I like the buttons above the wheel.

I've already swapped out the hard drive and battery, and decided to go the full hog and replace the front panel as well, as the screen was a bit scratched up.

I ordered the front panel, but didn't quite realise that the electronics were separate. There is no guide on how to remove the actual electronics, so before diving in and probably destroying everything, I wondered if anybody had any advice? Anything at all would help.

Contestado! Ver respuesta Yo también tengo este problema

Es esta una buena pregunta?

Puntuación 1
Agregar un comentario

1 Respuesta

Solución Elegida

Updating this as I figured it out myself, and hopefully this may come in useful to somebody down the line who is searching for the same answer.

Basically, the electronics are just held on to the front plate with some adhesive, and a couple of white plastic 'posts'. To get it off, I used a large (plastic) spudger to loosen around the edges, and then pulled the whole thing off from the top end. You want to make sure you are careful, as the electronics underneath are metal - and the PCB could snap if you are too rough. Replacing these in the new iPod is as simple as swapping them over.

For some other tips that weren't obvious when I searched:

1. Restoring on a modern Mac is almost impossible, even with FireWire. The best option is to get a Windows XP Virtual Machine and restore using USB. The iPod will then work on your Macbook with USB fine.

2. If you upgrade your hard drive to an 80gb version, make sure you have the 30 or 40gb iPod, as the 20gb's back plate is not deep enough to accommodate the 80gb.

Fue útil esta respuesta?

Puntuación 3

3 comentarios:

Thank you! I was wondering how the electronic pcb came off of the faceplate as I have to swap mine as well. I'm glad I discovered your post!

- de

Use lots of drops of Isopropyl Alcohol to soften the glue (make the job much easier & less destructive)!

- de

Do you also do that to the donor board off of the replacement faceplate and just transfer it? Does any other glue need to be added or will the old stuff work? Thanks!

- de

Agregar un comentario

Añadir tu respuesta

Clicky Steve estará eternamente agradecido.
Ver Estadísticas:

Ultimas 24 horas: 0

Ultimos 7 días: 0

Ultimos 30 días: 2

Todo El Tiempo: 135