Saltar al contenido principal

iPhone de 4 pulgadas lanzado en marzo de 2016 con especificaciones de hardware similares al 6s. Disponible en Plata, Gris espacial, Oro u Oro rosa con opciones de almacenamiento de 16/64 GB. Modelos A1662 y A1723.

Preguntas 1046 Ver todo

Component missing from logic board

Hi All,

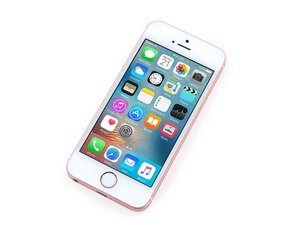
Please see the image below, I managed to knock off one of the components just above the battery connector on my iPhone SE and now it wont charge (or atleast the battery status isnt correctly reported).

Can you advise what the compoment was?

Block Image

Thanks,

Adam

Contestado! Ver respuesta Yo también tengo este problema

Es esta una buena pregunta?

Puntuación 0
Agregar un comentario

2 Respuestas

Solución Elegida

The component you identify as missing, the third one from the top of the connector, is FL2400, a 120 Ohm / 210mA Ferrite Bead. It is on the gas gauge line between the battery and the Tigris chip. This part is easy to order from DigiKey or scavenge from a donor board. This chip is pretty common across multiple models of iDevices so just check a schematic to find another one. Alternatively, you could just short the two pads. The ferrite beads acts as a noise filter on the line so while it is preferable to have it, shorting it will at least allow your phone to work. If you ever see erratic behaviour on your gas gauge, then you would need to replace it properly.

These components are tiny, measuring just 0.5mil X 1mil and it is in close proximity to the battery connector and stuck next to a shield. This is by no means an easy repair unless you have good tools and some experience working at this scale. Whatever you do, don't just assume you can use a standard soldering iron otherwise you risk damaging your logic board even further. There are plenty of videos on youtube that make it look easy but these folks are using multi-thousand dollar micro-soldering workstations under stereoscopic magnification.

If you don't feel comfortable doing this yourself, then look for a repair shop that does micro-soldering repairs. It shouldn't be a very expensive repair.

Fue útil esta respuesta?

Puntuación 4
Agregar un comentario

Hi, have the same problem (maybe) here. It looks like even using a plastic spudger is enough to do this if you are really unlucky. Incidentally some ideas I had: use “laser soldering” to heat just the prepared solder microcolloid consisting of screened soot/PG dust and solder paste on each end rather than using conventional reflow because this may be far superior. I am looking into writing some papers on this :-)

Minimum power may be less than 150mW so a modified BR writer diode could be fine if the board is preheated to 75 Celsius first (still within tolerance) also have some old dead boards with various problems to practise on.

Also possible: use IR 250mW diode with coaxial blue beam from weaker laser eg an Osram PL450 as this may be somewhat safer: use indirect viewing via a safe box and other measures to prevent eye exposure to reflected beam(s).

Ideally I want to fix the one with long screw damage (found this one in a bin!)

Incidentally dried up solder paste is still somewhat useful if chemically separated: need to put it back into solution and modified so that the particles are once again separate. I think this could work but need to do some more research.

Fue útil esta respuesta?

Puntuación 0
Agregar un comentario

Añadir tu respuesta

Adam Levitt estará eternamente agradecido.
Ver Estadísticas:

Ultimas 24 horas: 0

Ultimos 7 días: 0

Ultimos 30 días: 2

Todo El Tiempo: 1,438