Saltar al contenido principal

iPhone 4S - Charging Dock Connector & Loud Speaker and WiFi Antenna Replacement

Guía Archivada
Esta guía se mantiene únicamente para fines históricos. Utiliza la última versión de la guía para llevar a cabo tu reparación.

Qué necesitas

Resumen del Video

  1. iPhone 4S - Charging Dock Connector & Loud Speaker and WiFi Antenna Replacement, Dock Connector: paso 1, imagen 1 de 1
    • If present, remove the small strip of tape covering one of the dock connector screws.

  2. iPhone 4S - Charging Dock Connector & Loud Speaker and WiFi Antenna Replacement: paso 2, imagen 1 de 2 iPhone 4S - Charging Dock Connector & Loud Speaker and WiFi Antenna Replacement: paso 2, imagen 2 de 2
    • Use a plastic opening tool to flip up the retaining flap on the home button ribbon cable ZIF socket.

    • Be sure you are prying up on the hinged retaining flap, not the socket itself.

  3. iPhone 4S - Charging Dock Connector & Loud Speaker and WiFi Antenna Replacement: paso 3, imagen 1 de 1
    • Use a pair of tweezers to pull the home button ribbon cable out of its socket.

    • There are tiny components on the back side of the ribbon, so be careful not to damage them upon ribbon removal.

  4. iPhone 4S - Charging Dock Connector & Loud Speaker and WiFi Antenna Replacement: paso 4, imagen 1 de 1
    • Carefully pull the rubber microphone holder out of its tube in the bottom edge of the iPhone.

  5. iPhone 4S - Charging Dock Connector & Loud Speaker and WiFi Antenna Replacement: paso 5, imagen 1 de 1
    • Remove the two 1.3 mm Phillips screws securing the dock connector to the case of the iPhone.

  6. iPhone 4S - Charging Dock Connector & Loud Speaker and WiFi Antenna Replacement: paso 6, imagen 1 de 1
    • Remove the tiny rubber spacer near the dock connector.

  7. iPhone 4S - Charging Dock Connector & Loud Speaker and WiFi Antenna Replacement: paso 7, imagen 1 de 2 iPhone 4S - Charging Dock Connector & Loud Speaker and WiFi Antenna Replacement: paso 7, imagen 2 de 2
    • Use the edge of a plastic opening tool to peel the dock connector and its cable off the black plastic case of the iPhone.

    • If you are replacing the dock connector with a new part, make sure to transfer the rubber casing around the microphone. You can do this using a spudger.

  8. iPhone 4S - Charging Dock Connector & Loud Speaker and WiFi Antenna Replacement: paso 8, imagen 1 de 2 iPhone 4S - Charging Dock Connector & Loud Speaker and WiFi Antenna Replacement: paso 8, imagen 2 de 2
    • Pry the dock connector away from its opening at the bottom of the iPhone.

    • Remove the dock connector.

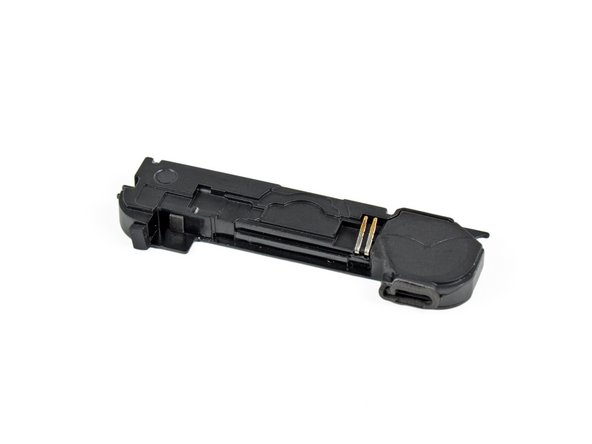
  9. iPhone 4S - Charging Dock Connector & Loud Speaker and WiFi Antenna Replacement, Speaker Enclosure: paso 9, imagen 1 de 1
    • Speaker enclosure remains.

Conclusión

To reassemble your device, follow these instructions in reverse order.

19 personas más completaron esta guía.

ZFix

Miembro Desde 12/09/13

191,182 Reputación

330 Guías creadas

Equipo

Master Techs Miembro de Master Techs

Community

322 Miembros

2,521 Guías creadas

0 comentarios

Agregar Comentario

Ver Estadísticas:

Ultimas 24 horas: 0

Ultimos 7 días: 0

Ultimos 30 días: 0

Todo El Tiempo: 10,623