Qué necesitas
-
-
Use a heat gun to gently heat the front panel to the right of the home button.
-
Do not heat up the home button, as it is plastic and easily melts/deforms.
-
-
-
Once the area of the front panel to the right of the home button has been heated adequately, it should be easy to insert a plastic opening tool between the outer plastic bezel and the front panel right next to the home button.
-
Use your plastic opening tool to gently create a small gap between the front panel and the outer bezel to the right of the home button.
-
Insert a guitar pick into the small gap created by the plastic opening tool.
-
-
-
Heat up the area of the front bezel to the right of the home button along the bottom edge and make your way closer to the bottom right corner of the iPad.
-
Slide the first guitar pick toward the bottom right corner of the iPad and insert another guitar pick to maintain the gap between the front panel and the iPad next to the home button.
-
-
-
-
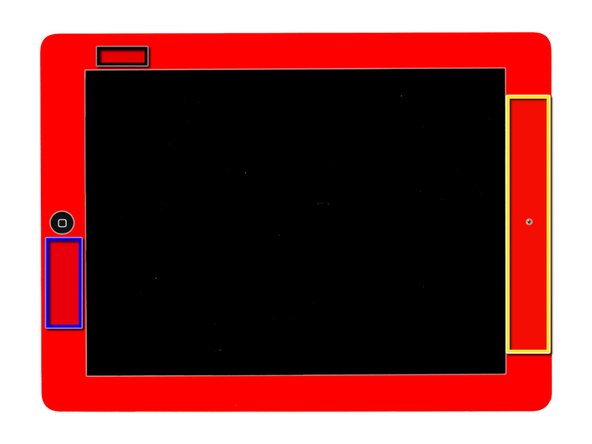
When separating the front panel from the bottom left corner of the iPad 2, be careful not to rip the digitizer cable (highlighted in red in the first picture). It is extremely thin and easy to tear.
-
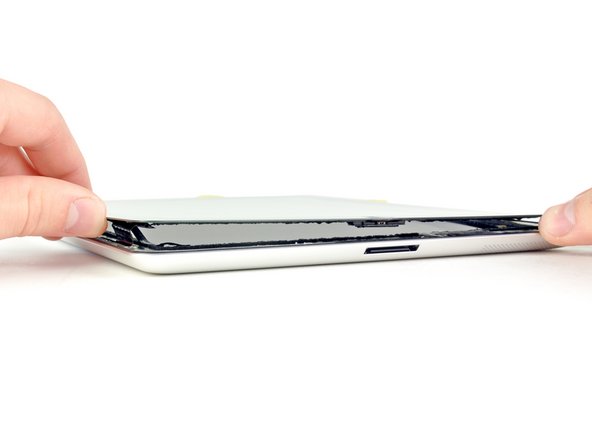
Slightly lift the front panel near the dock connector to separate it from the foam adhesive securing it to the LCD.
-
Use a guitar pick to help cut the foam adhesive securing the perimeter of the LCD to the front panel.
-


To reassemble your device, follow these directions in reverse and use our iPad 2 CDMA Front Panel Adhesive strip guide to reattach the front panel.
To reassemble your device, follow these directions in reverse and use our iPad 2 CDMA Front Panel Adhesive strip guide to reattach the front panel.
