Introducción
¡Actualice su disco duro para ganar más espacio de almacenamiento!
Qué necesitas
-
-
Afloje los dos tornillos Phillips cautivos que sujetan la puerta de acceso al iMac.
-
Retire la puerta de acceso del iMac.
-
-
-
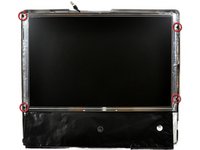
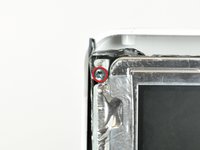
Retire los cuatro tornillos siguientes:
-
Tres Torx T8 de 6 mm.
-
Un Torx T8 de 8 mm.
-
-
-
Dale la vuelta a tu iMac y colócalo con el soporte hacia abajo sobre una superficie plana.
-
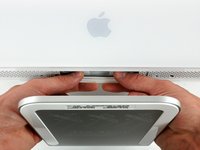
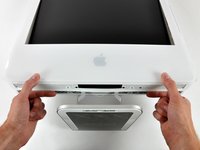
Para levantar el bisel frontal del iMac, simultáneamente:
-
Utilice los pulgares para presionar los brazos de la RAM y mantener presionada la iMac.
-
Utilice los dedos índice para tirar del pequeño puente de material del bisel frontal hacia usted.
-
Tire del bisel frontal hacia arriba con los dedos índice.
-
Una vez que el pequeño puente de material haya salido de los brazos de la RAM, levante el bisel frontal por su borde inferior lo suficiente para dejar libre el borde inferior de la caja trasera.
-
-
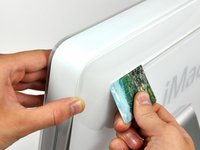
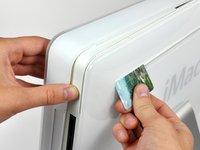
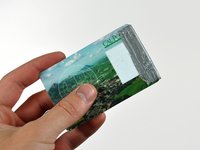
Herramienta utilizada en este paso:Plastic Cards$2.99
-
Inserte una tarjeta plástica en la esquina de la ranura de ventilación cerca de la parte superior de la carcasa trasera.
-
Empuje la tarjeta hacia la parte superior del iMac para liberar el pestillo del bisel frontal.
-
Retire el bisel frontal de la caja trasera.
-
Repita este proceso para el otro lado del bisel frontal.
-
Si el bisel se niega a soltarse, intente presionar el borde inferior hacia la caja trasera y repita este proceso de apertura.
-
-
-
-
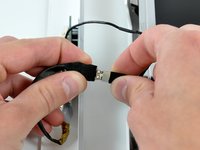
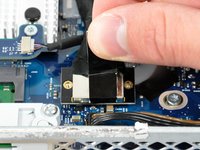
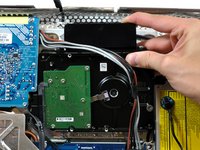
Retire el conjunto de cables de alimentación de detrás del soporte del disco duro.
-
-
-
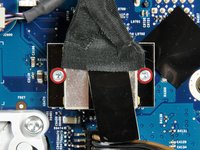
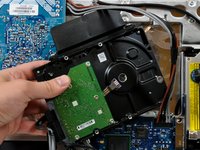
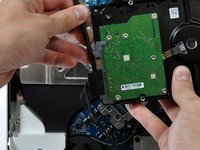
Retire los dos tornillos Torx T8 que sujetan el soporte del disco duro al disco duro.
-


Para volver a ensamblar el dispositivo, siga estas instrucciones en orden inverso.
Cancelar: No complete esta guía.
303 personas más completaron esta guía.
Un agradecimiento especial a estos traductores:
100%

¡ Angel nos está ayudando a reparar el mundo! ¿Quieres contribuir?
Empezar a traducir ›

19Guía Comentarios
It was a fun way to spend a sunday! We didn't have a magnetic screwdriver so we used a glue stick and dipped our screwdriver in the "goop" and used it to secure the screws to the driver for the deep screw section. Fun stuff!
Thanks to this guide and a RAM upgrade my imac has at least a couple more years left on it. I did not disconnect the front bezel or LCD I just laid them aside (the LCD had to be propped up a little to prevent pulling). The scariest part was removing the HD heat sensor. I just went really slow and most of the glue was still attached to the sensor so that all I had to do was press it against the new HD and it affixed just fine. One week later and everything is working great! Magnetizing the Torx driver with the remote magnet is a great idea. I purchased a stand alone magnetizer/demagnetizer myself though.
Very handy guide. I just replaced the internal drive on my iMac and it's working well. Here also is a pretty good video of the procedure:
Part 1: http://www.youtube.com/watch?v=ShY8zuT-w...
Part 2: http://www.youtube.com/watch?v=RjsIU1XEk...
Thanks to this very good description. Now these Mac has 10x more HD-Size than before! (1.5 TB). I wrote this from the IMAc so that you see: it works fine!
Thank you!
Dirk