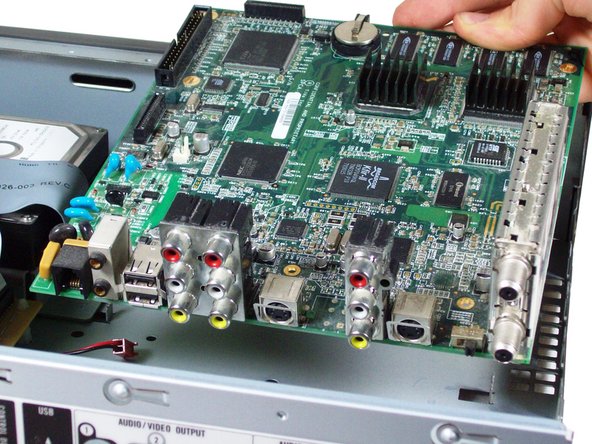
Saltar al contenido principal

TiVo Series 2 TCD24008A Motherboard Replacement

Qué necesitas

  1. TiVo Series 2 TCD24008A Motherboard Replacement, Cover: paso 1, imagen 1 de 1
    • Unscrew the five 0.31 inch T-9 screws on the back cover.

  2. TiVo Series 2 TCD24008A Motherboard Replacement: paso 2, imagen 1 de 1
    • Slide the cover towards the back until it is no longer under the front cover.

  3. TiVo Series 2 TCD24008A Motherboard Replacement: paso 3, imagen 1 de 1
    • Lift the cover up and off the device.

  4. TiVo Series 2 TCD24008A Motherboard Replacement, Motherboard: paso 4, imagen 1 de 1
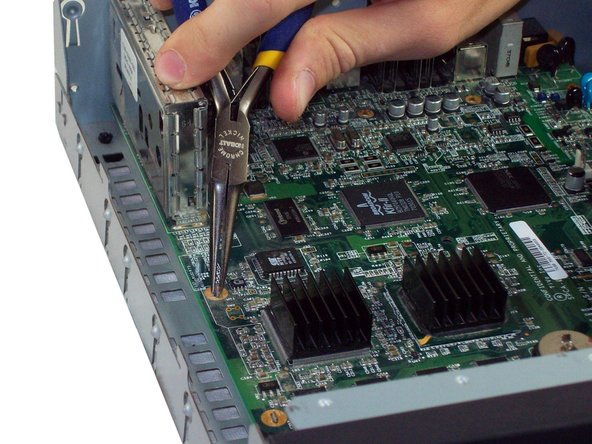
    • Unscrew the 0.31 inch T-9 size screw on the back panel

    • Unscrew the two 0.59 inch T-8 size screws on the back panel

  5. TiVo Series 2 TCD24008A Motherboard Replacement: paso 5, imagen 1 de 1
    • Unplug the fan from the motherboard by gently pulling up on the red plug.

  6. TiVo Series 2 TCD24008A Motherboard Replacement: paso 6, imagen 1 de 1
    • Unplug the ribbon attaching the front panel sensor by pulling it upwards gently.

  7. TiVo Series 2 TCD24008A Motherboard Replacement: paso 7, imagen 1 de 1
    • Unplug the ribbon connecting the hard drive to the motherboard by pulling straight up on the ribbon. This may require some gentle wiggling.

  8. TiVo Series 2 TCD24008A Motherboard Replacement: paso 8, imagen 1 de 1
    • Unplug the ribbon connecting the power supply to the motherboard by pulling upwards on this ribbon.

  9. TiVo Series 2 TCD24008A Motherboard Replacement: paso 9, imagen 1 de 2 TiVo Series 2 TCD24008A Motherboard Replacement: paso 9, imagen 2 de 2
    • Locate the four metal tabs on the motherboard.

    • Using Pliers, bend each of the tabs until they align straight with the holes underneath them.

    • Bend these just enough to slip them through the holes. Over-bending could snap these tabs. While this won't affect how the TiVo functions, they are there to secure the motherboard to prevent damage.

  10. TiVo Series 2 TCD24008A Motherboard Replacement: paso 10, imagen 1 de 1
    • Locate and remove the four 0.31 inch T-9 size screws at the front of the motherboard.

  11. TiVo Series 2 TCD24008A Motherboard Replacement: paso 11, imagen 1 de 2 TiVo Series 2 TCD24008A Motherboard Replacement: paso 11, imagen 2 de 2
    • Pull directly up on the motherboard so that it slips over the four golden metal tabs.

    • Pull up and away from the back panel so all of the cable inputs slip through the casing.

Conclusión

To reassemble your device, follow these instructions in reverse order.

Cody Hunter

Miembro Desde 10/10/11

22 Reputación

2 Guías creadas

Equipo

Cal Poly, Team 5-33, Amido Fall 2011 Miembro de Cal Poly, Team 5-33, Amido Fall 2011

CPSU-AMIDO-F11S5G33

4 Miembros

7 Guías creadas

0 comentarios

Agregar Comentario

Ver Estadísticas:

Ultimas 24 horas: 0

Ultimos 7 días: 0

Ultimos 30 días: 0

Todo El Tiempo: 1,078