Saltar al contenido principal

Sony Vaio VGN-TXN25N Keyboard Replacement

Qué necesitas

  1. Sony Vaio VGN-TXN25N Keyboard Replacement, Keyboard: paso 1, imagen 1 de 1
    • Take out the screw in the center of the computer.

  2. Sony Vaio VGN-TXN25N Keyboard Replacement: paso 2, imagen 1 de 1
    • Flip the computer right side up.

    • Open screen so that keyboard is visible.

  3. Sony Vaio VGN-TXN25N Keyboard Replacement: paso 3, imagen 1 de 2 Sony Vaio VGN-TXN25N Keyboard Replacement: paso 3, imagen 2 de 2
    • Use a plastic opening tool to gently lift the keyboard at a corner.

    • Make sure you get below the keyboard itself and not just the keys.

    • Slide the tool around the perimeter of the keyboard and it will start to lift.

  4. Sony Vaio VGN-TXN25N Keyboard Replacement: paso 4, imagen 1 de 2 Sony Vaio VGN-TXN25N Keyboard Replacement: paso 4, imagen 2 de 2
    • Do not pull the keyboard away from the computer. There is a ribbon cord attaching the keyboard to the computer.

    • Once the keyboard has been lifted at a few edges, lift the keyboard with both hands.

  5. Sony Vaio VGN-TXN25N Keyboard Replacement: paso 5, imagen 1 de 3 Sony Vaio VGN-TXN25N Keyboard Replacement: paso 5, imagen 2 de 3 Sony Vaio VGN-TXN25N Keyboard Replacement: paso 5, imagen 3 de 3
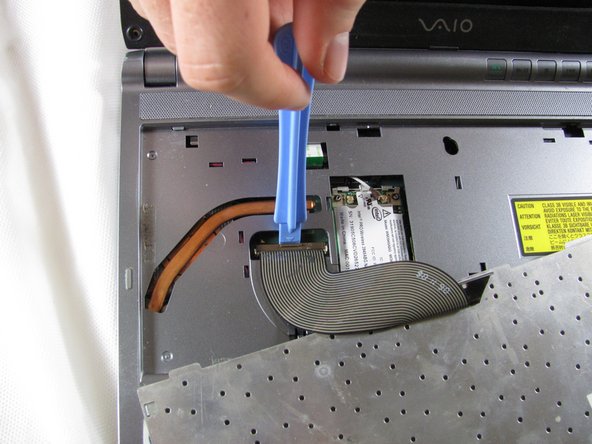
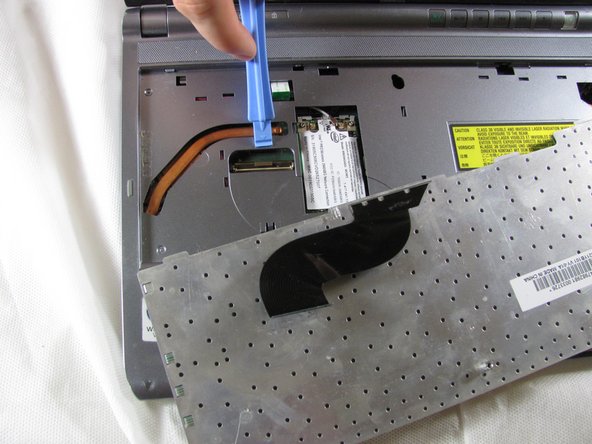
    • Locate the ribbon cord behind the keyboard.

    • Locate a brown clamp attaching the keyboard to the computer.

    • Use a plastic opening tool to lift the clamp and release the cable.

    • Now the keyboard can be pulled away entirely.

Conclusión

To reassemble your device, follow these instructions in reverse order.

Austen

Miembro Desde 04/03/12

32 Reputación

2 Guías creadas

Equipo

Cal Poly, Team 5-3, Forte Spring 2012 Miembro de Cal Poly, Team 5-3, Forte Spring 2012

CPSU-FORTE-S12S5G3

5 Miembros

12 Guías creadas

0 comentarios

Agregar Comentario

Ver Estadísticas:

Ultimas 24 horas: 0

Ultimos 7 días: 5

Ultimos 30 días: 10

Todo El Tiempo: 2,064