Saltar al contenido principal

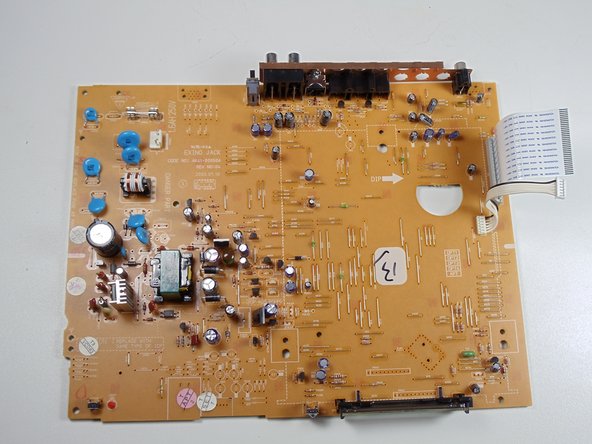
Removing Samsung DVD-P230 Motherboard

Qué necesitas

  1. Removing Samsung DVD-P230 Motherboard, Outer Cover & Faceplate: paso 1, imagen 1 de 3 Removing Samsung DVD-P230 Motherboard, Outer Cover & Faceplate: paso 1, imagen 2 de 3 Removing Samsung DVD-P230 Motherboard, Outer Cover & Faceplate: paso 1, imagen 3 de 3
    • Open the tray by pressing the eject button

    • Remove the DVD tray faceplate by pushing the faceplate up off of the tray.

  2. Removing Samsung DVD-P230 Motherboard: paso 2, imagen 1 de 1
    • Press the eject button to insert the tray

    • After the tray is closed unplug DVD player

  3. Removing Samsung DVD-P230 Motherboard: paso 3, imagen 1 de 1
    • Unscrew the 3 screws in the back.

  4. Removing Samsung DVD-P230 Motherboard: paso 4, imagen 1 de 2 Removing Samsung DVD-P230 Motherboard: paso 4, imagen 2 de 2
    • Pull the outer case upward and then towards you.

  5. Removing Samsung DVD-P230 Motherboard: paso 5, imagen 1 de 3 Removing Samsung DVD-P230 Motherboard: paso 5, imagen 2 de 3 Removing Samsung DVD-P230 Motherboard: paso 5, imagen 3 de 3
    • There are six symmetrically placed tabs holding in the front faceplate. Unhook these six tabs to loosen the faceplate.

  6. Removing Samsung DVD-P230 Motherboard: paso 6, imagen 1 de 2 Removing Samsung DVD-P230 Motherboard: paso 6, imagen 2 de 2
    • Pull off front faceplate. This may take a couple of tries to get all six tabs unhooked simultaneously.

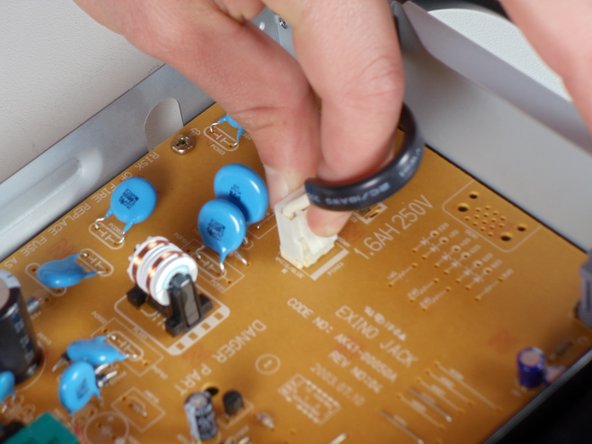
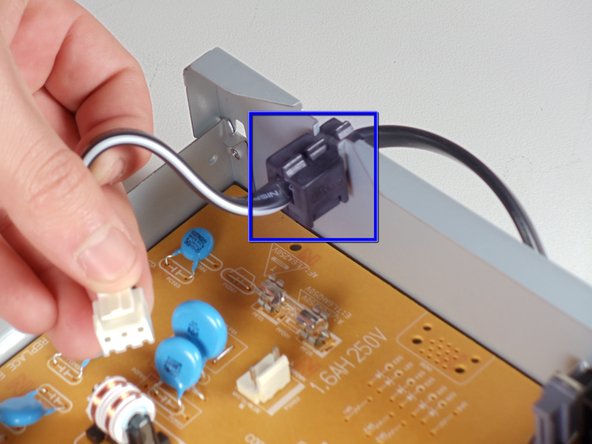
  7. Removing Samsung DVD-P230 Motherboard, Power Cord: paso 7, imagen 1 de 3 Removing Samsung DVD-P230 Motherboard, Power Cord: paso 7, imagen 2 de 3 Removing Samsung DVD-P230 Motherboard, Power Cord: paso 7, imagen 3 de 3
    • Locate the white clip that attaches the cord to the motherboard

    • Grasp clip and squeeze to release

    • Lift up and remove power cord

    • Slide cord mount from outer case

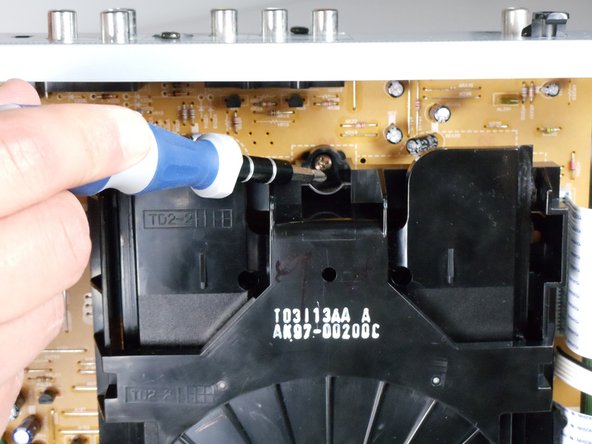
  8. Removing Samsung DVD-P230 Motherboard, Tray: paso 8, imagen 1 de 3 Removing Samsung DVD-P230 Motherboard, Tray: paso 8, imagen 2 de 3 Removing Samsung DVD-P230 Motherboard, Tray: paso 8, imagen 3 de 3
    • Remove the three screws holding in the DVD tray

  9. Removing Samsung DVD-P230 Motherboard: paso 9, imagen 1 de 2 Removing Samsung DVD-P230 Motherboard: paso 9, imagen 2 de 2
    • Remove the power cord and first two ribbons by pulling them directly out of their sockets.

  10. Removing Samsung DVD-P230 Motherboard: paso 10, imagen 1 de 2 Removing Samsung DVD-P230 Motherboard: paso 10, imagen 2 de 2
    • Gently lift the DVD tray off of the motherboard.

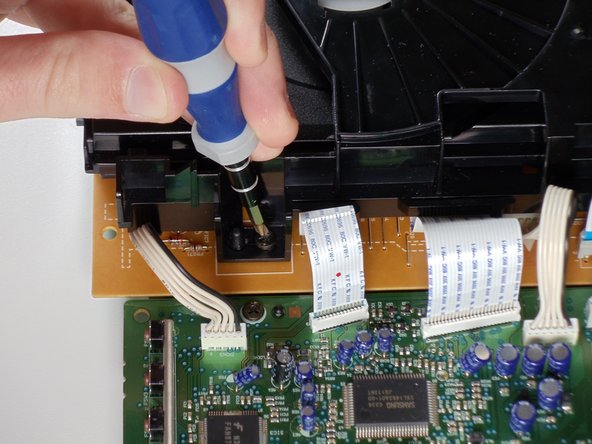
  11. Removing Samsung DVD-P230 Motherboard, Motherboard: paso 11, imagen 1 de 2 Removing Samsung DVD-P230 Motherboard, Motherboard: paso 11, imagen 2 de 2
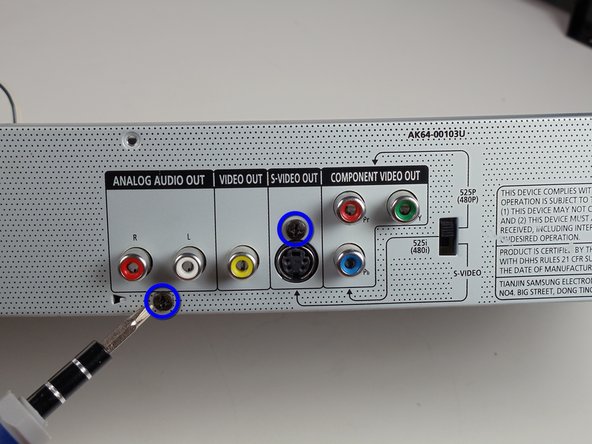
    • Unscrew the 2 screws on the motherboard

    • Unscrew the 2 screws on the back

  12. Removing Samsung DVD-P230 Motherboard: paso 12, imagen 1 de 3 Removing Samsung DVD-P230 Motherboard: paso 12, imagen 2 de 3 Removing Samsung DVD-P230 Motherboard: paso 12, imagen 3 de 3
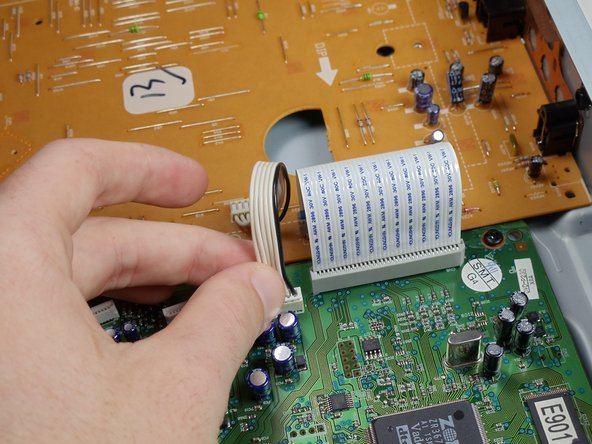
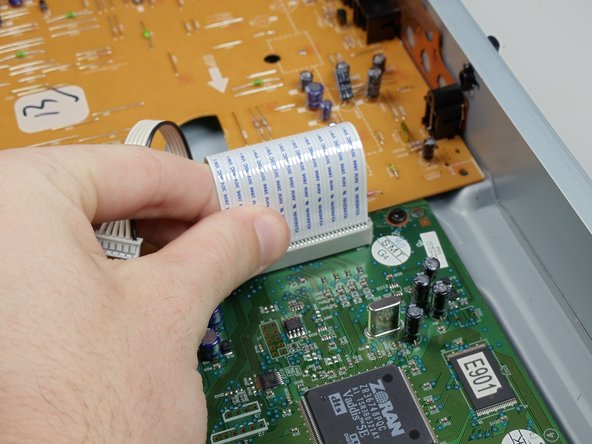
    • Disconnect the wires and ribbon by pulling them out of their respective connections

  13. Removing Samsung DVD-P230 Motherboard: paso 13, imagen 1 de 2 Removing Samsung DVD-P230 Motherboard: paso 13, imagen 2 de 2
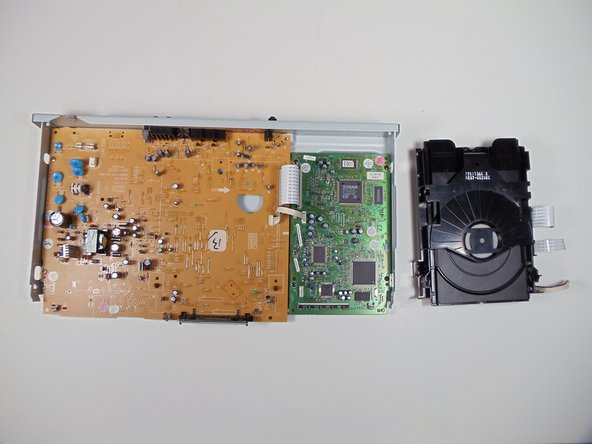
    • Lift board up and out of the lower case

Conclusión

To reassemble your device, follow these instructions in reverse order.

Una persona más ha completado esta guía.

Mitchell Hart

Miembro Desde 01/21/11

903 Reputación

5 Guías creadas

Equipo

Cal Poly, Team 3-30, Regan Winter 2011 Miembro de Cal Poly, Team 3-30, Regan Winter 2011

CPSU-REGAN-W11S3G30

4 Miembros

8 Guías creadas

0 comentarios

Agregar Comentario

Ver Estadísticas:

Ultimas 24 horas: 0

Ultimos 7 días: 2

Ultimos 30 días: 4

Todo El Tiempo: 3,209