Saltar al contenido principal

RCA RCT6378W2 Screen Replacement

Guía Archivada
Esta guía se mantiene únicamente para fines históricos. Utiliza la última versión de la guía para llevar a cabo tu reparación.

Qué necesitas

  1. RCA RCT6378W2 Screen Replacement, Screen Replacement: paso 1, imagen 1 de 1
    • Remove two 2.4mm x 4mm screws from bottom of the tablet with Phillips #00 Screwdriver.

  2. RCA RCT6378W2 Screen Replacement: paso 2, imagen 1 de 2 RCA RCT6378W2 Screen Replacement: paso 2, imagen 2 de 2
    • Remove back cover with lever tool, exposing the battery and motherboard.

  3. RCA RCT6378W2 Screen Replacement: paso 3, imagen 1 de 2 RCA RCT6378W2 Screen Replacement: paso 3, imagen 2 de 2
    • Using the tweezers, remove the black tape connecting the screen to the motherboard.

  4. RCA RCT6378W2 Screen Replacement: paso 4, imagen 1 de 2 RCA RCT6378W2 Screen Replacement: paso 4, imagen 2 de 2
    • Pull up the switch to remove the input connector.

  5. RCA RCT6378W2 Screen Replacement: paso 5, imagen 1 de 1
    • Heat the iOpener in the microwave, following the instructions provided with the tool. Lay the heated iOpener on the front screen for two minutes to soften the connection of the screen to the tablet.

  6. RCA RCT6378W2 Screen Replacement: paso 6, imagen 1 de 2 RCA RCT6378W2 Screen Replacement: paso 6, imagen 2 de 2
    • Use the suction cup and lever tool tool to pry the front screen from the tablet.

Conclusión

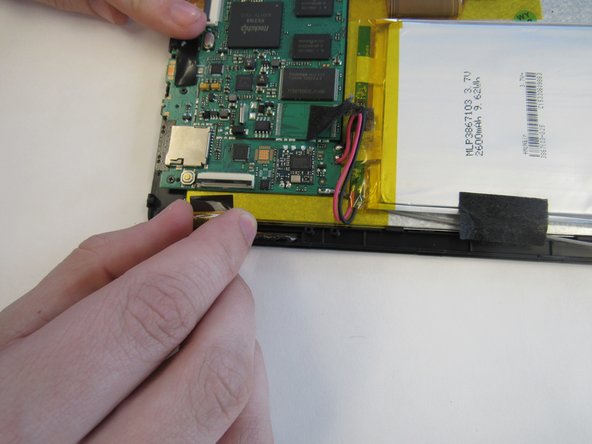
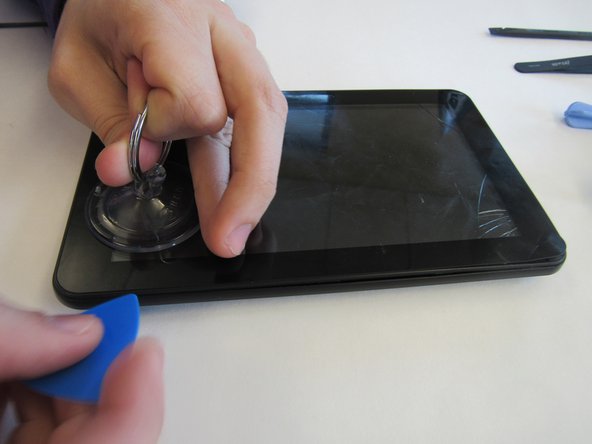
To reassemble your device, follow these instructions in reverse order.

2 personas más completaron esta guía.

mikayla

Miembro Desde 01/29/15

408 Reputación

2 Guías creadas

Equipo

Clemson, Team 14-4, Shirley Spring 2015 Miembro de Clemson, Team 14-4, Shirley Spring 2015

CLEM-SHIRLEY-S15S14G4

6 Miembros

15 Guías creadas

0 comentarios

Agregar Comentario

Ver Estadísticas:

Ultimas 24 horas: 0

Ultimos 7 días: 0

Ultimos 30 días: 0

Todo El Tiempo: 1,189