Saltar al contenido principal

Palm IIIc Screen Replacement

Qué necesitas

  1. Palm IIIc Screen Replacement, Removing broken LCD screen: paso 1, imagen 1 de 1
    • Keep track of all pieces removed from the device.

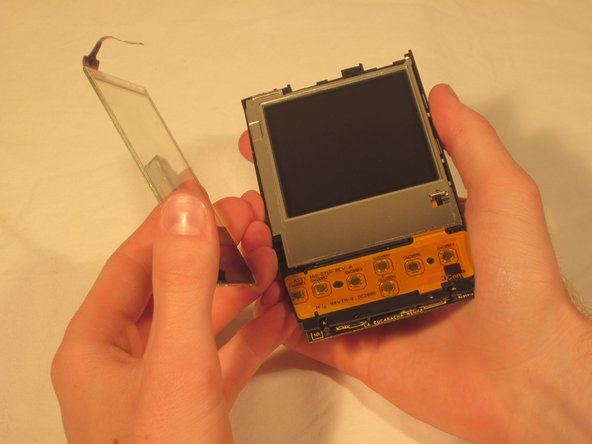
    • Gently pull off the device cover. The cover snaps on and off easily where the cover attaches to the Palm IIIc device

  2. Palm IIIc Screen Replacement: paso 2, imagen 1 de 1
    • Using a Phillips head screwdriver, take out the four screws on the back of the device. You may have to pull them out with your hands once they are unscrewed.

    • There will be two long screws and two short screws. The long screws come from the top of the device, and the short screws come from the bottom of the device.

  3. Palm IIIc Screen Replacement, Remove the Front and Back Covers: paso 3, imagen 1 de 1
    • Using a spudger, carefully pry open the front and back covers along the side seam.

    • A small sensor cover will fall out when the front and back covers are removed. Keep track of it.

  4. Palm IIIc Screen Replacement, Screen: paso 4, imagen 1 de 1
    • Unhook the battery cable from the motherboard and remove the battery.

  5. Palm IIIc Screen Replacement: paso 5, imagen 1 de 2 Palm IIIc Screen Replacement: paso 5, imagen 2 de 2
    • On the back of the motherboard use tweezers to pull up the ZIF connector which looks like a brown plastic tab.

    • Once the ZIF connector is unattached, remove the clear screen cover.

  6. Palm IIIc Screen Replacement: paso 6, imagen 1 de 1
    • Using tweezers unhook the blue and red screen cables where they connect to the motherboard.

  7. Palm IIIc Screen Replacement: paso 7, imagen 1 de 3 Palm IIIc Screen Replacement: paso 7, imagen 2 de 3 Palm IIIc Screen Replacement: paso 7, imagen 3 de 3
    • Using tweezers, pull up the other two ZIF connector tabs.

  8. Palm IIIc Screen Replacement: paso 8, imagen 1 de 1
    • Gently pull the black clips on the inside case to detach the motherboard from the device. Pull the motherboard out towards the bottom left corner.

  9. Palm IIIc Screen Replacement: paso 9, imagen 1 de 1
    • Pull the screen out from the front.

Conclusión

To reassemble your device, follow these instructions in reverse order.

Equipo

Cal Poly, Team 20-69, Walters Spring 2011 Miembro de Cal Poly, Team 20-69, Walters Spring 2011

CPSU-WALTERS-S11S20G69

5 Miembros

8 Guías creadas

0 comentarios

Agregar Comentario

Ver Estadísticas:

Ultimas 24 horas: 0

Ultimos 7 días: 1

Ultimos 30 días: 1

Todo El Tiempo: 1,000