Saltar al contenido principal

Oster BLSTSS-PZO Gear Shaft Replacement

Qué necesitas

  1. Oster BLSTSS-PZO Gear Shaft Replacement, Circuitboard: paso 1, imagen 1 de 1
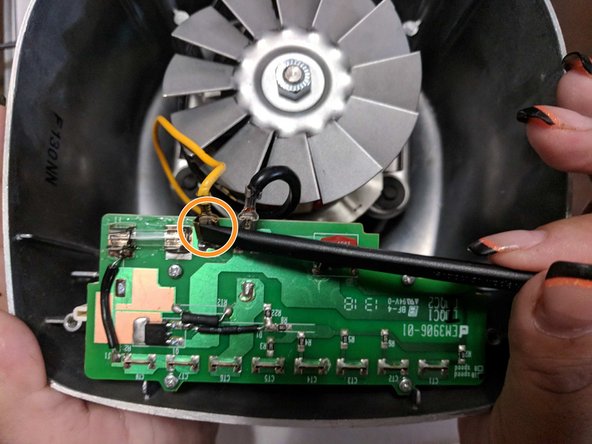
    • Use the prying tools to open the four plastic screw holes on the bottom of the blender.

  2. Oster BLSTSS-PZO Gear Shaft Replacement: paso 2, imagen 1 de 1
    • Use the Phillips #1 Screwdriver to unscrew the four 16 mm screws and remove the plastic bottom.

  3. Oster BLSTSS-PZO Gear Shaft Replacement: paso 3, imagen 1 de 1
    • Gently remove the circuit board.

  4. Oster BLSTSS-PZO Gear Shaft Replacement: paso 4, imagen 1 de 2 Oster BLSTSS-PZO Gear Shaft Replacement: paso 4, imagen 2 de 2
    • Use the spudger to detach the black wire from the circuit board.

    • Repeat for yellow wire.

  5. Oster BLSTSS-PZO Gear Shaft Replacement: paso 5, imagen 1 de 3 Oster BLSTSS-PZO Gear Shaft Replacement: paso 5, imagen 2 de 3 Oster BLSTSS-PZO Gear Shaft Replacement: paso 5, imagen 3 de 3
    • Use the Phillips #1 to remove the four 8mm screws.

    • Use the medal spudger to detach the circuit board from the buttons.

    • Gently pull and release circuit board from buttons.

  6. Oster BLSTSS-PZO Gear Shaft Replacement, Gear Shaft: paso 6, imagen 1 de 3 Oster BLSTSS-PZO Gear Shaft Replacement, Gear Shaft: paso 6, imagen 2 de 3 Oster BLSTSS-PZO Gear Shaft Replacement, Gear Shaft: paso 6, imagen 3 de 3
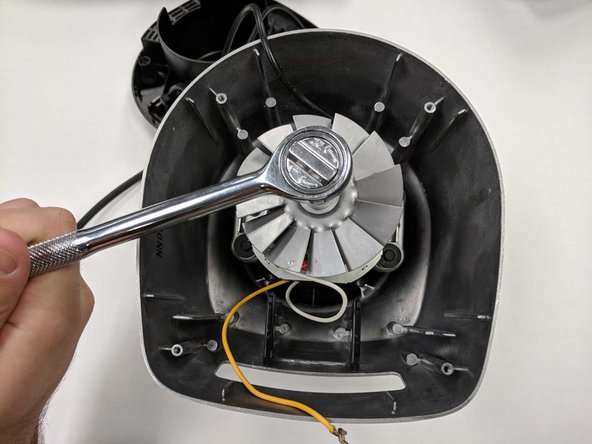
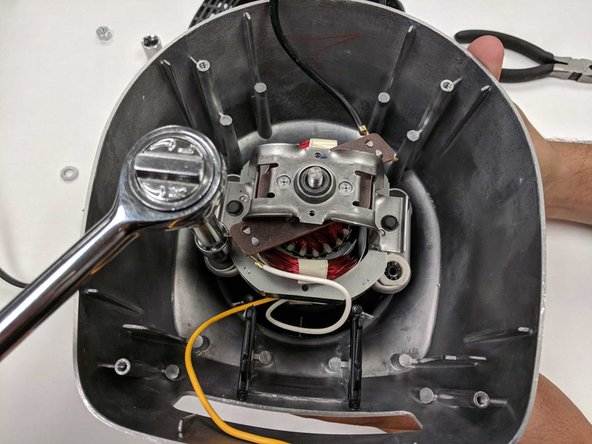
    • Remove the screw on top of the fan with the 4mm socket stock wrench.

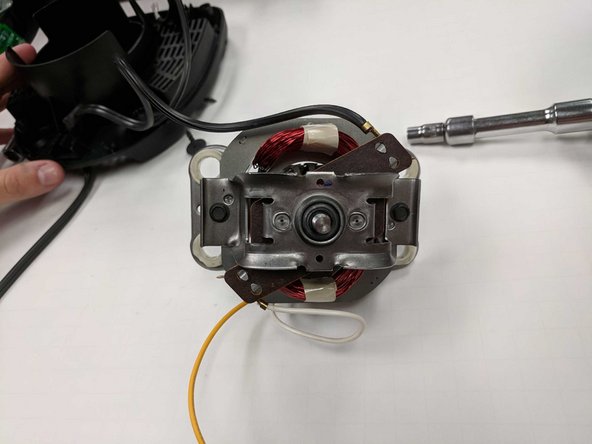
    • Remove the fan and washer.

  7. Oster BLSTSS-PZO Gear Shaft Replacement: paso 7, imagen 1 de 3 Oster BLSTSS-PZO Gear Shaft Replacement: paso 7, imagen 2 de 3 Oster BLSTSS-PZO Gear Shaft Replacement: paso 7, imagen 3 de 3
    • Remove the four screws with the 4mm socket stock wrench.

    • Remove gear shaft.

Conclusión

To reassemble your device, follow these instructions in reverse order.

Una persona más ha completado esta guía.

0 comentarios

Agregar Comentario

Ver Estadísticas:

Ultimas 24 horas: 0

Ultimos 7 días: 1

Ultimos 30 días: 10

Todo El Tiempo: 677