Saltar al contenido principal

Lenovo N22 Chromebook Battery Replacement

Qué necesitas

  1. Lenovo N22 Chromebook Battery Replacement, Keyboard: paso 1, imagen 1 de 3 Lenovo N22 Chromebook Battery Replacement, Keyboard: paso 1, imagen 2 de 3 Lenovo N22 Chromebook Battery Replacement, Keyboard: paso 1, imagen 3 de 3
    • Power down the Chromebook before starting the repair.

    • Opening the Chromebook voids the manufacturer warranty.

    • Flip the Chromebook so that the bottom is facing up.

    • Use a Phillips #1 screwdriver to remove the six 6.6 mm screws on the bottom.

    • Use a spudger to remove each of the 4 rubber feet.

    • Use a Phillips #1 screwdriver to remove the four additional screws under the rubber feet.

  2. Lenovo N22 Chromebook Battery Replacement: paso 2, imagen 1 de 3 Lenovo N22 Chromebook Battery Replacement: paso 2, imagen 2 de 3 Lenovo N22 Chromebook Battery Replacement: paso 2, imagen 3 de 3
    • Flip the Chromebook back over and open the screen.

    • Wedge the plastic opening tool between the keyboard and the bottom of the Chromebook.

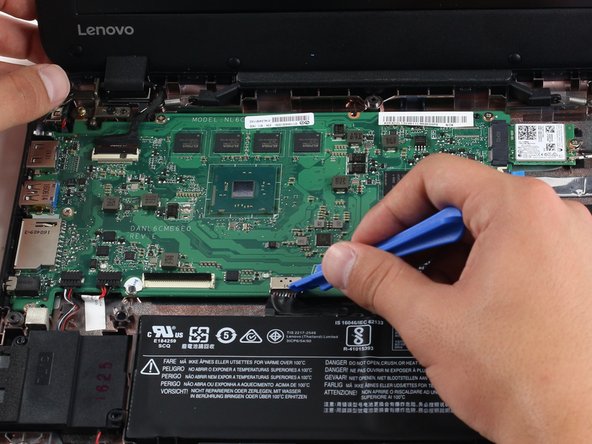
    • Run the plastic opening tool along the seam between the keyboard and the bottom of the Chromebook until the keyboard moves freely. Several tabs will pop out.

    • It is normal for the tabs to make a loud click when released. The corner tabs will be harder to release than the others and will make a louder click.

  3. Lenovo N22 Chromebook Battery Replacement: paso 3, imagen 1 de 2 Lenovo N22 Chromebook Battery Replacement: paso 3, imagen 2 de 2
    • Once the keyboard is released, grab the two top corners closest to the screen and slowly lift the keyboard up.

    • Do not lift the keyboard quickly or you might break the two cables that connect the keyboard to the motherboard.

    • Disconnect the cables by lifting up the retaining flaps on the black ZIF connectors.

    • Slowly pull the cables up and out of the connectors.

  4. Lenovo N22 Chromebook Battery Replacement: paso 4, imagen 1 de 1
    • Lift the keyboard up and off the back panel, exposing the motherboard and battery.

  5. Lenovo N22 Chromebook Battery Replacement, Battery: paso 5, imagen 1 de 2 Lenovo N22 Chromebook Battery Replacement, Battery: paso 5, imagen 2 de 2
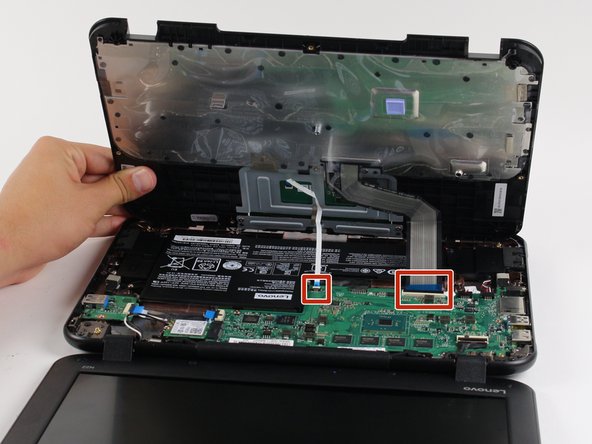
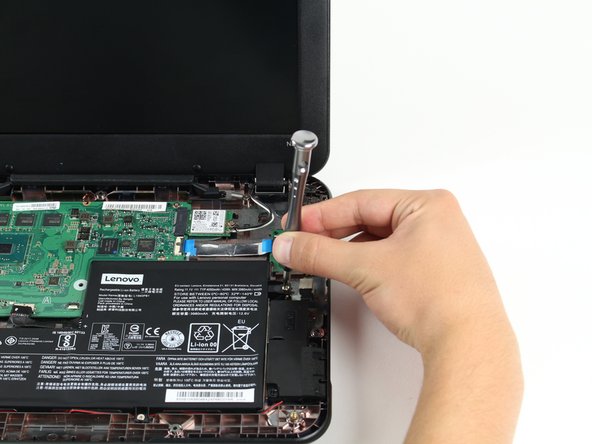
    • Separate the battery cable from the motherboard by wedging the edge of a plastic opening tool between the black cable connector and the silver socket on the motherboard.

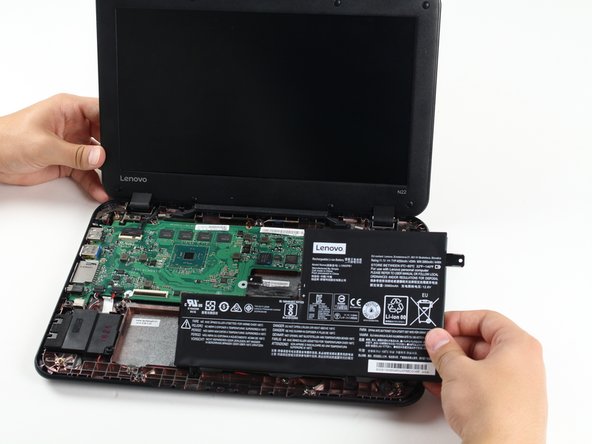
    • Pull the battery cable straight towards you, away from the silver socket.

  6. Lenovo N22 Chromebook Battery Replacement: paso 6, imagen 1 de 2 Lenovo N22 Chromebook Battery Replacement: paso 6, imagen 2 de 2
    • Use a Philips #1 screwdriver to remove the three 4.3 mm screws securing the battery.

  7. Lenovo N22 Chromebook Battery Replacement: paso 7, imagen 1 de 2 Lenovo N22 Chromebook Battery Replacement: paso 7, imagen 2 de 2
    • Lift up on the tabs that were held down by the screws to remove the battery.

Conclusión

To reassemble your device, follow these instructions in reverse order.

10 personas más completaron esta guía.

Kevin Yerina

Miembro Desde 04/26/17

453 Reputación

2 Guías creadas

Equipo

Cal Poly, Team S21-G1, Livingston Spring 2017 Miembro de Cal Poly, Team S21-G1, Livingston Spring 2017

CPSU-LIVINGSTON-S17S21G1

4 Miembros

14 Guías creadas

4 comentarios

amazing!! thank you

Mark safoo - Contestar

thanks I needed to take the bottom off so I can take a certain screw

xian panadero - Contestar

That's way too much just to take the battery out. it was helpful having these steps. Thank you

Becky Breneman - Contestar

Agregar Comentario

Ver Estadísticas:

Ultimas 24 horas: 1

Ultimos 7 días: 14

Ultimos 30 días: 52

Todo El Tiempo: 16,665