Saltar al contenido principal

How to Reassemble the Palm IIIc

Qué necesitas

  1. How to Reassemble the Palm IIIc, How to Reassemble the Palm IIIc: paso 1, imagen 1 de 1
    • Reinsert the screen into the case that contains the buttons.

  2. How to Reassemble the Palm IIIc: paso 2, imagen 1 de 1
    • Put the Motherboard back into casing from right to left.

    • Make sure the black clips are securing the motherboard into the casing.

  3. How to Reassemble the Palm IIIc: paso 3, imagen 1 de 3 How to Reassemble the Palm IIIc: paso 3, imagen 2 de 3 How to Reassemble the Palm IIIc: paso 3, imagen 3 de 3
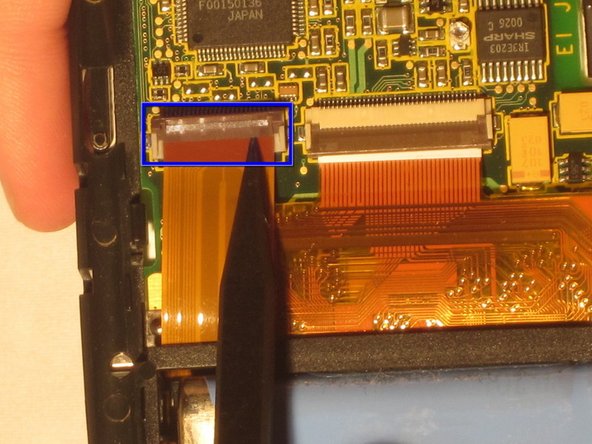
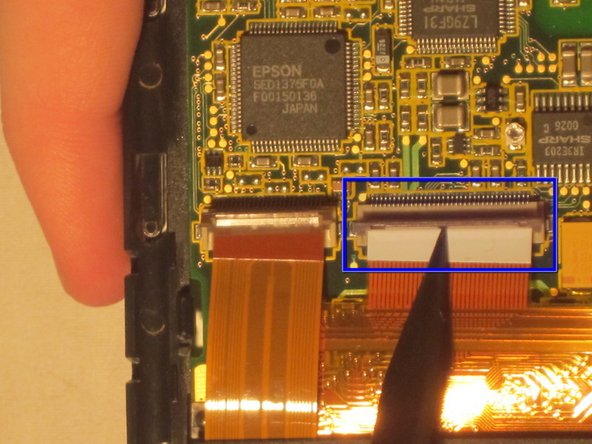
    • Secure the bottom two ZIF connectors into their slots by opening the flap and inserting the ZIF connectors.

    • Gently press down on the flap to secure the ZIF connector. This secures the screen and buttons to the motherboard.

  4. How to Reassemble the Palm IIIc: paso 4, imagen 1 de 2 How to Reassemble the Palm IIIc: paso 4, imagen 2 de 2
    • Connect the blue and red screen cables to the beige box they were removed from.

  5. How to Reassemble the Palm IIIc: paso 5, imagen 1 de 2 How to Reassemble the Palm IIIc: paso 5, imagen 2 de 2
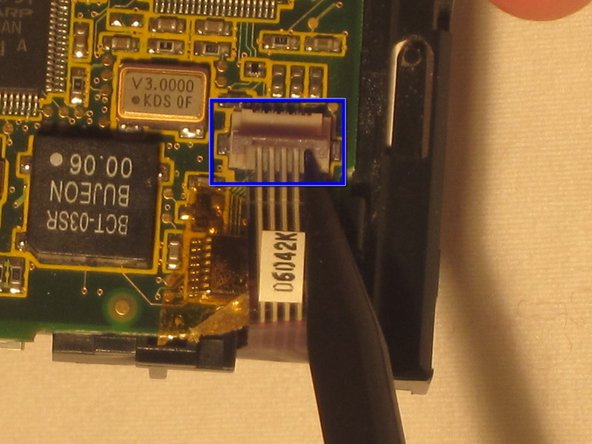
    • Open the ZIF connector box at the top of the motherboard by gently pulling up on the flap.

    • Insert the ZIF tab into the connector box.

    • Gently press down on the flap to secure the ZIF tab in place.

  6. How to Reassemble the Palm IIIc: paso 6, imagen 1 de 1
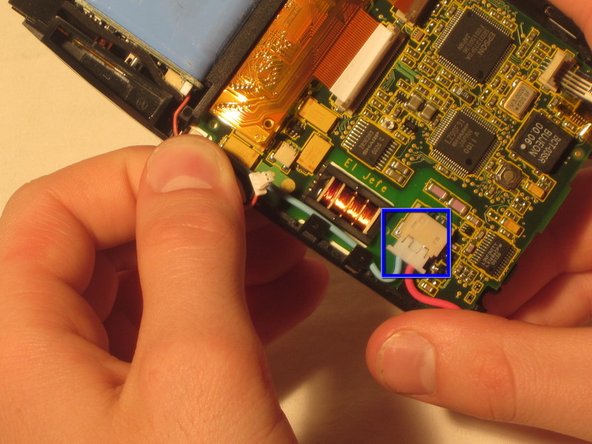
    • Attach the white box on the end of the red cable connected to the battery into the connector box on the motherboard.

  7. How to Reassemble the Palm IIIc: paso 7, imagen 1 de 1
    • Place the front and back covers around the casing containing the motherboard and screen.

    • Before securing the covers, place the sensor in between the front and back cover at the top of the device.

    • After the sensor is in place between the two covers, firmly secure the front and back covers.

  8. How to Reassemble the Palm IIIc: paso 8, imagen 1 de 1
    • Replace the long screws at the top of the back case with the Philips head screwdriver.

    • Replace the short screws to the bottom of the back case using the Philips head screwdriver.

    • After the screws are in place, insert the stylus.

  9. How to Reassemble the Palm IIIc: paso 9, imagen 1 de 1
    • Gently snap the flip cover back into place where it connects at the top of the Palm IIIc

Linea de Meta

Una persona más ha completado esta guía.

Angela Arthur

Miembro Desde 02/16/12

101 Reputación

1 Guía escrita

Equipo

Ohio State, Team 1-5, Buehl Winter 2012 Miembro de Ohio State, Team 1-5, Buehl Winter 2012

OSU-BUEHL-W12S1G5

5 Miembros

1 Guía escrita

0 comentarios

Agregar Comentario

Ver Estadísticas:

Ultimas 24 horas: 0

Ultimos 7 días: 0

Ultimos 30 días: 1

Todo El Tiempo: 241