Saltar al contenido principal

HP Spectrex360 13-ac023dx Display Replacement

Qué necesitas

  1. HP Spectrex360 13-ac023dx Display Replacement, Battery: paso 1, imagen 1 de 2 HP Spectrex360 13-ac023dx Display Replacement, Battery: paso 1, imagen 2 de 2
    • Flip the laptop over so the model sticker faces the ceiling.

  2. HP Spectrex360 13-ac023dx Display Replacement: paso 2, imagen 1 de 3 HP Spectrex360 13-ac023dx Display Replacement: paso 2, imagen 2 de 3 HP Spectrex360 13-ac023dx Display Replacement: paso 2, imagen 3 de 3
    • Use a Torx #5 screwdriver to remove the six 3.5 mm screws holding the back cover to the laptop.

  3. HP Spectrex360 13-ac023dx Display Replacement: paso 3, imagen 1 de 2 HP Spectrex360 13-ac023dx Display Replacement: paso 3, imagen 2 de 2
    • Use the Phillips #000 screwdriver to remove the four 3.5 mm screws holding the battery.

    • After removing the screws, detach the battery wire from the mother board with the iFixit opening tool.

    • Then, carefully lift the battery off with the iFixit opening tool.

  4. HP Spectrex360 13-ac023dx Display Replacement, Display: paso 4, imagen 1 de 1
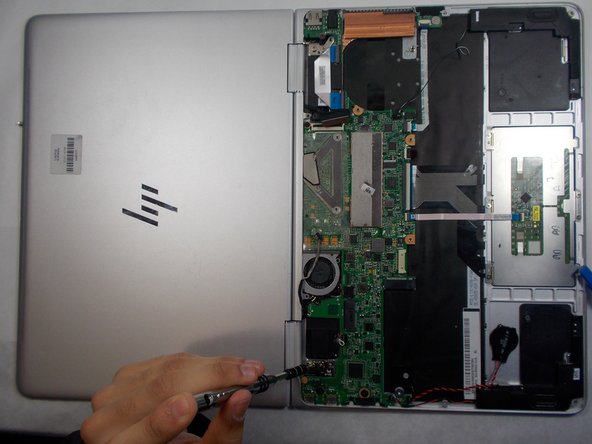
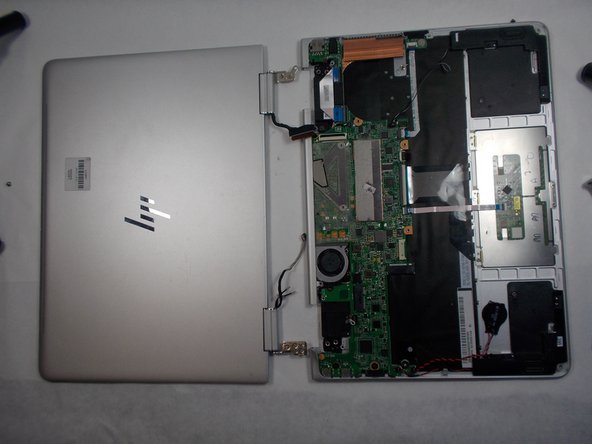
    • Lay the laptop flat on the table with the keyboard side facing the table and the motherboard facing up.

  5. HP Spectrex360 13-ac023dx Display Replacement: paso 5, imagen 1 de 3 HP Spectrex360 13-ac023dx Display Replacement: paso 5, imagen 2 de 3 HP Spectrex360 13-ac023dx Display Replacement: paso 5, imagen 3 de 3
    • Using the Phillips #000 screwdriver, remove the four 1.0 mm screws that attach the display to the main body of the computer.

  6. HP Spectrex360 13-ac023dx Display Replacement: paso 6, imagen 1 de 3 HP Spectrex360 13-ac023dx Display Replacement: paso 6, imagen 2 de 3 HP Spectrex360 13-ac023dx Display Replacement: paso 6, imagen 3 de 3
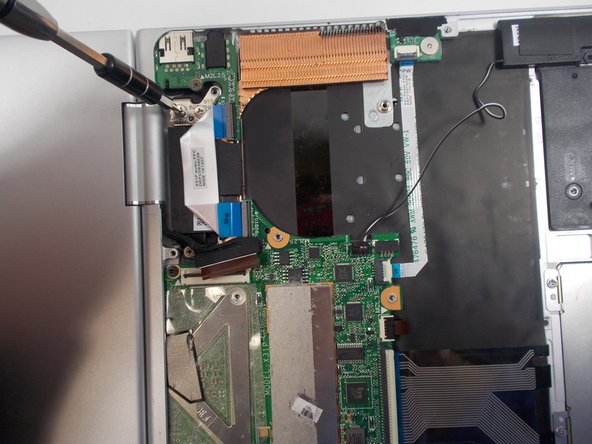
    • Move the metal components that were just unscrewed out of the way to make a clear view of the two display connectors.

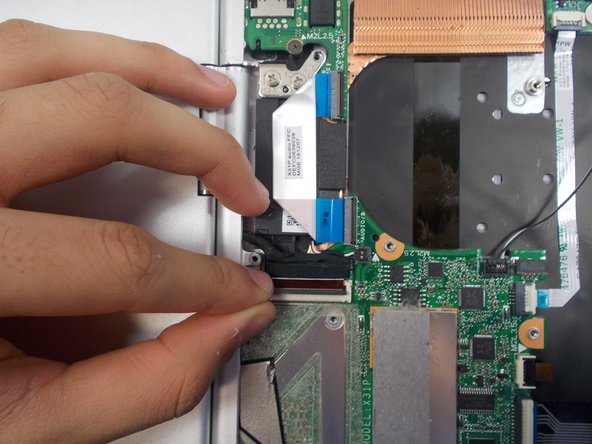
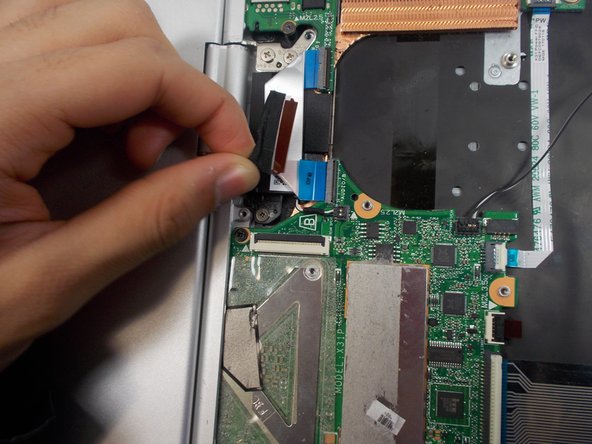
    • Flip up both latches that are found at the center of the computer's body where the wires connect to the motherboard. Then release the wires that attach to the display. This will separate the two main parts of the computer.

  7. HP Spectrex360 13-ac023dx Display Replacement: paso 7, imagen 1 de 2 HP Spectrex360 13-ac023dx Display Replacement: paso 7, imagen 2 de 2
    • Separate the display from the bottom half of the computer(motherboard).

Conclusión

To reassemble your device, follow these instructions in reverse order.

2 personas más completaron esta guía.

Jonathan

Miembro Desde 10/21/19

486 Reputación

4 Guías creadas

Equipo

Un comentario

I couldn’t remove the display without removing the one speaker. In the pictures, you can easily see that he just bent the metal case at the hinge and pried it out.

Ryan Stauffer - Contestar

Agregar Comentario

Ver Estadísticas:

Ultimas 24 horas: 2

Ultimos 7 días: 14

Ultimos 30 días: 70

Todo El Tiempo: 2,527