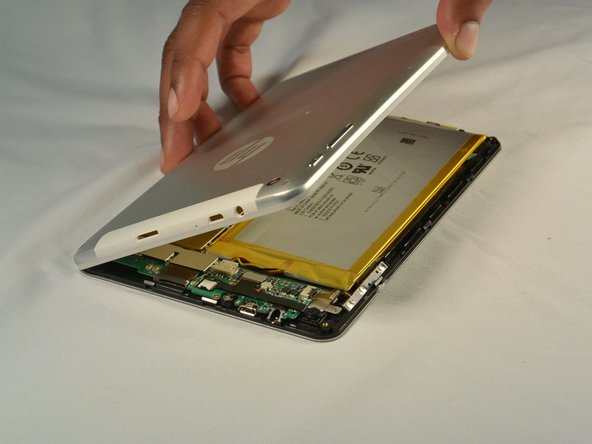
Saltar al contenido principal

HP 7 Plus 1302 Power and Volume Button Replacement

Qué necesitas

  1. HP 7 Plus 1302 Power and Volume Button Replacement, Back Cover: paso 1, imagen 1 de 1
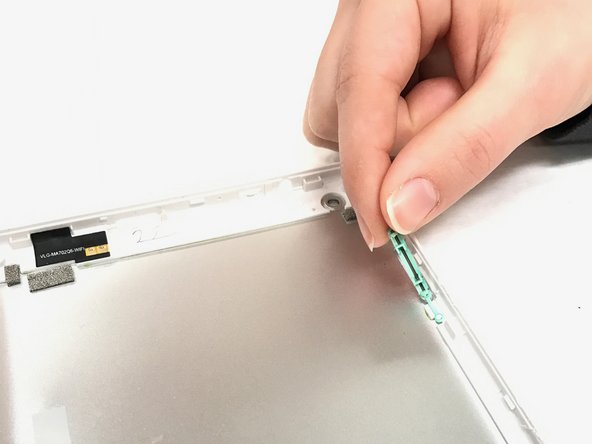
    • Using the T5 Torx Screwdriver, remove the T5x3mm screws located in all 4 corners.

    • Device should be turned off and unplugged before starting the replacements.

  2. HP 7 Plus 1302 Power and Volume Button Replacement: paso 2, imagen 1 de 2 HP 7 Plus 1302 Power and Volume Button Replacement: paso 2, imagen 2 de 2
    • Use the plastic opening tool to push in between the front and the back of the tablet.

    • Slide the plastic opening tool around all 4 sides of the tablet to separate the back cover.

    • Be careful when you are trying to remove the back as it can damage the screen if you force it too much.

  3. HP 7 Plus 1302 Power and Volume Button Replacement: paso 3, imagen 1 de 2 HP 7 Plus 1302 Power and Volume Button Replacement: paso 3, imagen 2 de 2
    • Continue sliding the plastic opening tool around the tablet until all 4 sides are separated from each other.

    • Remove the back cover.

  4. HP 7 Plus 1302 Power and Volume Button Replacement, Power and Volume Button: paso 4, imagen 1 de 1
    • Locate the power and volume buttons on the right side

  5. HP 7 Plus 1302 Power and Volume Button Replacement: paso 5, imagen 1 de 2 HP 7 Plus 1302 Power and Volume Button Replacement: paso 5, imagen 2 de 2
    • Pop out the power and volume buttons with your hands

Conclusión

To reassemble your device, follow these instructions in reverse order.

Shannon Suttles

Miembro Desde 01/29/17

225 Reputación

2 Guías creadas

Equipo

IUPUI, Team 1-4, Baechle Spring 2017 Miembro de IUPUI, Team 1-4, Baechle Spring 2017

IUPUI-BAECHLE-S17S1G4

4 Miembros

8 Guías creadas

0 comentarios

Agregar Comentario

Ver Estadísticas:

Ultimas 24 horas: 0

Ultimos 7 días: 0

Ultimos 30 días: 0

Todo El Tiempo: 254