Saltar al contenido principal

Garmin Nuvi 680 Motherboard Replacement

Qué necesitas

  1. Garmin Nuvi 680 Motherboard Replacement, Outer Case: paso 1, imagen 1 de 1
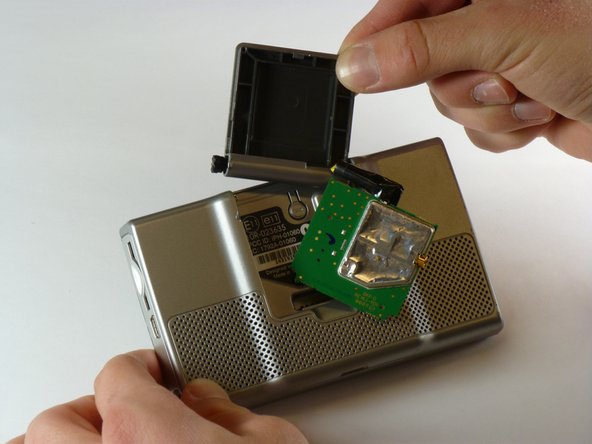
    • Flip open the antenna on the back of the device.

    • Remove the two 4.42 mm screws on the antenna cover using a T5 Torx screwdriver.

  2. Garmin Nuvi 680 Motherboard Replacement: paso 2, imagen 1 de 1
    • Remove the antenna cover.

  3. Garmin Nuvi 680 Motherboard Replacement: paso 3, imagen 1 de 1
    • The yellow wire is connected to the motherboard, so you cannot disconnect it until you finish opening the device.

    • Pull the antenna circuit board out of its case.

  4. Garmin Nuvi 680 Motherboard Replacement: paso 4, imagen 1 de 2 Garmin Nuvi 680 Motherboard Replacement: paso 4, imagen 2 de 2
    • Insert the pointed end of a spudger into the leftmost slit of the antenna case.

    • Push the spudger to the right.

    • Slide the antenna case out slowly or you may lose the antenna's spring. The spring is inside the black plastic that holds the antenna case to the device.

    • Slide the antenna case out of the device.

    • Reinstallation tip: first reassemble the antenna casing (place antenna back into its plastic cover), and then re-insert the entire assembly back into the GPS body.

  5. Garmin Nuvi 680 Motherboard Replacement: paso 5, imagen 1 de 1
    • Remove the two screws on the back of the outer case using a T5 Torx screwdriver.

    • These screws are 10.82 mm long.

  6. Garmin Nuvi 680 Motherboard Replacement: paso 6, imagen 1 de 2 Garmin Nuvi 680 Motherboard Replacement: paso 6, imagen 2 de 2
    • Gently pull apart the front and back of the device. The front and back are still connected by ribbon cables.

    • Starting along the top, separate the front and back of the device by pushing an iPod-opening tool into the crack along each side of the case.

  7. Garmin Nuvi 680 Motherboard Replacement, Antenna: paso 7, imagen 1 de 2 Garmin Nuvi 680 Motherboard Replacement, Antenna: paso 7, imagen 2 de 2
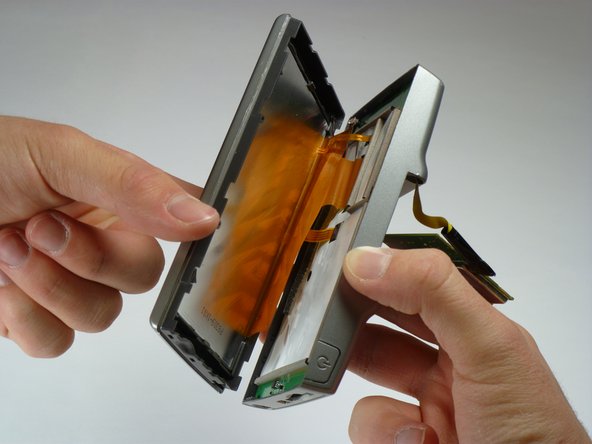
    • Use a spudger to disconnect the yellow antenna wire from the ZIF connector by opening the brown latch holding the wire in place.

    • Remove the antenna.

  8. Garmin Nuvi 680 Motherboard Replacement, Screen Wiring: paso 8, imagen 1 de 1
    • Do not remove the ribbon cables without lifting the latch or the cable will be damaged.

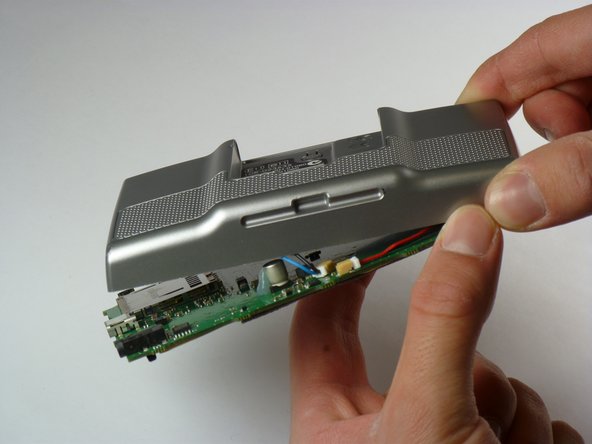
    • Lift the latches on the ribbon cable connectors. All the ribbon cables may have latches. The right most latch may have a latch that flips in the opposite direction from the others.

    • Gently pull the ribbon cables out of their connectors. They should slide out easily.

    • Do not separate the two halves of the device yet or the on/off cable may be severed.

  9. Garmin Nuvi 680 Motherboard Replacement: paso 9, imagen 1 de 2 Garmin Nuvi 680 Motherboard Replacement: paso 9, imagen 2 de 2
    • Gently pull the cable for the on/off button straight up to remove it.

    • The two halves of the device may now be separated.

  10. Garmin Nuvi 680 Motherboard Replacement, Motherboard: paso 10, imagen 1 de 1
    • Use a PH1 sized Philips screwdriver to remove the two screws shown.

    • These screws are 6.88 mm long

  11. Garmin Nuvi 680 Motherboard Replacement: paso 11, imagen 1 de 2 Garmin Nuvi 680 Motherboard Replacement: paso 11, imagen 2 de 2
    • Carefully separate the motherboard from the outer case or the speaker and battery cables may be damaged.

    • Use a spudger to lift the edge of the motherboard.

  12. Garmin Nuvi 680 Motherboard Replacement: paso 12, imagen 1 de 1
    • Gently unplug the cable for the battery

    • Gently unplug the cable for the speaker.

  13. Garmin Nuvi 680 Motherboard Replacement: paso 13, imagen 1 de 1
    • Lift the motherboard out of the outer case.

Conclusión

To reassemble your device, follow these instructions in reverse order.

Una persona más ha completado esta guía.

Chris Marzano

Miembro Desde 01/20/11

968 Reputación

6 Guías creadas

Equipo

Cal Poly, Team 5-22, Amido Winter 2011 Miembro de Cal Poly, Team 5-22, Amido Winter 2011

CPSU-AMIDO-W11S5G22

5 Miembros

7 Guías creadas

0 comentarios

Agregar Comentario

Ver Estadísticas:

Ultimas 24 horas: 0

Ultimos 7 días: 0

Ultimos 30 días: 0

Todo El Tiempo: 3,615