Saltar al contenido principal

Disassembling Numark TT1600 Circuit board

Qué necesitas

  1. Disassembling Numark TT1600 Circuit board, Circuit board: paso 1, imagen 1 de 2 Disassembling Numark TT1600 Circuit board, Circuit board: paso 1, imagen 2 de 2
    • Flip over the turntable and remove the nine screws on the outer edges.

  2. Disassembling Numark TT1600 Circuit board: paso 2, imagen 1 de 1
    • Remove the back cover by pulling it apart.

  3. Disassembling Numark TT1600 Circuit board: paso 3, imagen 1 de 1
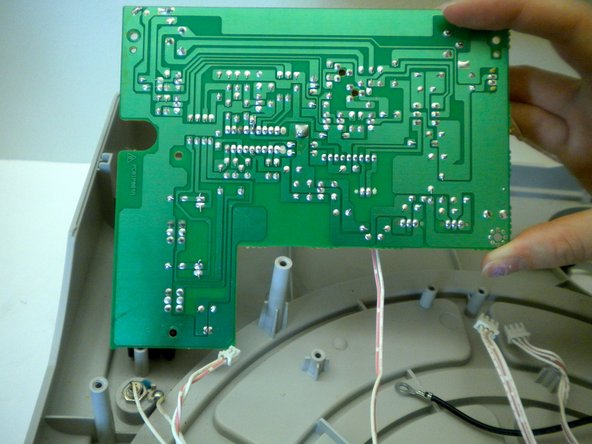
    • Locate the largest circuit board inside the device.

  4. Disassembling Numark TT1600 Circuit board: paso 4, imagen 1 de 1
    • Locate the wires that are plugged into the side of the circuit board.

  5. Disassembling Numark TT1600 Circuit board: paso 5, imagen 1 de 2 Disassembling Numark TT1600 Circuit board: paso 5, imagen 2 de 2
    • Gently pull out the wires plugged into the circuit board.

  6. Disassembling Numark TT1600 Circuit board: paso 6, imagen 1 de 2 Disassembling Numark TT1600 Circuit board: paso 6, imagen 2 de 2
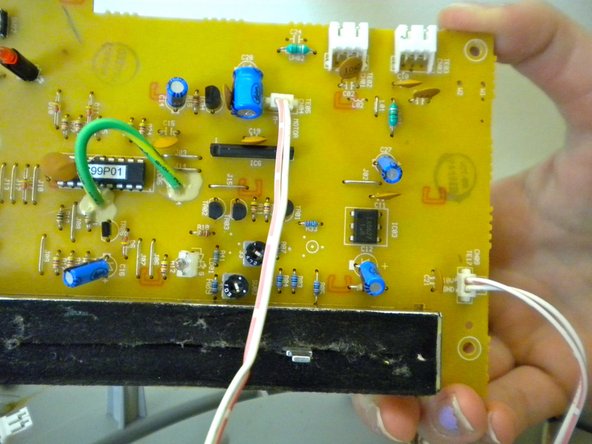
    • Once the wires are unplugged you will notice two more wires plugged into the bottom of the circuit board.

    • Note that these wires are soldered onto the circuit, indicated by the red markers.

    • To completely remove the circuit board these wires must be removed.

Conclusión

To reassemble your device, follow these instructions in reverse order.

Una persona más ha completado esta guía.

Sukhjinder

Miembro Desde 10/12/11

17 Reputación

1 Guía escrita

Equipo

Cal Poly, Team 17-14, Regan Fall 2011 Miembro de Cal Poly, Team 17-14, Regan Fall 2011

CPSU-REGAN-F11S17G14

4 Miembros

11 Guías creadas

0 comentarios

Agregar Comentario

Ver Estadísticas:

Ultimas 24 horas: 0

Ultimos 7 días: 0

Ultimos 30 días: 6

Todo El Tiempo: 1,517