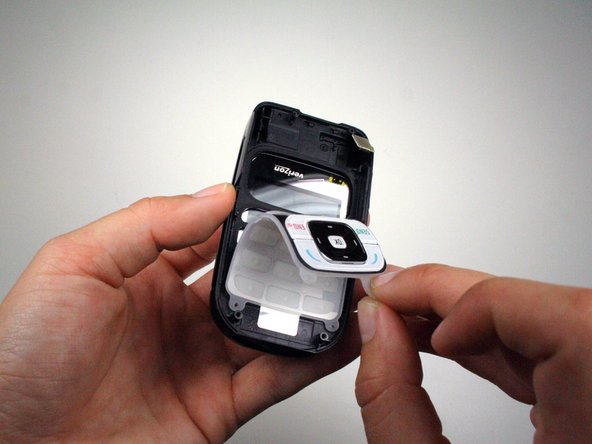
Saltar al contenido principal

Disassembling Nokia 2366i Keypad

Qué necesitas

  1. Disassembling Nokia 2366i Keypad, Battery: paso 1, imagen 1 de 2 Disassembling Nokia 2366i Keypad, Battery: paso 1, imagen 2 de 2
    • Turn off the phone.

    • Position the phone so that the back side is in view.

  2. Disassembling Nokia 2366i Keypad: paso 2, imagen 1 de 1
    • Apply pressure on the cover while simultaneously sliding the cover downward.

    • Remove the back battery cover.

  3. Disassembling Nokia 2366i Keypad: paso 3, imagen 1 de 3 Disassembling Nokia 2366i Keypad: paso 3, imagen 2 de 3 Disassembling Nokia 2366i Keypad: paso 3, imagen 3 de 3
    • Insert the spudger between the base of the phone and the phone battery.

    • Position the phone so that the battery won't fall out of the phone.

    • Carefully lift the battery out of the phone.

    • The battery lifts out of the phone easily.

  4. Disassembling Nokia 2366i Keypad, Rear Case: paso 4, imagen 1 de 2 Disassembling Nokia 2366i Keypad, Rear Case: paso 4, imagen 2 de 2
    • Use a Phillips #00 screwdriver or your fingers to remove the rubber tabs at top back of the phone.

  5. Disassembling Nokia 2366i Keypad: paso 5, imagen 1 de 2 Disassembling Nokia 2366i Keypad: paso 5, imagen 2 de 2
    • Remove four 5mm screws from the back of the phone using a T6 Torx screwdriver:

    • 2 screws at the bottom

    • 2 screws at the top

  6. Disassembling Nokia 2366i Keypad: paso 6, imagen 1 de 2 Disassembling Nokia 2366i Keypad: paso 6, imagen 2 de 2
    • Rotate the phone clockwise so the edge is facing you.

    • Insert the spudger in tabs between the outer casing and the inside frame.

    • Slide the spudger upwards.

    • This will remove the rear case of the phone.

  7. Disassembling Nokia 2366i Keypad: paso 7, imagen 1 de 1
    • The phone should now be in two different sections.

    • 1) The rear case of the phone.

    • 2) The motherboard and the rest of the phone.

  8. Disassembling Nokia 2366i Keypad, Motherboard: paso 8, imagen 1 de 2 Disassembling Nokia 2366i Keypad, Motherboard: paso 8, imagen 2 de 2
    • Use the spudger to lift off the yellow clip near the top right corner of the motherboard.

  9. Disassembling Nokia 2366i Keypad: paso 9, imagen 1 de 2 Disassembling Nokia 2366i Keypad: paso 9, imagen 2 de 2
    • Rotate the phone counterclockwise so that the edge is facing you.

    • Use the spudger to lift the motherboard out of the base of the phone.

    • Remove the motherboard from the base of the phone.

  10. Disassembling Nokia 2366i Keypad, Keypad: paso 10, imagen 1 de 1
    • Place key pad in view.

  11. Disassembling Nokia 2366i Keypad: paso 11, imagen 1 de 2 Disassembling Nokia 2366i Keypad: paso 11, imagen 2 de 2
    • Use your fingers to remove the keypad by carefully pulling from the top of the phone towards the bottom of the phone.

Conclusión

To reassemble your device, follow these instructions in reverse order.

Una persona más ha completado esta guía.

Michael Machado

Miembro Desde 01/21/11

334 Reputación

3 Guías creadas

Equipo

Cal Poly, Team 1-14, Amido Winter 2011 Miembro de Cal Poly, Team 1-14, Amido Winter 2011

CPSU-AMIDO-W11S1G14

5 Miembros

16 Guías creadas

0 comentarios

Agregar Comentario

Ver Estadísticas:

Ultimas 24 horas: 1

Ultimos 7 días: 1

Ultimos 30 días: 1

Todo El Tiempo: 840