Introducción
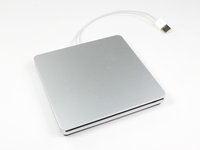
Una guía sencilla para reemplazar la unidad óptica del lector de discos externos vendido por Apple para el MacBook Air. Si tu unidad óptica se rompe, sigue esta guía para reemplazarla.
Nota: Aquí hay un método para sortear el archivo de configuración del OS X para ser utilizado en los sistemas iMac, MacBook o MacBook Pro antiguos con los cuales el lector no funcionaría normalmente. ¡Hazlo con precaución!
Abre el archivo com.apple.Boot.plist en un editor de textor o en una terminal, usa nano. Verás una clave <key>Kernel Flags</key>
Debajo de ella añade la siguiente línea;
<string>mbasd=1</string>
Reinicia tu Mac.
Si posees el modelo más actual A1379:
=
Desafortunadamente deberás reemplazar la unidad óptica por otra de un Apple Superdrive, debido a que los contactos en la placa madre están soldados directamente al cable USB.
El modelo producido antes de 2012 tiene una unidad óptica estándar PATA delgada, pero cualquier SuperDrive comprado de Apple de 2012 en adelante necesitará un cautín para ser reparado.
Qué necesitas
-
-
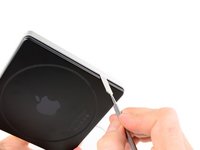
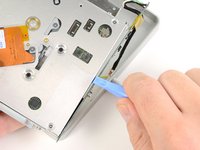
Para abrir el SuperDrive deberemos retirar la carcasa inferior.
-
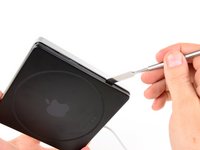
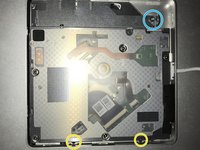
La carcasa inferior está sostenida por 8 sujetadores.
-
6 a los lados
-
2 en la parte trasera
-
-
-
-
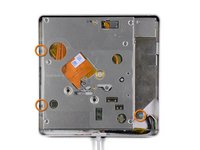
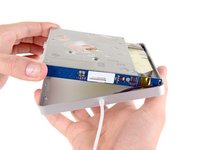
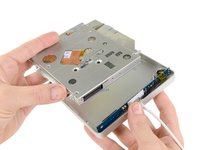
(A1270) Levanta la unidad óptica desde el lado grueso y jálala afuera.
-
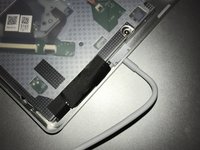
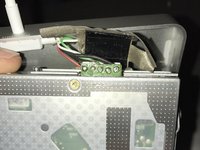
(A1379) Necesitarás ser aún más cuidadoso con este modelo, debido a que hay menos espacio para maniobrar. Despega la cinta aislante para ver el conector.
-
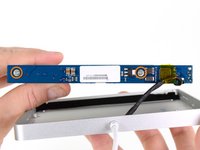
Cuando estés volviendo a instalar la unidad óptica, inserta la lengüeta en el lado de la ranira primero, justo como se muestra.
-


Para ensamblar tu dispositivo, sigue estas instrucciones en orden inverso.
Cancelar: No complete esta guía.
53 personas más completaron esta guía.
Un agradecimiento especial a estos traductores:
100%


Estos traductores nos están ayudando a reparar el mundo! ¿Quieres contribuir?
Empezar a traducir ›

23Guía Comentarios
After you pry open, inside there is an internal Super Drive.
Please tell me what's the markings/printed words model, name, brand, part number, etc....
Thank you.
My drive has nothing on that orange part in the middle of the drive (like you can see in the pictures here) except for two QR codes; it has absolutely no markings/printed words model, name, brand, part number, etc. on the inside, except the manufacturing date 2012 stamped inside the black aluminum bottom case cover.
Hope this helps.
Thank you. My drive from 2012 ist fastened with a six-sided star-shaped Torx screw on the right side. The ones on the left side are black Philips screws and they are so tiny that they are hard to see in normal light. All I want to do is clean the drive from dust since it won't read DVDs anymore, while it has no problems with CDs at all. So now this Torx screw is another obstacle. I will have to waste more time & money buying an extra tool, thanks to Apple.
Is it possible to replace the internal DVD drive by a Bluray? Does macOS Sierra work with external Bluray drives?
Thanks for helping.
Sincerely
Yes, but the only drive that is known to be an ATAPI (EIDE) connecting drive that supports Blu-ray is the Panasonic UJ-215-B. They were astronomically priced new in 2007-2008 when they were released. Good luck finding one today, and if you do it will still be very expensive and almost never a new one. But it seems to be a direct drop in replacement. I myself have already begun this project, and have one on the way right now. Bought it for $250 so it was pricey but considering it was new I got very lucky.