Saltar al contenido principal

why! W670SZQ1 Fan Replacement

Guía Archivada
Esta guía se mantiene únicamente para fines históricos. Utiliza la última versión de la guía para llevar a cabo tu reparación.

Qué necesitas

  1. why! W670SZQ1 Fan Replacement, accumulator: paso 1, imagen 1 de 3 why! W670SZQ1 Fan Replacement, accumulator: paso 1, imagen 2 de 3 why! W670SZQ1 Fan Replacement, accumulator: paso 1, imagen 3 de 3
    • Open the latch of the accumulator on the left side.

    • Open the battery latch on the right side.

    • Remove the accumulator by simultaneously holding the right-hand latch open.

  2. why! W670SZQ1 Fan Replacement, Access to the most important components: paso 2, imagen 1 de 3 why! W670SZQ1 Fan Replacement, Access to the most important components: paso 2, imagen 2 de 3 why! W670SZQ1 Fan Replacement, Access to the most important components: paso 2, imagen 3 de 3
    • Use the Philips screwdriver to remove the two screws at the bottom of the cover.

    • Lift the cover at the bottom right with the iFixit Opening Tool

    • Lift the cover at the bottom left with the iFixit Opening Tool

    • Finally, remove the cover to gain access to the most important components.

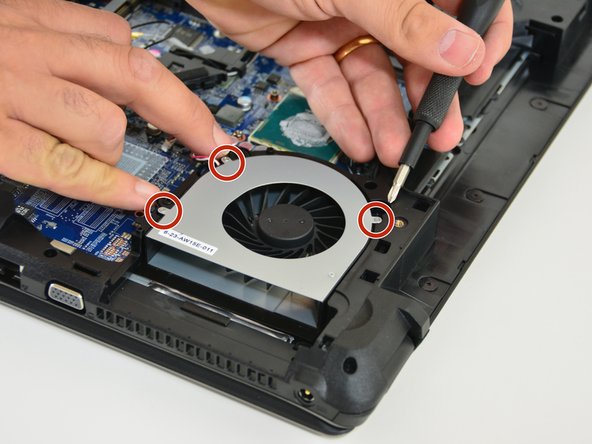
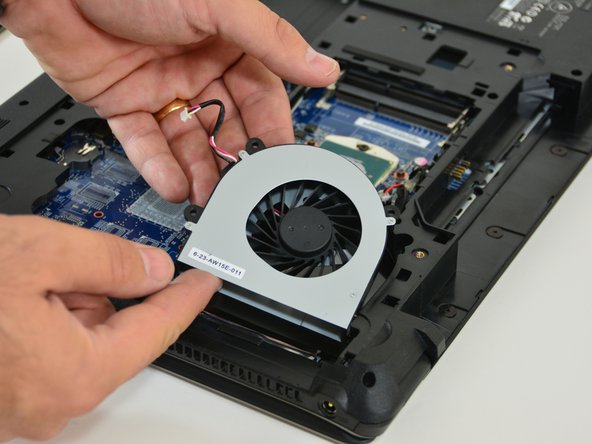
  3. why! W670SZQ1 Fan Replacement, Fan: paso 3, imagen 1 de 3 why! W670SZQ1 Fan Replacement, Fan: paso 3, imagen 2 de 3 why! W670SZQ1 Fan Replacement, Fan: paso 3, imagen 3 de 3
    • First, locate the fan. Then pull out the supply cable of the fan.

    • Remove the three retaining screws of the fan.

    • Finally, remove the fan by lifting it out.

Conclusión

Repeat the steps in reverse order to reassemble your device.

Un agradecimiento especial a estos traductores:

de en

100%

Estos traductores nos están ayudando a reparar el mundo! ¿Quieres contribuir?
Empezar a traducir ›

Felice Suglia

Miembro Desde 06/15/13

30,884 Reputación

264 Guías creadas

0 comentarios

Agregar Comentario

Ver Estadísticas:

Ultimas 24 horas: 0

Ultimos 7 días: 0

Ultimos 30 días: 1

Todo El Tiempo: 103