Saltar al contenido principal

why! N240BU Hard Drive M.2 Replacement

Qué necesitas

  1. why! N240BU Hard Drive M.2 Replacement, Battery: paso 1, imagen 1 de 2 why! N240BU Hard Drive M.2 Replacement, Battery: paso 1, imagen 2 de 2
    • Start by unlocking the right locking latch.

    • Then, by simultaneously unlocking the left latch, lift the battery out of its socket.

  2. why! N240BU Hard Drive M.2 Replacement, Access to main components: paso 2, imagen 1 de 2 why! N240BU Hard Drive M.2 Replacement, Access to main components: paso 2, imagen 2 de 2
    • Begin by spotting the dummy memory card.

    • Then, remove it and put it on your workplan.

  3. why! N240BU Hard Drive M.2 Replacement: paso 3, imagen 1 de 3 why! N240BU Hard Drive M.2 Replacement: paso 3, imagen 2 de 3 why! N240BU Hard Drive M.2 Replacement: paso 3, imagen 3 de 3
    • Locate the 15 screws that hold the bottom cover of the device in place.

    • Unscrew them and place them on your work surface.

    • Then, un-clip the bottom cover, starting with the side shown in the third picture.

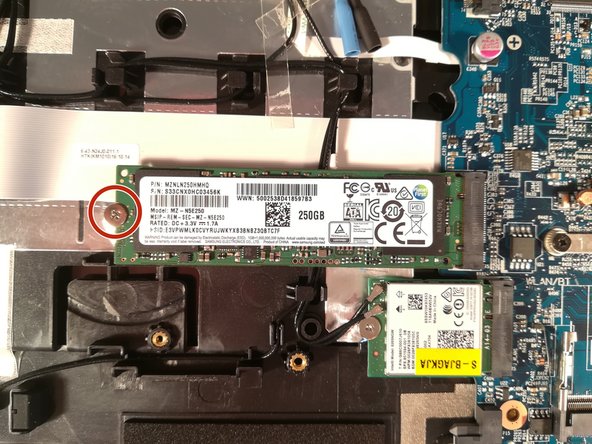
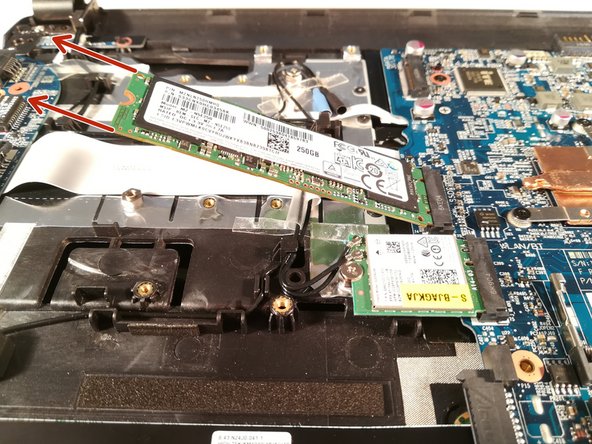
  4. why! N240BU Hard Drive M.2 Replacement, SSD Hard Drive: paso 4, imagen 1 de 3 why! N240BU Hard Drive M.2 Replacement, SSD Hard Drive: paso 4, imagen 2 de 3 why! N240BU Hard Drive M.2 Replacement, SSD Hard Drive: paso 4, imagen 3 de 3
    • Unscrew the screw circled in red

    • Pull out the M.2 SSD in the direction of the red arrows

Conclusión

To reassemble your device, follow these instructions in reverse order.

Una persona más ha completado esta guía.

Un agradecimiento especial a estos traductores:

fr en

100%

Estos traductores nos están ayudando a reparar el mundo! ¿Quieres contribuir?
Empezar a traducir ›

Felice Suglia

Miembro Desde 06/15/13

30,731 Reputación

262 Guías creadas

0 comentarios

Agregar Comentario

Ver Estadísticas:

Ultimas 24 horas: 1

Ultimos 7 días: 1

Ultimos 30 días: 1

Todo El Tiempo: 204