Saltar al contenido principal

iRobot Roomba 560 Motherboard Replacement

Qué necesitas

  1. iRobot Roomba 560 Motherboard Replacement, Start: paso 1, imagen 1 de 1
    • Rotate the Roomba so the bumper is in front of you.

  2. iRobot Roomba 560 Motherboard Replacement, Wheel Removal: paso 2, imagen 1 de 1
    • Remove the wheel using a spudger. You can probably also do this with your hand depending on how dirty the wheel is.

  3. iRobot Roomba 560 Motherboard Replacement, Wheel Removal: paso 3, imagen 1 de 1
    • Remove the wheel guiding inlay using the spudger or your hand.

  4. iRobot Roomba 560 Motherboard Replacement, Remove Main Brush: paso 4, imagen 1 de 1
    • Remove the main brush by unscrewing the single 5 mm screw on the yellow side sweeper using the Phillips #1 driver.

    • Once the screw is removed, lift out the brush and store the screw and brush.

  5. iRobot Roomba 560 Motherboard Replacement, Accessing the Battery: paso 5, imagen 1 de 3 iRobot Roomba 560 Motherboard Replacement, Accessing the Battery: paso 5, imagen 2 de 3 iRobot Roomba 560 Motherboard Replacement, Accessing the Battery: paso 5, imagen 3 de 3
    • Using the Phillips #1 driver, remove the four 10 mm screws that hold the back panel in place.

    • Once the four screws are removed, store the safely and lift up the back panel.

  6. iRobot Roomba 560 Motherboard Replacement, Remove the Vacuum-tray: paso 6, imagen 1 de 2 iRobot Roomba 560 Motherboard Replacement, Remove the Vacuum-tray: paso 6, imagen 2 de 2
    • Remove the vacuum try to have an easier repair.

  7. iRobot Roomba 560 Motherboard Replacement, Removing the Battery: paso 7, imagen 1 de 2 iRobot Roomba 560 Motherboard Replacement, Removing the Battery: paso 7, imagen 2 de 2
    • Locate the battery.

    • Lift up the yellow battery by pulling up the green tabs on its side.

    • Handle the battery with care.

  8. iRobot Roomba 560 Motherboard Replacement, Removing the wheels.: paso 8, imagen 1 de 3 iRobot Roomba 560 Motherboard Replacement, Removing the wheels.: paso 8, imagen 2 de 3 iRobot Roomba 560 Motherboard Replacement, Removing the wheels.: paso 8, imagen 3 de 3
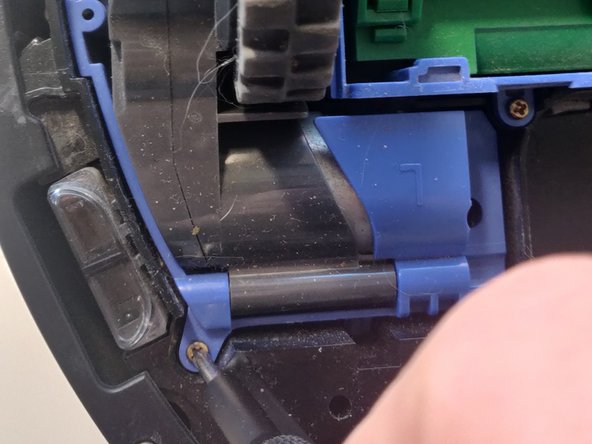
    • Using the Phillips #1 driver, remove the three screws that hold back the wheel unit on each side. This is not required but will make the repair easier.

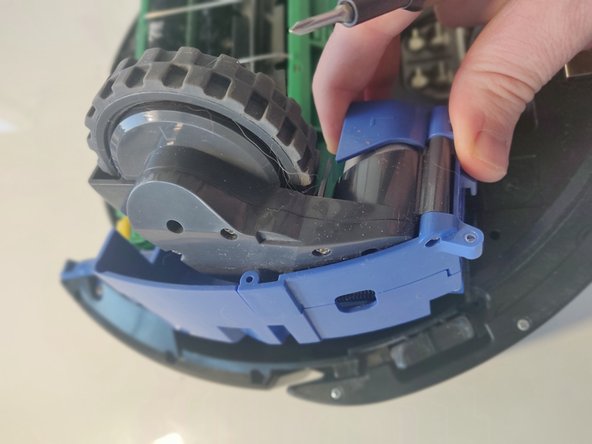
    • Lift out the wheel units and store safely.

    • Repeat on the other side.

  9. iRobot Roomba 560 Motherboard Replacement, Prepare for the mainboard extraction: paso 9, imagen 1 de 2 iRobot Roomba 560 Motherboard Replacement, Prepare for the mainboard extraction: paso 9, imagen 2 de 2
    • Check that the unit now looks like this and all the parts are removed.

    • Flip the unit around.

  10. iRobot Roomba 560 Motherboard Replacement, Unhook front panel: paso 10, imagen 1 de 1
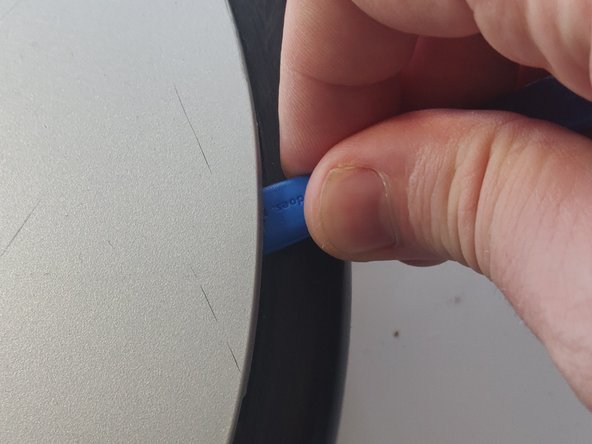
    • Use your hands to unhook the snaps between the silver panel from the black panel located where the vacuum bin was.

  11. iRobot Roomba 560 Motherboard Replacement, Remove top panel: paso 11, imagen 1 de 3 iRobot Roomba 560 Motherboard Replacement, Remove top panel: paso 11, imagen 2 de 3 iRobot Roomba 560 Motherboard Replacement, Remove top panel: paso 11, imagen 3 de 3
    • Using the ifixit spudgers pry under the main silver panel.

  12. iRobot Roomba 560 Motherboard Replacement, Panel removal: paso 12, imagen 1 de 1
    • Lift off the panel.

  13. iRobot Roomba 560 Motherboard Replacement, Remove front bumper: paso 13, imagen 1 de 1
    • Turn the unit around again and locate the 10 screws on the front bumper.

    • Using the Phillips #1 driver, remove the ten 10 mm screws on the bumper that run along the outer edge of the Roomba.

  14. iRobot Roomba 560 Motherboard Replacement, Lift off bumper: paso 14, imagen 1 de 3 iRobot Roomba 560 Motherboard Replacement, Lift off bumper: paso 14, imagen 2 de 3 iRobot Roomba 560 Motherboard Replacement, Lift off bumper: paso 14, imagen 3 de 3
    • Lift the thin top cover that holds the bumper in place.

    • Be very vigilant with the attached sensor. Otherwise you risk ripping off the cable and damaging the entire sensor.

  15. iRobot Roomba 560 Motherboard Replacement, Unscrew sensor: paso 15, imagen 1 de 2 iRobot Roomba 560 Motherboard Replacement, Unscrew sensor: paso 15, imagen 2 de 2
    • Lift the bumper upwards for easier access.

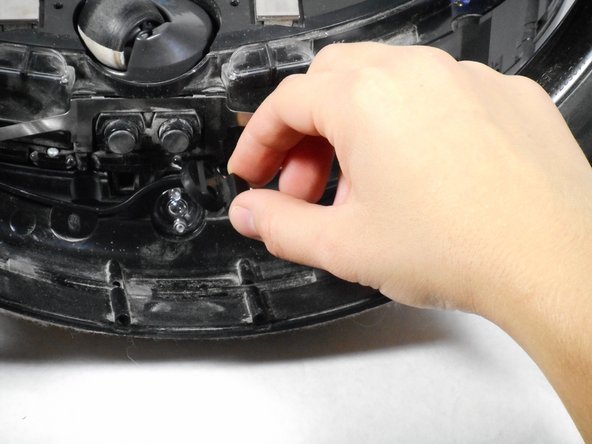
    • Unscrew the two 5 mm screws that connect the red and white wires to the device using the Phillips #1 driver.

    • Lift the circular black panel off the sensor housing.

  16. iRobot Roomba 560 Motherboard Replacement, Turn: paso 16, imagen 1 de 1
    • Turn the unit back around.

  17. iRobot Roomba 560 Motherboard Replacement, Remove top screws: paso 17, imagen 1 de 1
    • Using the Phillips #1 driver, unscrew the following 13 screws that hold the black panel in place:

    • Two 5 mm on the bottom ends of the semicircle handle.

    • Ten 7.5 mm scattered on the Roomba.

    • One 5 mm at the bottom of control board.

  18. iRobot Roomba 560 Motherboard Replacement, Lift panel off: paso 18, imagen 1 de 1
    • Lift the black panel off the device.

  19. iRobot Roomba 560 Motherboard Replacement, Mainboard access: paso 19, imagen 1 de 3 iRobot Roomba 560 Motherboard Replacement, Mainboard access: paso 19, imagen 2 de 3 iRobot Roomba 560 Motherboard Replacement, Mainboard access: paso 19, imagen 3 de 3
    • Remove the outer silver circle, black plastic cover, and black film from the central control board in that order.

  20. iRobot Roomba 560 Motherboard Replacement, Control board removal: paso 20, imagen 1 de 1
    • Using the Phillips #1 driver, unscrew the four 10 mm screws that surround the clean button.

  21. iRobot Roomba 560 Motherboard Replacement, Remove panel: paso 21, imagen 1 de 1
    • Lift off the panel.

  22. iRobot Roomba 560 Motherboard Replacement, Remove the protective sheet: paso 22, imagen 1 de 2 iRobot Roomba 560 Motherboard Replacement, Remove the protective sheet: paso 22, imagen 2 de 2
    • Lift off the plastic sheet.

  23. iRobot Roomba 560 Motherboard Replacement, Remove the connectors: paso 23, imagen 1 de 3 iRobot Roomba 560 Motherboard Replacement, Remove the connectors: paso 23, imagen 2 de 3 iRobot Roomba 560 Motherboard Replacement, Remove the connectors: paso 23, imagen 3 de 3
    • Remove all the top connectors to the mainboard.

    • You can use ifixit's reverse pliers but you can also use your hands.

  24. iRobot Roomba 560 Motherboard Replacement, Remove mainboard screws: paso 24, imagen 1 de 1
    • Using the Phillips #1 driver, unscrew the five screws on the mainboard.

    • Do not rip out mainboard now!

  25. iRobot Roomba 560 Motherboard Replacement, Lift off mainboard carefully: paso 25, imagen 1 de 3 iRobot Roomba 560 Motherboard Replacement, Lift off mainboard carefully: paso 25, imagen 2 de 3 iRobot Roomba 560 Motherboard Replacement, Lift off mainboard carefully: paso 25, imagen 3 de 3
    • Carefully lift off the mainboard, moving it towards you.

    • Be very careful with the connected connectors.

  26. iRobot Roomba 560 Motherboard Replacement, Remove connectors: paso 26, imagen 1 de 1
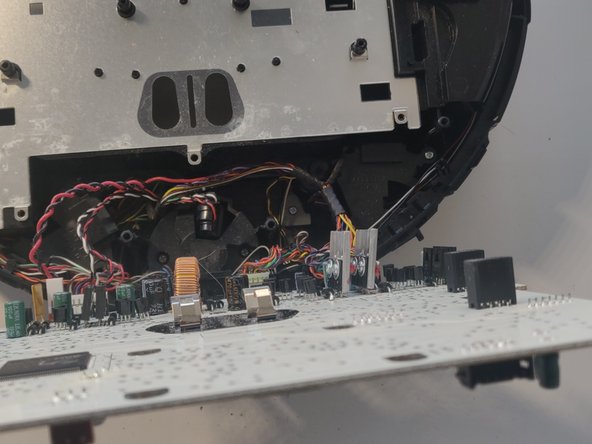
    • Very carefully disconnect the connections off the mainboard.

    • You can ifixit's reverse pliers.

  27. iRobot Roomba 560 Motherboard Replacement, Remove sensor and replace board: paso 27, imagen 1 de 2 iRobot Roomba 560 Motherboard Replacement, Remove sensor and replace board: paso 27, imagen 2 de 2
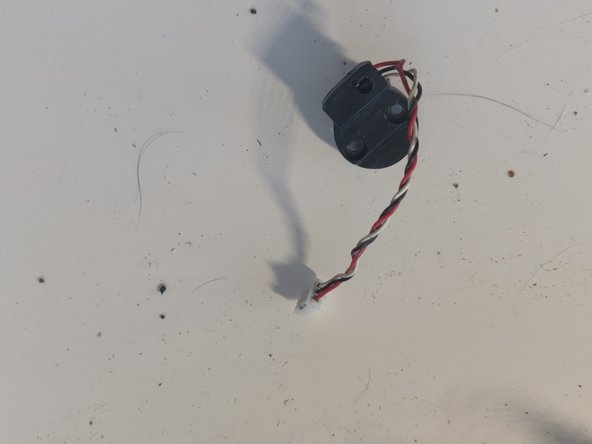
    • The sensor might still be attached/is not attached to the main unit but mainboard. Just unplug it.

    • You can now replace the mainboard and complete the steps from the bottom up to finish the replacement.

Conclusión

To reassemble your device, follow these instructions in reverse order.

4 personas más completaron esta guía.

Max Lembke

Miembro Desde 09/14/19

924 Reputación

3 Guías creadas

Un comentario

Greetings. I have two Model 560 sweepers. Neither of them has ever had a software update. I've tried resetting them to see if it will get them to complete a cleaning cycle, but they either short cycle back to the charger base, or crap out prematurely. I've installed a generic 5000 mAh battery, so there should be adequate power to complete two rooms with less than 50% carpet. Is there anybody out there who has one of the "Osmo" software updaters? I like the Model 560, and I have updated the gear drives and dust collectors, so I'd prefer NOT to junk them. Please advise.

Ed Allen, a.k.a. nostrodamos@live.com

Pasco, WA

(509) 542-1004

Ed Allen - Contestar

Agregar Comentario

Ver Estadísticas:

Ultimas 24 horas: 3

Ultimos 7 días: 27

Ultimos 30 días: 107

Todo El Tiempo: 3,254