Saltar al contenido principal

iPhone 6s Battery Replacement

Guía Archivada
Esta guía se mantiene únicamente para fines históricos. Utiliza la última versión de la guía para llevar a cabo tu reparación.

Qué necesitas

  1. iPhone 6s Battery Replacement, Battery Connection: paso 1, imagen 1 de 1
    • Power off your iPhone before beginning disassembly.

    • Remove the two 3.4 mm Pentalobe screws surrounding the Lightning connector.

  2. iPhone 6s Battery Replacement: paso 2, imagen 1 de 1
    Herramienta utilizada en este paso:
    iSclack
    $24.99
    Comprar
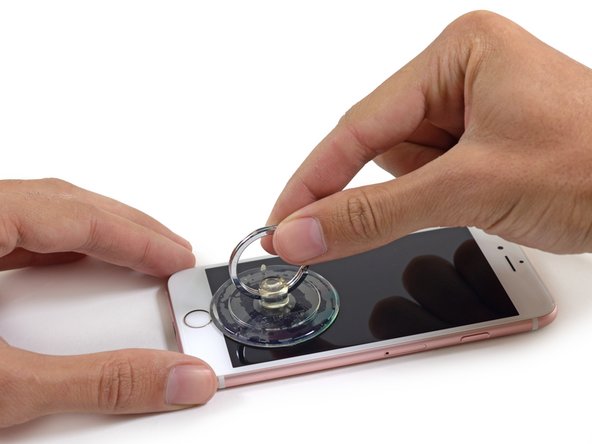
    • If you don't have an iSclack, use a single suction cup to lift the front panel:

    • Press a suction cup onto the screen, just above the home button.

    • Be sure the cup is pressed securely onto the screen to get a tight seal.

  3. iPhone 6s Battery Replacement: paso 3, imagen 1 de 3 iPhone 6s Battery Replacement: paso 3, imagen 2 de 3 iPhone 6s Battery Replacement: paso 3, imagen 3 de 3
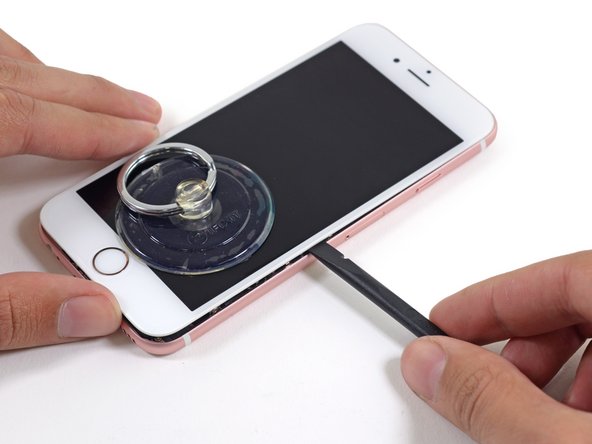
    • There is a notch on the underside of the display just above the headphone jack that is the safest place to begin prying the phone open.

    • Pull up on the suction cup to slightly separate the front panel assembly from the rear case.

    • Take your time and apply firm, constant force. The display assembly is a much tighter fit than most devices and is held down with adhesive.

    • Once a small gap has been opened, insert the flat end of a spudger above the headphone jack.

  4. iPhone 6s Battery Replacement: paso 4, imagen 1 de 2 iPhone 6s Battery Replacement: paso 4, imagen 2 de 2
    • Twist the spudger to open the gap more and break it free from the adhesive.

    • Keep pulling up on the suction cup while twisting the spudger.

  5. iPhone 6s Battery Replacement: paso 5, imagen 1 de 2 iPhone 6s Battery Replacement: paso 5, imagen 2 de 2
    • Use the edge of a spudger to slice through the adhesive on either side of the phone.

  6. iPhone 6s Battery Replacement: paso 6, imagen 1 de 2 iPhone 6s Battery Replacement: paso 6, imagen 2 de 2
    • Use the edge of a spudger to slice through the adhesive on either side of the phone.

  7. iPhone 6s Battery Replacement: paso 7, imagen 1 de 3 iPhone 6s Battery Replacement: paso 7, imagen 2 de 3 iPhone 6s Battery Replacement: paso 7, imagen 3 de 3
    • Use the suction cup to open the display, breaking the last of the adhesive.

    • Don't open the display more than 90 degrees, as it is still connected at the top by three cables that may break if stretched.

  8. iPhone 6s Battery Replacement: paso 8, imagen 1 de 1
    • Lean the display against something to keep it propped up while you're working on the phone.

  9. iPhone 6s Battery Replacement: paso 9, imagen 1 de 1
    • Remove the following screws from the battery connector bracket:

    • One 3.0 mm Phillips #00 screw

    • One 2.3 mm Phillips #00 screw

  10. iPhone 6s Battery Replacement: paso 10, imagen 1 de 1
    • Remove the metal battery connector bracket from the iPhone.

  11. iPhone 6s Battery Replacement: paso 11, imagen 1 de 3 iPhone 6s Battery Replacement: paso 11, imagen 2 de 3 iPhone 6s Battery Replacement: paso 11, imagen 3 de 3
    • Use the flat end of a spudger to disconnect the battery connector from the logic board.

    • Push the connector to the side to ensure it doesn't accidentally make contact and power on the phone while you're working on it.

  12. iPhone 6s Battery Replacement, Battery: paso 12, imagen 1 de 3 iPhone 6s Battery Replacement, Battery: paso 12, imagen 2 de 3 iPhone 6s Battery Replacement, Battery: paso 12, imagen 3 de 3
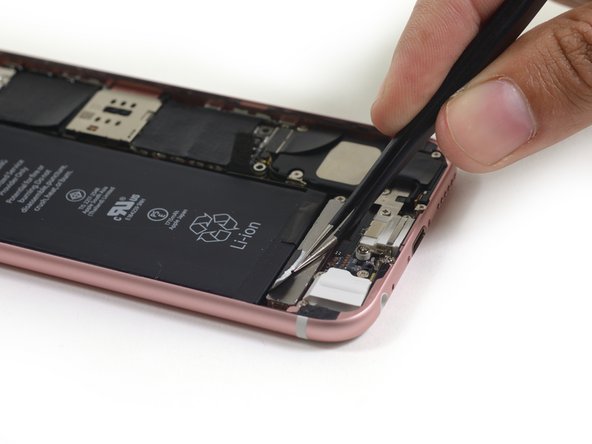
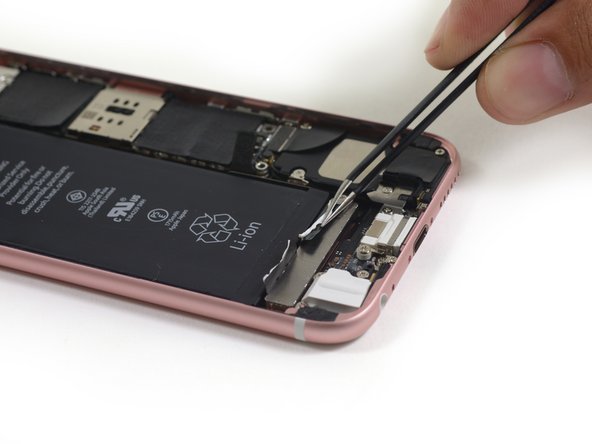
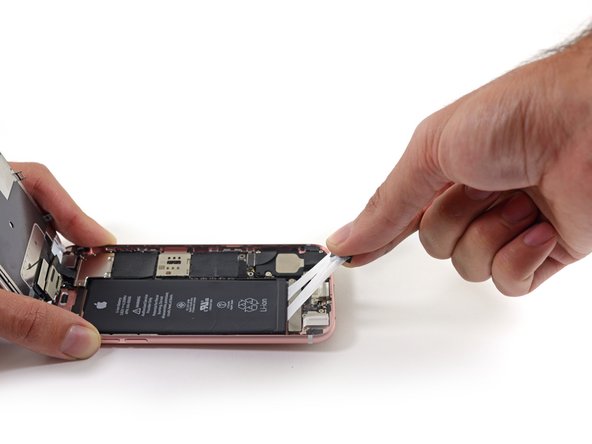
    • Use tweezers to peel up the edges of the two adhesive strips at the bottom of the battery.

  13. iPhone 6s Battery Replacement: paso 13, imagen 1 de 1
    • Grab the ends of the two adhesive strips and hold them together. Try to keep the strips flat and wide.

  14. iPhone 6s Battery Replacement: paso 14, imagen 1 de 3 iPhone 6s Battery Replacement: paso 14, imagen 2 de 3 iPhone 6s Battery Replacement: paso 14, imagen 3 de 3
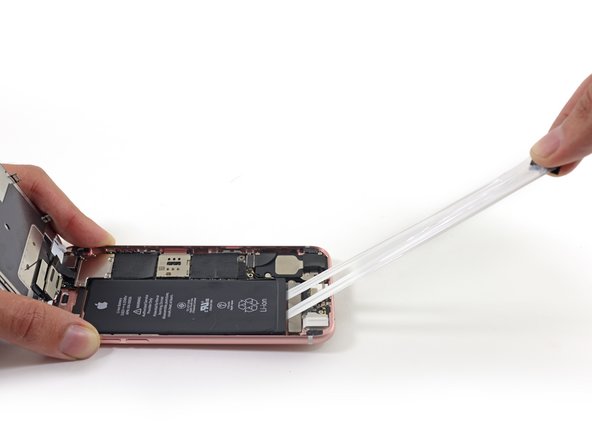
    • Slowly and gently pull the two strips up and away from the phone.

    • The strips will stretch to many times the length of the battery—keep pulling until they come out from between the battery and the rear case.

  15. iPhone 6s Battery Replacement: paso 15, imagen 1 de 1
    • Remove the battery from the rear case.

    • When installing the battery, refer to this guide to replace your battery's adhesive strips.

Conclusión

To reassemble your device, follow these instructions in reverse order.

75 personas más completaron esta guía.

Sam Goldheart

Miembro Desde 10/18/12

465,656 Reputación

538 Guías creadas

Equipo

iFixit Miembro de iFixit

Staff

135 Miembros

16,734 Guías creadas

11 comentarios

Quickkkkkkkkkkk Question. How do I go about replacing that adhesive you had me slice?

Doc Brown - Contestar

I need to buy the 6s replacement battery itself as well as the tools. Do you sell that as well as the display?

2ndwindranch - Contestar

i remember i get my battery repair kit and adhesive for less than 25$ from this seller on amazon https://www.amazon.com/dp/B01LKN9AUG

exdany9 -

Please do a video. Lets see how fast you guys can change the 6s battery.

klactwiggy - Contestar

nice very repair mizan.....

mohsen m - Contestar

Agregar Comentario

Ver Estadísticas:

Ultimas 24 horas: 0

Ultimos 7 días: 3

Ultimos 30 días: 7

Todo El Tiempo: 68,700