Saltar al contenido principal

iPhone 5s Display Assembly Replacement

Guía Archivada
Esta guía se mantiene únicamente para fines históricos. Utiliza la última versión de la guía para llevar a cabo tu reparación.

Qué necesitas

  1. iPhone 5s Display Assembly Replacement, Display Assembly: paso 1, imagen 1 de 1
    • Remove pentalobe screws with torx screwdriver.

  2. iPhone 5s Display Assembly Replacement: paso 2, imagen 1 de 2 iPhone 5s Display Assembly Replacement: paso 2, imagen 2 de 2
    • After using spudger or suction cup to lift screen. Be careful not to pull screen completely up. The touch id sensor flex cable is attached near the home button. There is a small metal clip that needs to be carefully pry'd off before removing flex cable connector.

  3. iPhone 5s Display Assembly Replacement: paso 3, imagen 1 de 2 iPhone 5s Display Assembly Replacement: paso 3, imagen 2 de 2
    • Disconnect battery before screen removal by removing 2 screws from shield. Once shield is removed, disconnect battery using nylon spudger. (DO NOT USE METAL TOOLS)

  4. iPhone 5s Display Assembly Replacement: paso 4, imagen 1 de 3 iPhone 5s Display Assembly Replacement: paso 4, imagen 2 de 3 iPhone 5s Display Assembly Replacement: paso 4, imagen 3 de 3
    • Remove four screws from shield covering display assembly connectors. Lift connectors using nylon spudger.

Conclusión

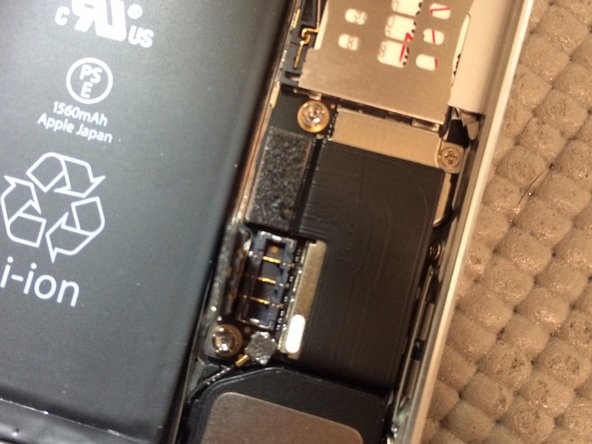
Swap all parts from old display assembly to new assembly. Do not remove all at once, replace components one at a time. To reassemble your device, follow these instructions in reverse order.

57 personas más completaron esta guía.

Fausto Lebron

Miembro Desde 10/25/13

4,119 Reputación

1 Guía escrita

0 comentarios

Agregar Comentario

Ver Estadísticas:

Ultimas 24 horas: 0

Ultimos 7 días: 0

Ultimos 30 días: 9

Todo El Tiempo: 32,623