Esta versión puede contener ediciones incorrectas. Cambie a la última instantánea verificada.
Qué necesitas
-
-
Remueve los dos tornillos Pentalobe P2 de 3.6 mm localizados en las esquinas del conector dock.
-
El Destornillador de 5-Puntas solo debe ser utilizado una vez porque tiene la posibilidad de barrer el tornillo.
-
-
-
Remueve los siguientes tornillos asegurando el conector de la batería a la tarjeta lógica
-
Un tornillo Phillips de 1.7 mm
-
Un tornillo Phillips de 1.5 mm
-
-
-
-
Inserta el borde de una herramienta de apertura de plástico entre la batería y la carcasa exterior cerca del borde inferior del iPhone.
-
Corre la herramienta de apertura de plástico junto el borde derecho de la batería y has palanca en varios puntos para separar completamente del adhesivo asegurándola a la carcasa exterior.
-
Espera por alrededor de un minuto para que el alcohol debilite el adhesivo.
-
Usa el lado plano de una herramienta de apertura de plástico para levantar gentilmente la batería.
-
-
Este paso está sin traducir. Ayuda a traducirlo
-
Remove the following screws securing the dock connector cable cover to the logic board:
-
One 1.5 mm Phillips screw
-
One 1.2 mm Phillips screw
-
Remove the metal dock connector cable cover.
-
-
Este paso está sin traducir. Ayuda a traducirlo
-
Use the edge of a plastic opening tool to pry the dock cable up from its socket on the logic board.
-
-
Este paso está sin traducir. Ayuda a traducirlo
-
Peel the dock connector cable off the adhesive securing it to the logic board and the side of the speaker enclosure.
-
-
Este paso está sin traducir. Ayuda a traducirlo
-
Use the edge of a plastic opening tool to pry the cellular antenna cable up from its socket on the logic board.
-
De-route the cellular antenna cable out from under the metal fingers attached to the logic board.
-
-
Este paso está sin traducir. Ayuda a traducirlo
-
Remove the two 2.4 mm Phillips screws securing the speaker enclosure assembly to the outer case.
-
-
Este paso está sin traducir. Ayuda a traducirlo
-
Remove the small black spacer that was under the Phillips screw near the vibrator.
-
-
Este paso está sin traducir. Ayuda a traducirlo
-
Use a plastic opening tool to lift the speaker enclosure assembly out of the case, being sure not to damage the EMI fingers on the attached Wi-Fi antenna.
-
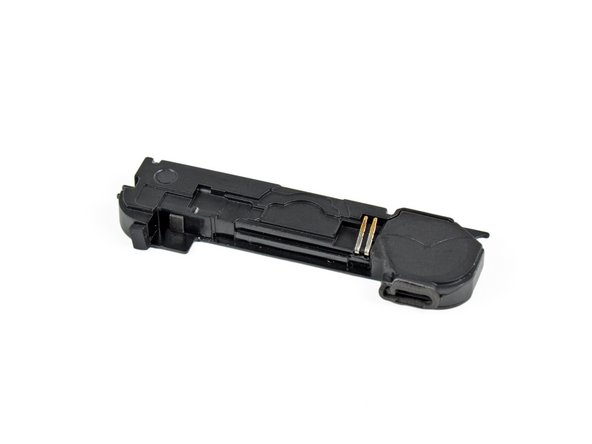
Remove the speaker enclosure assembly.
-
-
Este paso está sin traducir. Ayuda a traducirlo
-
Remove the two 1.6 mm Phillips screws securing the cellular antenna to the speaker enclosure.
-
-
Este paso está sin traducir. Ayuda a traducirlo
-
Starting near the cellular antenna cable, use the edge of a plastic opening tool to peel the antenna off the speaker enclosure.
-
Continue peeling the cellular antenna off the speaker enclosure, being careful not to rip the gold bracket attached to one of its edges.
-
Remove the cellular antenna.
-


Cancelar: No complete esta guía.
185 personas más completaron esta guía.

8 comentarios
Your tutorial was very easy to follow and provided the exact direction and instruction for each step... Job well done, thanks for all of your hard work, because of it my install was a success and only took 15 minutes!
I found antenna is not replaceable.
Went according to directions fairly straightforward. The Philips heads in the ifixit pro kit are definitely substandard quality. Had to use another jewelers screwdriver on these screws. The fins are too wide.
Excellent guide I'm now tech wizard but replaced speaker enclosure no problem . Take your time I used a a4 pad and drew circles for each step I was removing screws or brackets so they were all labelled. It's nerve racking at first but follow guide you ll be fine.
Read it twice perform it once!
Be prepared and have all the tools
Enjoy!! I now have sound back thx ifixit!!!