Herramientas
Partes
No se especificaron partes.
-
Este paso está sin traducir. Ayuda a traducirlo
-
Use tweezers to peel up and remove the rectangular piece of foam tape covering the top right LCD screw.
-
Remove the triangular tape covering the lower right LCD screw.
-
-
Este paso está sin traducir. Ayuda a traducirlo
-
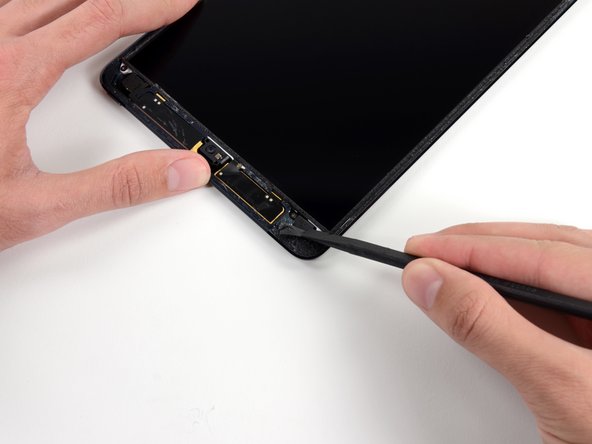
If the tape is present, use the flat end of a spudger to pry the tape up and away, exposing the LCD screw beneath.
-
-
Este paso está sin traducir. Ayuda a traducirlo
-
Remove the four 3.9 mm Phillips #000 screws securing the LCD to the rear case.
-
-
Este paso está sin traducir. Ayuda a traducirlo
-
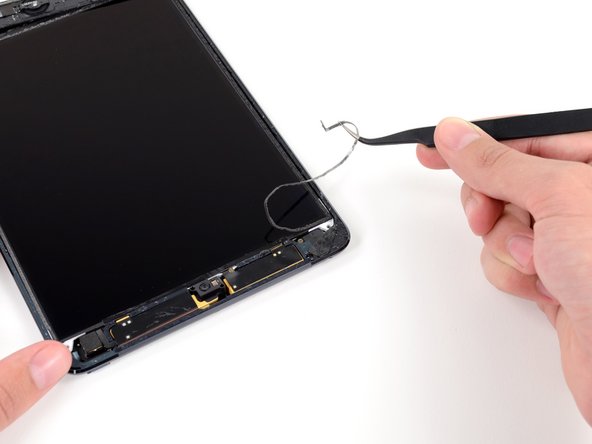
Use a pair of tweezers to peel up the small piece of tape connecting the LCD frame to the right speaker.
-
-
Este paso está sin traducir. Ayuda a traducirlo
-
Use a pair of thin tweezers to pull up the top of the foam tape surrounding the LCD.
-
Use the tweezers to peel the foam tape up to expose the top of the LCD.
-
-
Este paso está sin traducir. Ayuda a traducirlo
-
Insert the tip of a spudger between the LCD frame and the tape on the top of the LCD.
-
Slide the spudger along the space between the LCD frame and tape, separating the tape from the LCD frame.
-
-
-
Este paso está sin traducir. Ayuda a traducirlo
-
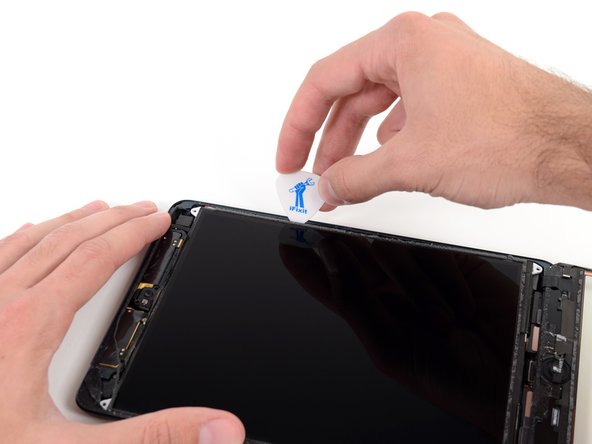
Insert a guitar pick into the gap between the LCD and rear case, near the top of the left side of the LCD.
-
Bend the pick slightly away from the iPad, just enough to spread the gap between the LCD and rear case.
-
-
Este paso está sin traducir. Ayuda a traducirlo
-
Insert the guitar pick into three more locations down the left side of the LCD and bend it over in each location, to slide the LCD over to the right side of the rear case.
-
-
Este paso está sin traducir. Ayuda a traducirlo
-
Now switch to the right side of the LCD, and pry with the guitar pick in several places along the side to shift the LCD back to the left.
-
-
Este paso está sin traducir. Ayuda a traducirlo
-
Insert the flat end of a spudger between the LCD frame and the metal backing plate.
-
-
Este paso está sin traducir. Ayuda a traducirlo
-
Starting at the top right of the device, slide the spudger in between the LCD frame and metal backing plate, which will separate the adhesive as you push.
-
-
Este paso está sin traducir. Ayuda a traducirlo
-
Repeat the previous procedure along the top of the LCD.
-
Insert the flat end of the spudger between the LCD frame and metal backing plate and gently push the spudger in across the top of the device, separating adhesive.
-
-
Este paso está sin traducir. Ayuda a traducirlo
-
Continue with the left side of the LCD: insert the flat end of the spudger between the LCD and shield plate and insert the spudger as far as it will go.
-
-
Este paso está sin traducir. Ayuda a traducirlo
-
Lift the LCD up a couple inches from the rear case to ensure it's free from the adhesive.
-
-
Este paso está sin traducir. Ayuda a traducirlo
-
While holding the LCD with one hand, Insert the flat end of a spudger into the gap between this tape and the left speaker.
-
Gently pull the LCD away from the speakers while rotating the spudger outward to separate the tape from the speaker.
-
-
Este paso está sin traducir. Ayuda a traducirlo
-
Insert the flat end of the spudger into the gap between the right speaker and the LCD tape.
-
While pulling the LCD away from the speakers, rotate the spudger outward, widening the gap and releasing the tape from the speaker.
-
-
Este paso está sin traducir. Ayuda a traducirlo
-
Flip the LCD over and rest it on top of the front panel glass.
-
Cancelar: No complete esta guía.
Una persona más ha completado esta guía.