Introducción
below, information on tablet repairs that can be carried out at your own "kitchen" table. However, dear reader, take into account that this is a device that is difficult to repair and requires attention. Before you start, read about the safety rules and the tools you need. This can will save you from making irreversible mistakes. Good luck.
Qué necesitas
-
-
sometimes the success of an operation depends on the right idea. In this case, the screen is completely destroyed.
-
in this case, both the digitizer and the matrix are completely destroyed. My idea is to remove these parts and replace them. It is worth making sure beforehand that the iPad is working (despite the broken screen). You can do this by connecting your iPad to your computer. If it is detected, it is safe to change the screen.
-
however, if your computer doesn't detect your connected iPad, it's likely that the damage is more than you think. In that case, find a good repair shop and consult the next steps.
-
-
-
Model 9 has a separate LCD display and digitizer.
-
when selecting a replacement digitizer, check that there is an adhesive applied. If not, one extra sheet will be needed.
-
because of the finely broken glass, be sure to wear safety glasses (you only have one pair of eyes and they cannot be replaced). Think about protective gloves if you need to.
-
Small plastic blade will come in handy. The piece of plastic I wrote about above must be really thin but quite stiff. You can use a piece of neatly cut paper from a school notebook (non-conductive).
-
-
-
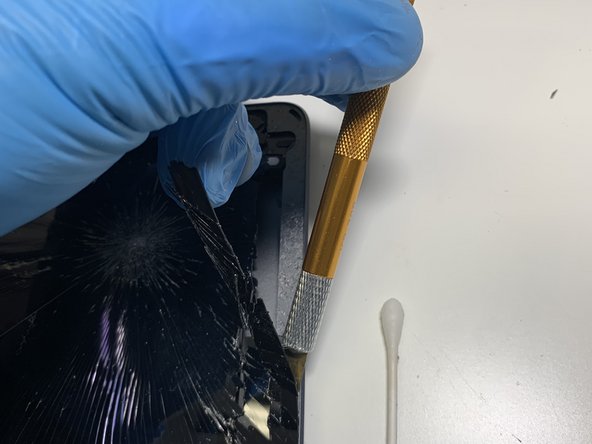
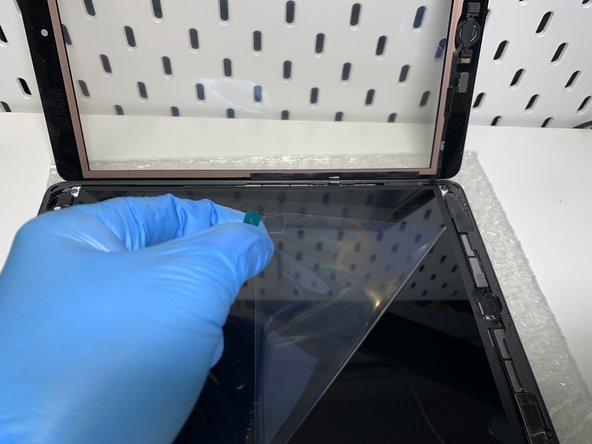
it is easiest to start from the place marked with a yellow circle. Then, along the purple arrows on both sides. Absolutely stop before the bottom edge!
-
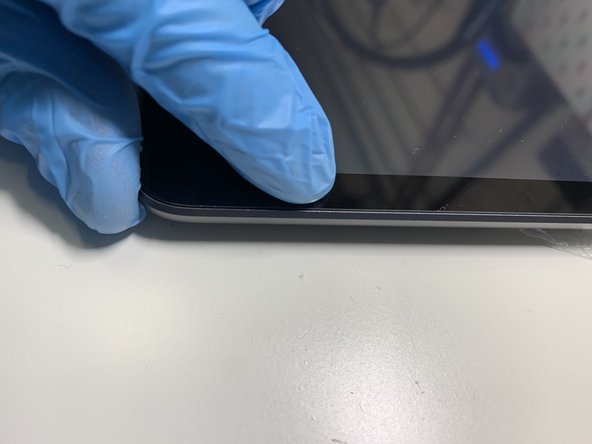
a drop of isopropanol and a spatula or a thin, flat screwdriver will certainly help to overcome the every next few inches.
-
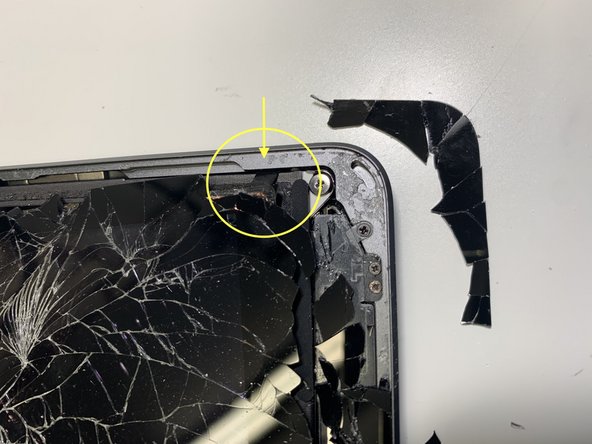
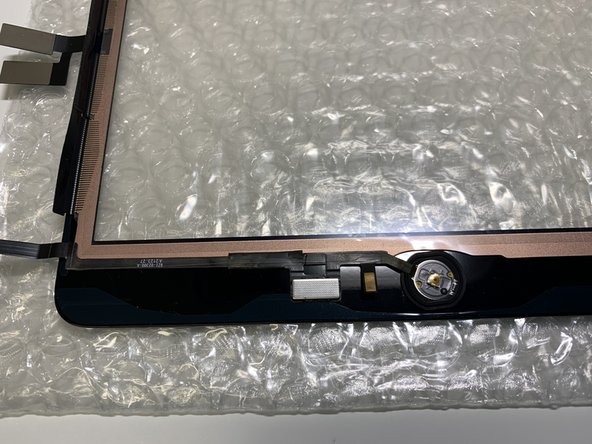
with a yellow circle I mark the Touch.ID tape which is running from the digitizer under the matrix. This bend is sensitive.
-
-
-
do not try to peel the button tape off the digitizer at this stage. There is a shortcut that will give you a lot of space for further work
-
the shortcut I'm talking about is disconnecting the entire assembly. To do this, disconnect the battery voltage and remove the matrix and digitizer with the Touch.ID button tape
-
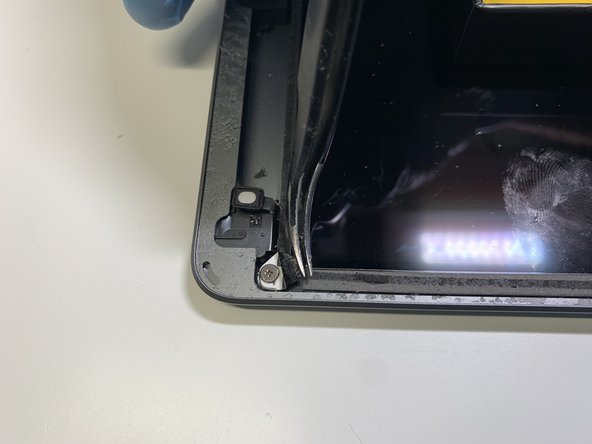
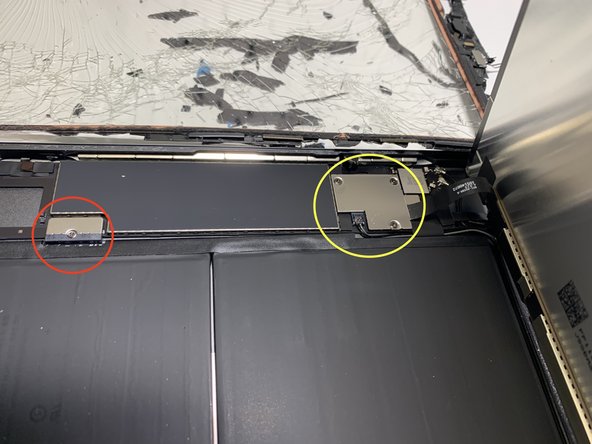
with red circles I mark the screws fixing the matrix
-
-
-
the northern screws are covered by isolator tape. Gently peel off (do not tear it - you will need it) until the screw is exposed. South screws may be covered by the black glue, don't worry about it. Just unscrew the screws - the glue will give slightly.
-
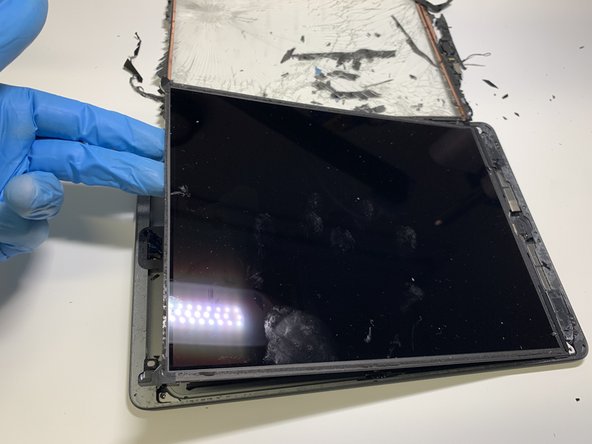
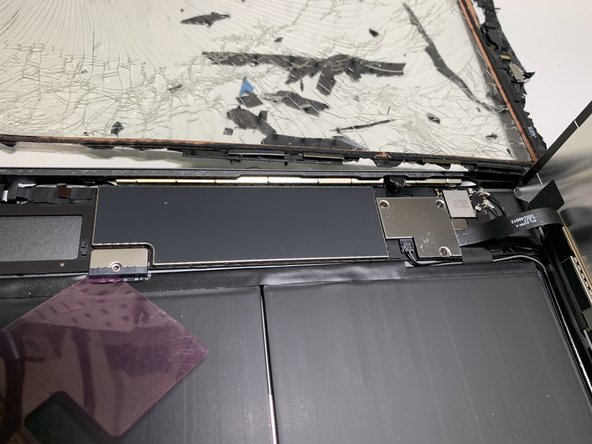
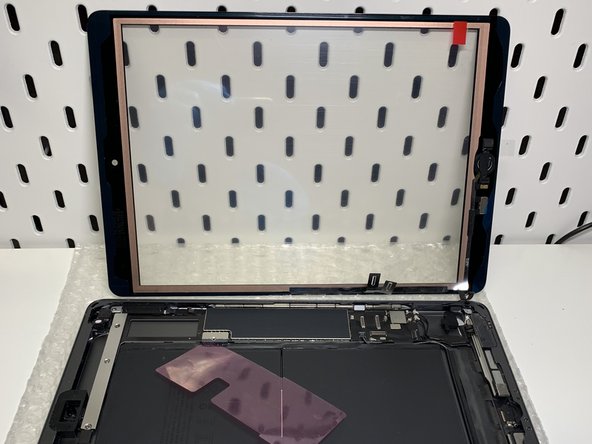
unscrewed matrix (4 screws) slightly lift it by the northern edge. Pay attention to the signal tapes connected to the motherboard
-
-
-
My matrix is broken, I don't care about it. If yours works and you are not going to replace it - do not touch the display surface (black). Fingerprints are very difficult to remove.
-
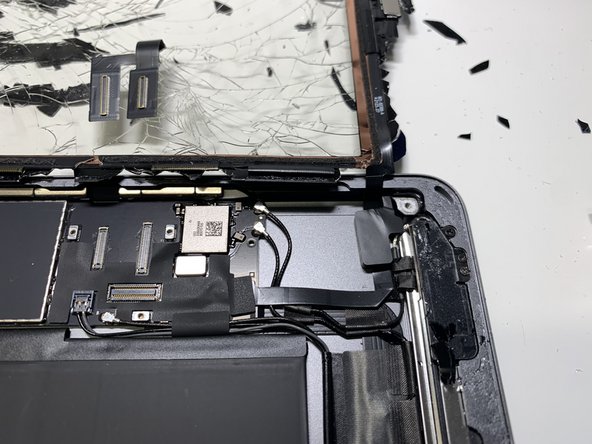
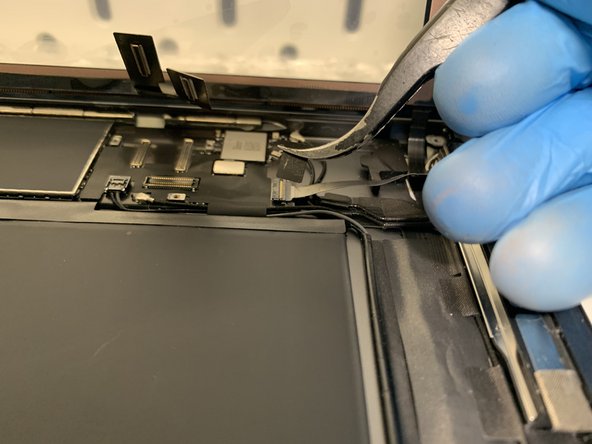
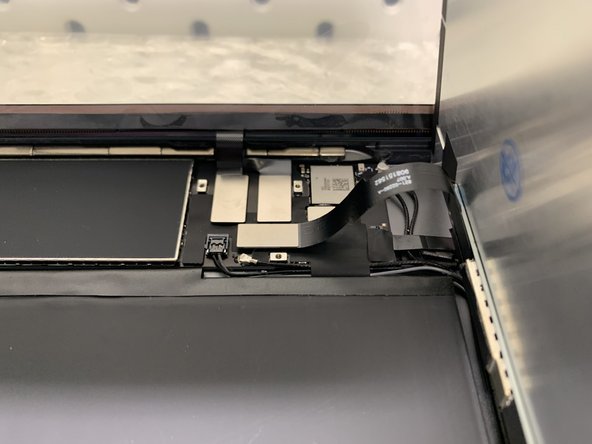
when you lift the matrix, under you will see the motherboard and connected battery. The red circle I marked a power supply piont, which should be disconnected at first. The yellow circle I marked the connection of the digitizer and screen to the motherboard.
-
the safest way to remove power from the motherboard is separating a power connector. You can do this by slipping a thin non-conductive layer between the power pins (especially the negative ones).
-
-
-
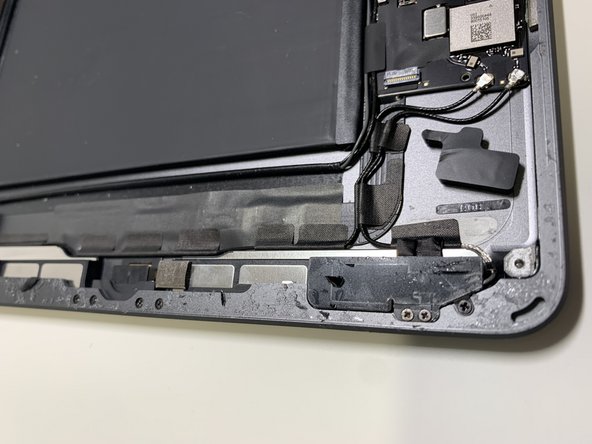
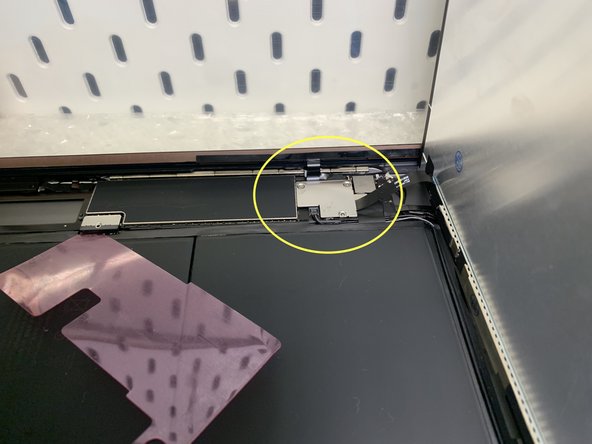
after unscrewing the cover you will see three fastened connectors: two parallel - it's digitizer and one perpendicular - it's a matrix. Unclip the connectors and remove the matrix. If it is damaged, as in my case, it should be utilized of. If it works and you're not going to replace it, make sure you put it away in a safe place.
-
a few more wires and one flat strip remain connected. Unless you're going to remove the motherboard (I don't see a need to do so in this case) you don't need to worry about it. Only the flat tape remains important - it's a tape of Home button and the Touch.ID function
-
-
-
-
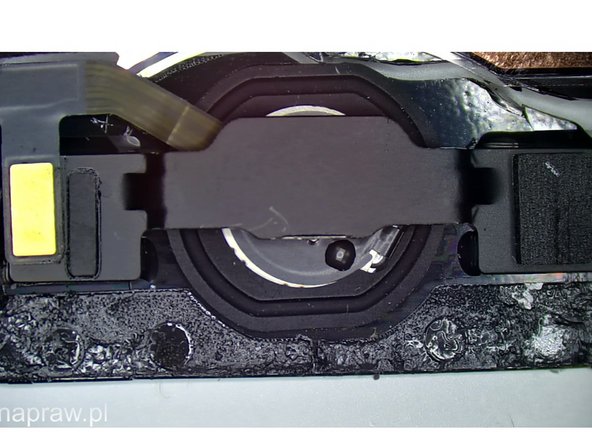
the connector is a bit different than you have already seen in this device. Peel off the protective tape and pry the lock bar on the opposite side of the tape.
-
remove the tape from the unlocked port, peel it off the case and put it aside.
-
-
-
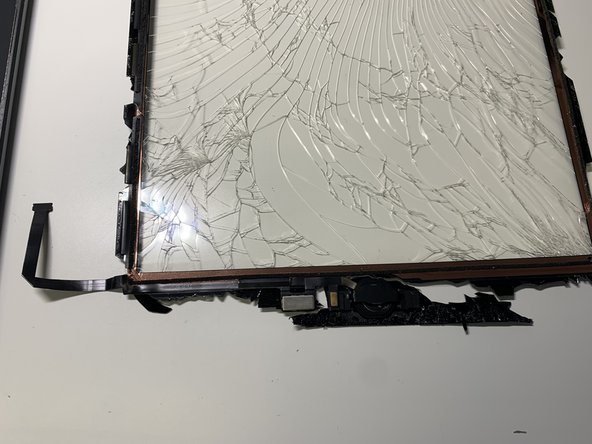
finally managed to disconnect the digitizer from the tablet. You can skip the next 10 and 11 steps if your digitizer is in one piece. If it's broken into thousands of pieces (like mine) read it carefully
-
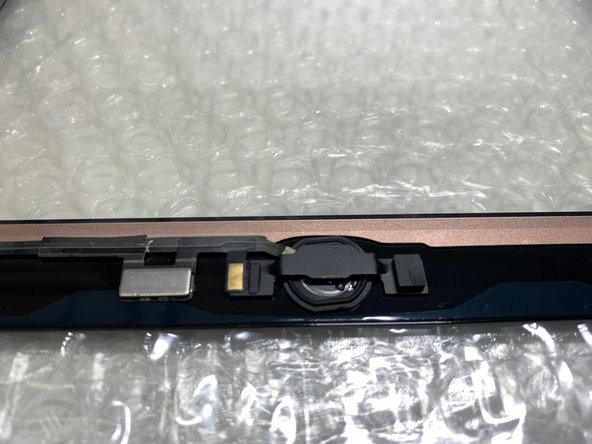
the entire home button strip consists of several connected sections (some with a bit of electronics on board), a clicking button and an additional bracket that is absolutely necessary for proper operation.
-
the whole set consists of 3 elements: a tape with a button, a metal bracked and a button-sized round washer (in my case it was glued to the body of the button). Make sure the washer is not left on the glass. Thoroughly clean the entire assembly of fine glass debris and dirts.
-
-
-
be extremely careful at this stage. Remove any speck of glass from the adhesive surfaces or remove all remaining adhesive with a cotton swab and isopropanol.
-
-
-
particles of broken glass left on the contact surface of the housing, new digitizer glass and button tape under pressure will lead to scratches and subsequent cracks on the surface of the new digitizer glass. Make sure that the surfaces are absolutely clean and free of anything
-
don't forget to clear the table you're working on. Leftover particles of broken glass can scratch the case in a really ugly way
-
-
-
unfortunately, this step is necessary. More and more often we buy non-original spare parts (mainly due to the price but also due to the lack of availability of genuine spare parts). These, especially Chinese ones, are often incomplete or not working.
-
Connect the whole new set to the tablet and test their operation. If you do not peel off the protective films, you can easily return the purchased non-working items and request a replacement or refund. If the technical film is removed earlier, dishonest sellers try to blame us - the owners of the devices for installation faults
-
-
-
place the digitizer on a clean surface in front of you. Note that the inner touch side also has a clear protective film on it. Gently bend the area around the connection tapes (so as not to stick the tape to the foil but to the proper screen)
-
remove the tape protecting the adhesive on the tapes from the inside. This side should stick to the digitizer glass.
-
gently bend the tape to the surface of the digitizer. The glue is not very strong but should be enough for a moment. Cover the glued tape with the previously removed digitizer protective film (in the previous point). This will stop the tape from peeling off
-
-
-
place the button in the intended place. Make sure once again that you have removed all possible dirt and particles from the glass of the previous digitizer
-
lead the cable along the edge of the digitizer layer in the left direction - parallel to the bottom edge of the screen. Whether the tape will overlap the digizer level (a layer with copper mini-wires) depends on the construction of the replacement shield itself. In the original ones there is room to leave a 0.5mm gap.
-
put the home button bracket in the right place and stick it. In the original, the braket is additionally secured with a thin layer of hot glue
-
-
-
mount the metal Home button bracket so that the round distance corresponds to the micro-switch of the button - which is important for proper work of entire button (click function)
-
stick the rest of the button tape to the glass. In the case (like mine) where the screen adhesive is already placed on the inside of the glass, make sure that you do not stick the button to the film protecting the adhesive. Lift the foil protecting the adhesive and glue the button elements under it.
-
-
-
it's almost done :) Apply glue to the edge of the screen or the edge of the housing (depending on the type). If you already bought a screen with glue (like me) go to the next step.
-
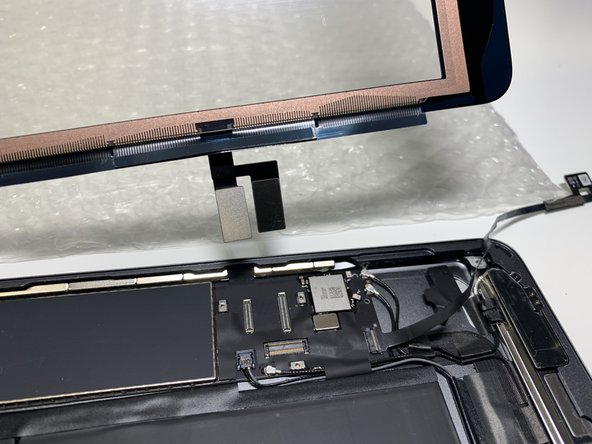
a support for the screen would be useful - place the screen perpendicular to the housing and connect the Home button ribbon.
-
-
-
connect the digitizer (double plugs). The connection ribbons should be bent towards the inside of the tablet. When closing, tapes should push themselves under the edge of the housing.
-
set the matrix perpendicular to the housing and plug the connector into the port. You can screw a connecrors bracket. Remove the plastic cover of the battery port and replace the screw - it's time to test.
-
-
-
put the elements back in the right place, but do not tear off the foil protecting the glue and the surface of the screen. Check the operation of the screen, touch and button. If everything works, go to the next step
-
-
-
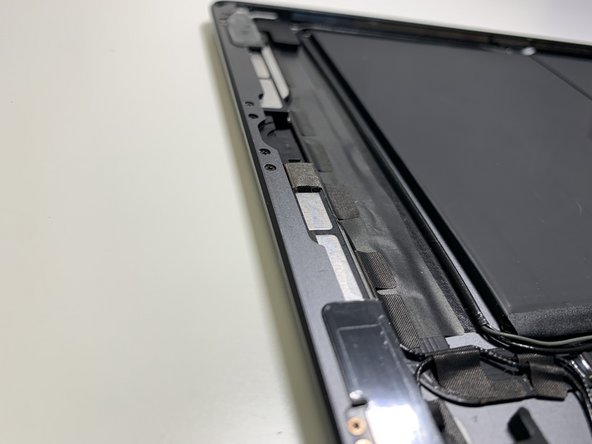
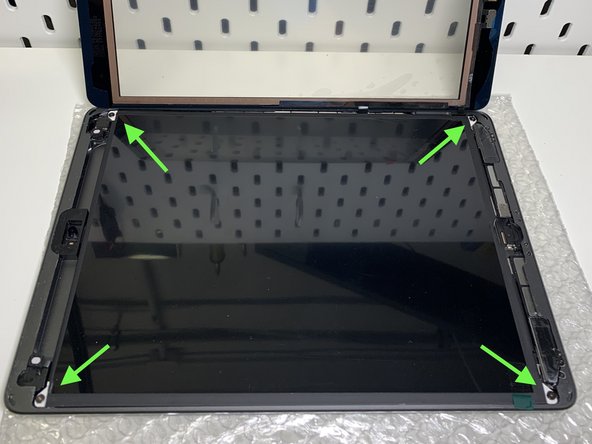
set the matrix in the right place and screw in the securing screws (marked with a green arrow). If the holes are not blocked, you can pierce the membranes with a thin screwdriver or other tool.
-
-
-
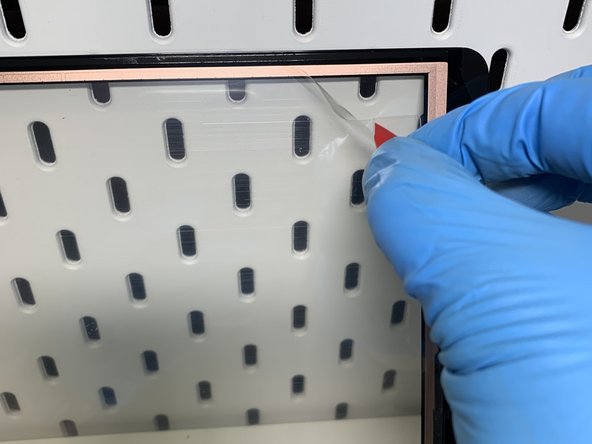
remove the protective film of the screen adhesive
-
remove the protective film of the digitizer
-
remove the protective film of the matrix (remember
-
-
-
set the tablet right edge up (do not stick yet). Closing the screen from this side, you will notice how the connecting strips slide under the edge of the housing. If you feel that they are curling ON THE EDGE - stop, go back to step - 17 - and adjust the position of the straps.
-
If the tapes have hidden under the edge, close the screen and press down lightly. The glue is strong enough to hold the digitizer to the edge. You don't have to use force.
-
Check the operation of the touch and the aesthetics of the entire connection (screen - aluminum edge of the tablet). I hope you are satisfied with your work.
-
Congratulations - you have just replaced the screen and digitizer in your favorite tablet on your own kitchen table (according to the mission of studionapraw.pl :)
-


I know it wasn't easy, but you just saved a lot of money. Replacing the screen and digitizer in most repair shops costs from $ 150-200.
The matrix cost me $42 and the digitizer $12. Total: $54 So I saved about $150 by investing my own time and work. Pride in yourself - priceless.
I know it wasn't easy, but you just saved a lot of money. Replacing the screen and digitizer in most repair shops costs from $ 150-200.
The matrix cost me $42 and the digitizer $12. Total: $54 So I saved about $150 by investing my own time and work. Pride in yourself - priceless.
Cancelar: No complete esta guía.
10 personas más completaron esta guía.

5 comentarios
Hello I would like to inquire you about iPhone 12 mini logic board failure... could you do any repairment about this down to the microelectronics as well?
hello @hendrik16862
send an email please for more details - the address you can found in the "about me" tab
Yes, I repair every Apple device at the microelectronic level, iPhones too. In most cases, this can be fixed, however, the details depend on the specific case.Yes, I repair every Apple device at the microelectronic level, iPhones too. In most cases, this can be fixed, however, the details depend on the specific case.
No matter how carefully I remove / re-connect new touch connectors, occasionally the onboard sockets get damaged....I'm talking with the most minimal amount of pressure to push the connector in, occasionally the connector does not seat and damages the onboard socket, never to work again without replacement.....this is by far the single most frustrating repair issue with this model and other model ipad.....is there ANY %100 way to seat the connectors without damage ?
hello Russell
I have my own way: the condition is that the battery is disconnected, this is extremely important. If you place the new screen on the edge of the tablet, its cables will fall freely into the appropriate port. Without pressing, move the connector left/right until you feel something fall into place. Light pressure will make a "click" and that's it. Done. The second one is a bit more fun, but the principle is the same.I have my own way: the condition is that the battery is disconnected, this is extremely important. If you place the new screen on the edge of the tablet, its cables will fall freely into the appropriate port. Without pressing, move the connector left/right until you feel something fall into place. Light pressure will make a "click" and that's it. Done. The second one is a bit more fun, but the principle is the same.