Introducción
La eliminación de la pantalla requiere cortar el adhesivo con una herramienta de apertura iMac especializada. Una vez que haya completado su reparación, deberá seguir nuestra Guía de cinta adhesiva para raspar el adhesivo viejo y reemplazarlo con nuevas tiras adhesivas de doble adhesivo.
Qué necesitas
-
-
Con la bisagra libre para moverse, el iMac estará desequilibrado y será difícil de trabajar en él. Las reparaciones se pueden completar con el iMac desequilibrado, pero son más rápidas y fáciles con una cuña de servicio iMac.
-
Si estás usando la tarjeta de servicio de iFixit, sigue estas instrucciones de montaje para armarlo.
-
-
-
-
Coloca el iMac boca arriba en una mesa.
-
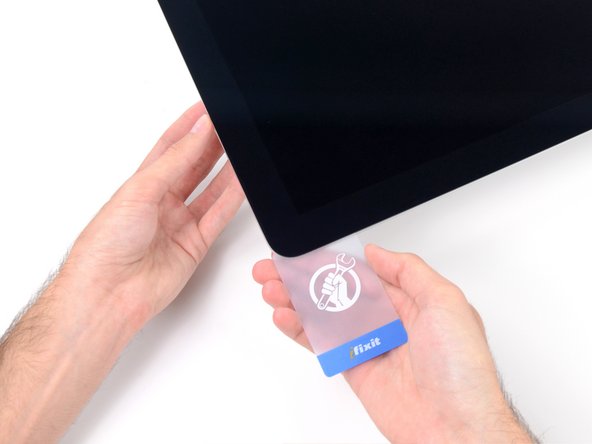
Comenzando desde la esquina superior derecha del iMac, inserta una tarjeta de plástico entre la pantalla y el marco.
-
-
-
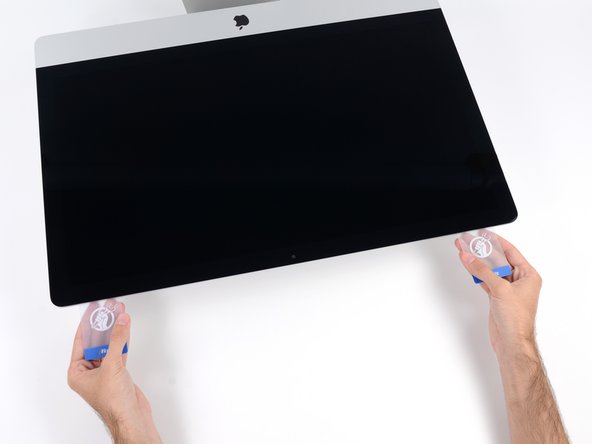
Con las tarjetas insertadas como se muestra cerca de las esquinas, gire suavemente las tarjetas para aumentar el espacio entre la pantalla y la carcasa.
-
Si hay secciones que parecen pegarse y no se separan, deje de girar y use una de las tarjetas para cortar el adhesivo en el área problemática.
-
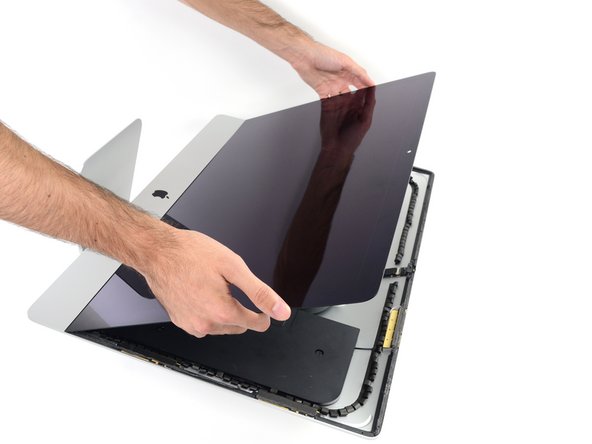
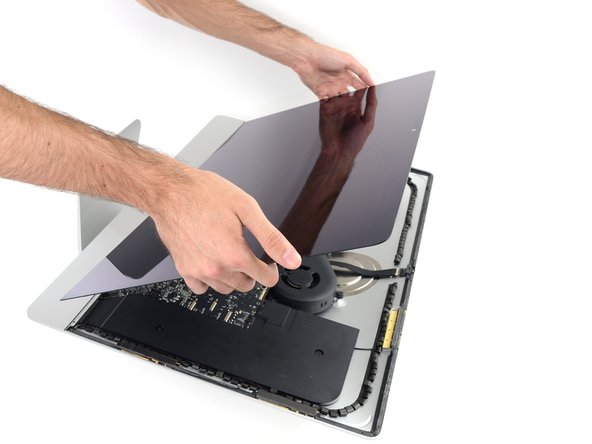
Comience a levantar la parte superior de la pantalla desde el marco.
-
-
-
Si hay un alambre o cable debajo de una cinta adhesiva, siempre separa la cinta primero.
-
Si el cable está pegado a la estructura, usa un iOpener calentado o un secador de pelo primero para soltar el adhesivo. Entonces podrás introducir una púa de apertura por debajo del cable para aflojarlo. Nunca tires directamente de los conectores delicados.
-
Desliza una púa de apertura por debajo de los cojines de acolchamiento para separarlos de la pantalla, y tira de ellos con cuidado. Podrías necesitar algo de cinta de doble cara para unirlos a la nueva pantalla.
-
Para volver a armar tu dispositivo, sigue estas instrucciones e orden inverso y usa nuestra Guía de tiras adhesivas para volver a colocar el cristal de la pantalla.
Lleva tus desechos electrónicos a un centro de reciclaje certificado.
¿La reparación no salió según lo planeado? Prueba algunos soluciones de problemas básicos, o solicita ayuda a nuestra Comunidad de respuestas.
Cancelar: No complete esta guía.
43 personas más completaron esta guía.
Un agradecimiento especial a estos traductores:
100%
Estos traductores nos están ayudando a reparar el mundo! ¿Quieres contribuir?
Empezar a traducir ›
12 comentarios
I'd like to note, that it is in no way necessary to save the wedge for when the screen is removed. In fact, the wedge is used when removing the LCD, because the rear housing may tilt when removing it, and the wedge counters this.
So, for your own sake, DO NOT lay down the iMac, but in stead, leave it standing upright, with the wedge in place, when removing the display, and let it stay there until you're done with servicing your iMac.
Also, from step 18 through 22, the iMac needs to be standing upright, NOT lying down, as you can easily damage the glass when lifting it like that.
Since there is not antenna wire to cut around the frame, I used a razor blade and and stopped at the camera and it worked like a charm. Where the guide used the card on the bottom edge for the final cut, I used a razor blade also and it only took one cut verses going back and forth with a card.
When I used a tool, the adhesive kept sticking together again as the guide mentions. The razor cut the adhesive down the center itself, so it was one easy pass and on sticky adhesive.
If you take a small chip out of the glass on the edge or crack, just get cell phone protector and cut it to size. You can also go to home depot and they have a glass specific crazy glue that you can first put in the crack or chip (do not put on the casing part. I cleaned with crazy glue first). Use a razor to get the glue into the crack, let dry and then clean off and put on the screen protector. I used rubbing alcohol first to clean the glass and chip area.
Not a perfect solution, but better than $700+ for a display.
When you cutting the edge you can also put some books under the display part to keep it level and easy to go around as you cut. If you cut the bottom all the way with the razor, you will have a clean cut and you can pull it towards you while the unit is as described in the guide steps 18-22. I do not like the idea of standing up the unit as there is more pressure on the bottom edge of the glass from the displaly


