Introducción
Actualiza los módulos de RAM para un aumento instantáneo de la velocidad.
Qué necesitas
-
-
Afloja los tres tornillos Phillips que sujetan la tapa de acceso al extremo inferior de tu iMac.
-
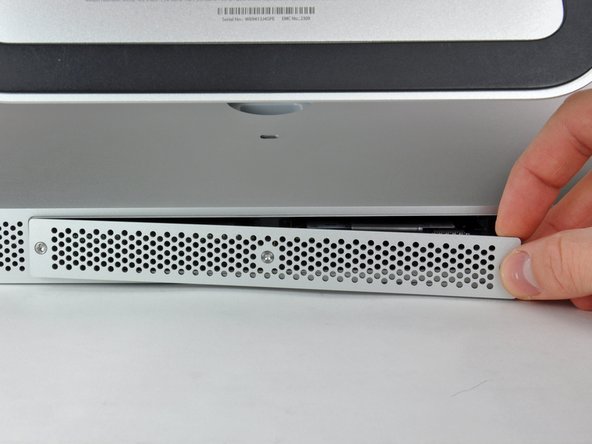
Quita la tapa de acceso de tu iMac.
-
-
-
-
Usa tus dedos o la punta de un spudger para deslizar la lengüeta de plástico de la bandeja de RAM de la ranura RAM.
-


Para volver a ensamblar tu dispositivo, sigue estas instrucciones en orden inverso.
Para volver a ensamblar tu dispositivo, sigue estas instrucciones en orden inverso.
Cancelar: No complete esta guía.
166 personas más completaron esta guía.
Un agradecimiento especial a estos traductores:
100%


Estos traductores nos están ayudando a reparar el mundo! ¿Quieres contribuir?
Empezar a traducir ›

8 comentarios
Interestingly, the mid 2011 iMac 27 inch also goes to 12GB!
I originally thought I'd be upgrading to 8GB today but found 4 slots instead of 2 :-)
As long as the two front (close to the screen) slots are paired with the exact same RAM config.
For example:
Two front slots Apple 2GB chips = 4GB.
Two rear slots, Crucial Lexar 4GB chips = 8GB
Total 12GB
Hoorah no waste and more RAM, come on Lion... I'm Ready!
Need a#0 screwdriver, not #1
Be sure to really push the RAM all the way into the socket. I had a "no RAM" error beep when I first booted up my iMac after doing this. Just an extra two millimetres was all it needed to be properly installed. It can be quite tough to get in.
Hi,
I've got a 2309 and just received my two additional 4GB RAM Cards. Put them in and I can say that the speed improved (now with 16GB). Not dramatically, however, some applications did always show the little rainbow disc when my Mac was "thinking". This is now gone.
I am on OS X 10.9.5 still and the whole Mac feels as if it can "breathe" more lightly with the additional RAM.
Thanks!
My 11,1 27” 2.66Ghz iMac happy eats up all the 4x8GB I put in there.