Introducción
ストレージ・スペースを増やすためにハードドライブをアップグレードしましょう。
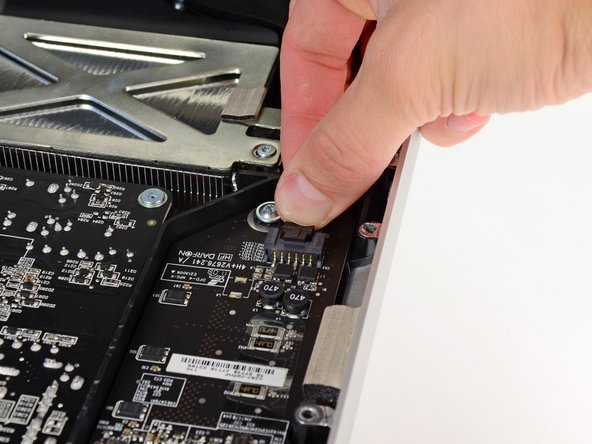
このガイドはSSD搭載のiMacハードドライブのアップグレードの方法が含まれます。SSDの温度センサーのインストール方法も説明していますので、Macのファンは正確なスピードで作動するでしょう。
iMacを起動する前にコンピューターのプラグを抜き、電力供給コンデンサを放電するために10秒間電源ボタンを押したままにします。
細心の注意を払ってください電力供給装置の後ろにあるコンデンサのリード線やむき出しのはんだ接合に触れないでください。
Qué necesitas
-
-
ガラスパネルの上部コーナーの2箇所に吸盤カップを取り付けます。
-
吸盤カップがうまく装着しない場合は、ガラスパネルと吸盤カップを中性洗剤などで綺麗に拭き取ってください。
-
-


デバイスを組み立て直すには、これらの手順と逆の順序に従ってください。
デバイスを組み立て直すには、これらの手順と逆の順序に従ってください。
Cancelar: No complete esta guía.
309 personas más completaron esta guía.
Un agradecimiento especial a estos traductores:
100%


Estos traductores nos están ayudando a reparar el mundo! ¿Quieres contribuir?
Empezar a traducir ›

80 comentarios
Hi guys, the tools arrived today and I did already chage the default harddisk against the WD Velociraptor 500GB. For now everything is working fine. The iMac is in the middle of restoring the time maschine backup. Everything worked out as described. Excellent! I was just a little surprised by the magnetic forces which one needs to overcome gently...
Is there a temp sensor that monitors the HD? I did the upgrade but now my fan is always on. I must've done something wrong.
Did you use the same brand hard drive? Did check the instructions about cable orientation on the hard drive? Did you double check the LCD thermal sensor cable?
Take a glance at this page for full explanations:
http://www.hddfancontrol.com/imac-hard-d...
I had the same issue here (after replacing the original HDD by a 1TB WB Caviar Blue) and it has been fixed by this utility.
HTH,
In response to the software, that does work, however, it can be taken care of hardware wise if our recommendations are followed.