Saltar al contenido principal

iMac G4 17 800 MHz EMC 1936 Drive Carrier Assembly Replacement

Qué necesitas

  1. iMac G4 17 800 MHz EMC 1936 Drive Carrier Assembly Replacement, Bottom Plate: paso 1, imagen 1 de 1
    • Unplug all the cables from the computer, including the power cable. Lay the computer face-down, supporting the neck and base with a soft cloth under the screen.

  2. iMac G4 17 800 MHz EMC 1936 Drive Carrier Assembly Replacement: paso 2, imagen 1 de 1
    • Loosen the four Phillips #0 screws.

  3. iMac G4 17 800 MHz EMC 1936 Drive Carrier Assembly Replacement: paso 3, imagen 1 de 1
    • Carefully remove the base access panel.

  4. iMac G4 17 800 MHz EMC 1936 Drive Carrier Assembly Replacement, Bottom Plate Housing: paso 4, imagen 1 de 2 iMac G4 17 800 MHz EMC 1936 Drive Carrier Assembly Replacement, Bottom Plate Housing: paso 4, imagen 2 de 2
    • Remove the four 25mm T-15 screws.

  5. iMac G4 17 800 MHz EMC 1936 Drive Carrier Assembly Replacement: paso 5, imagen 1 de 2 iMac G4 17 800 MHz EMC 1936 Drive Carrier Assembly Replacement: paso 5, imagen 2 de 2
    • Open the housing plate.

    • Be gentle with the wires still connected to the logic board so as not to ruin the cables.

    • A fixed plug connector between the logic board and upper unit will cause some resistance. Pull gently but firmly.

  6. iMac G4 17 800 MHz EMC 1936 Drive Carrier Assembly Replacement, Drive Carrier Assembly: paso 6, imagen 1 de 3 iMac G4 17 800 MHz EMC 1936 Drive Carrier Assembly Replacement, Drive Carrier Assembly: paso 6, imagen 2 de 3 iMac G4 17 800 MHz EMC 1936 Drive Carrier Assembly Replacement, Drive Carrier Assembly: paso 6, imagen 3 de 3
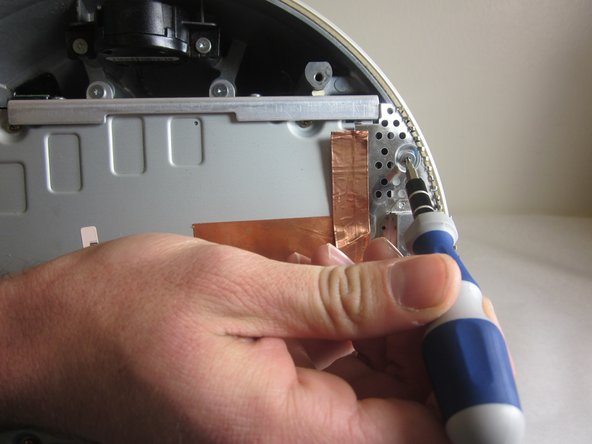
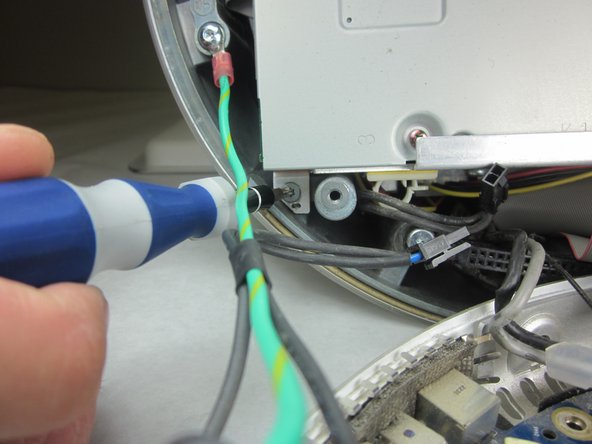
    • Remove the 2 torx 10mm screws on the EMI shield

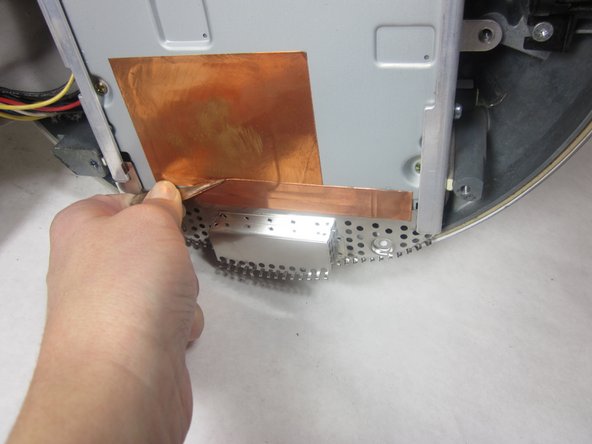
    • Carefully remove shield and copper tape

  7. iMac G4 17 800 MHz EMC 1936 Drive Carrier Assembly Replacement: paso 7, imagen 1 de 2 iMac G4 17 800 MHz EMC 1936 Drive Carrier Assembly Replacement: paso 7, imagen 2 de 2
    • Remove the 4 10mm torx screws attatched to the drive carrier.

    • The drive carrier includes optical drive and hard drive.

  8. iMac G4 17 800 MHz EMC 1936 Drive Carrier Assembly Replacement: paso 8, imagen 1 de 1
    • Grasp the carrier with both hands on each side.

    • Remove the carrier by lifting up and out.

    • Pull gently but firmly. The carrier is meant to fit snugly.

  9. iMac G4 17 800 MHz EMC 1936 Drive Carrier Assembly Replacement: paso 9, imagen 1 de 1
    • Flip the removed carrier to the right and pull out power cables.

Conclusión

To reassemble your device, follow these instructions in reverse order.

3 personas más completaron esta guía.

Courtney

Miembro Desde 10/06/11

1,076 Reputación

3 Guías creadas

Equipo

Cal Poly, Team 21-22, Maness Fall 2011 Miembro de Cal Poly, Team 21-22, Maness Fall 2011

CPSU-MANESS-F11S21G22

4 Miembros

13 Guías creadas

2 comentarios

What two screws in step 6

David Hunter - Contestar

We need a "action" shot; we need to show an actual screwdriver unscrewing the screw.

David Hunter - Contestar

Agregar Comentario

Ver Estadísticas:

Ultimas 24 horas: 2

Ultimos 7 días: 6

Ultimos 30 días: 11

Todo El Tiempo: 2,329