Saltar al contenido principal

iHome iW1 Speaker Tweeter Replacement

Qué necesitas

  1. iHome iW1 Speaker Tweeter Replacement, Battery: paso 1, imagen 1 de 3 iHome iW1 Speaker Tweeter Replacement, Battery: paso 1, imagen 2 de 3 iHome iW1 Speaker Tweeter Replacement, Battery: paso 1, imagen 3 de 3
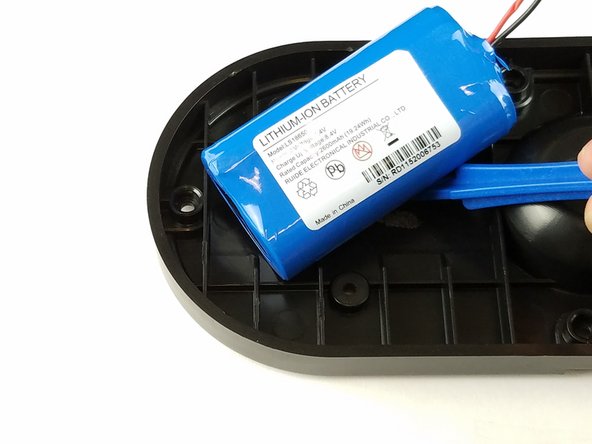
    • Remove the rubber from the bottom of the speaker, use a medium blue plastic spudger to gently work its way under the rubber and slowly peel off for each of the three feet. The order does not matter.

  2. iHome iW1 Speaker Tweeter Replacement: paso 2, imagen 1 de 2 iHome iW1 Speaker Tweeter Replacement: paso 2, imagen 2 de 2
    • Remove the six 11 mm Philips #1 screws found underneath the foam to remove the steel outer metal frame.

    • Once the screws come off, keep them safely off to the side.

  3. iHome iW1 Speaker Tweeter Replacement: paso 3, imagen 1 de 2 iHome iW1 Speaker Tweeter Replacement: paso 3, imagen 2 de 2
    • Remove the metal frame gently and set aside.

  4. iHome iW1 Speaker Tweeter Replacement: paso 4, imagen 1 de 2 iHome iW1 Speaker Tweeter Replacement: paso 4, imagen 2 de 2
    • Remove the two remaining 11 mm Philips #1 screws holding the base and set them aside.

  5. iHome iW1 Speaker Tweeter Replacement: paso 5, imagen 1 de 3 iHome iW1 Speaker Tweeter Replacement: paso 5, imagen 2 de 3 iHome iW1 Speaker Tweeter Replacement: paso 5, imagen 3 de 3
    • Lift the base up gently keeping in mind that the base is connected with wires to internal parts of the speaker.

    • Disconnect the white bundled cable connector attached to the charging node using a spudger. The base of the speaker is now free to be removed.

  6. iHome iW1 Speaker Tweeter Replacement: paso 6, imagen 1 de 3 iHome iW1 Speaker Tweeter Replacement: paso 6, imagen 2 de 3 iHome iW1 Speaker Tweeter Replacement: paso 6, imagen 3 de 3
    • Remove the white power cable connector that connects the charging node to the battery, using the plastic spudger.

    • Pry the battery off using the plastic spudger.

  7. iHome iW1 Speaker Tweeter Replacement, Wi-Fi Adapter: paso 7, imagen 1 de 3 iHome iW1 Speaker Tweeter Replacement, Wi-Fi Adapter: paso 7, imagen 2 de 3 iHome iW1 Speaker Tweeter Replacement, Wi-Fi Adapter: paso 7, imagen 3 de 3
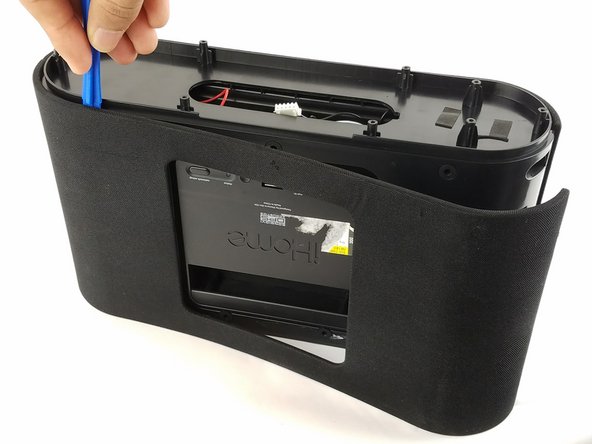
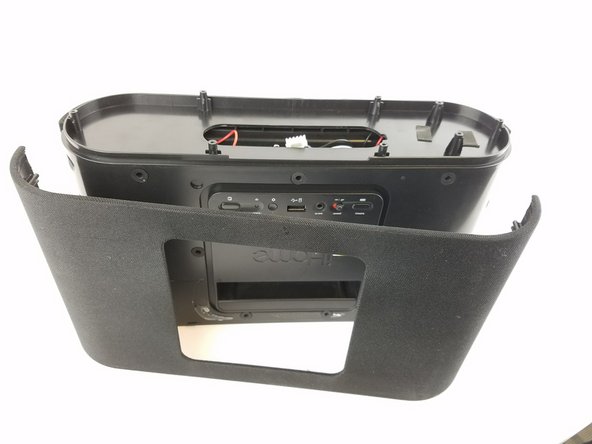
    • Pry off the mesh frame from the back side of the speaker with a plastic spudger until you hear a click noise when the clip is removed.

  8. iHome iW1 Speaker Tweeter Replacement: paso 8, imagen 1 de 3 iHome iW1 Speaker Tweeter Replacement: paso 8, imagen 2 de 3 iHome iW1 Speaker Tweeter Replacement: paso 8, imagen 3 de 3
    • Use a plastic spudger to remove the rubber grommets from the four corners of the speaker underneath the mesh frame.

  9. iHome iW1 Speaker Tweeter Replacement: paso 9, imagen 1 de 3 iHome iW1 Speaker Tweeter Replacement: paso 9, imagen 2 de 3 iHome iW1 Speaker Tweeter Replacement: paso 9, imagen 3 de 3
    • Remove the four 11 mm Philips #1 screws from beneath the rubber grommet that was removed from the previous step in all four corners.

  10. iHome iW1 Speaker Tweeter Replacement: paso 10, imagen 1 de 3 iHome iW1 Speaker Tweeter Replacement: paso 10, imagen 2 de 3 iHome iW1 Speaker Tweeter Replacement: paso 10, imagen 3 de 3
    • Separate the mesh frame and plastic frame by placing the spudger in between them.

    • Do not pull the two pieces since the two pieces are held together with the ribbon cable.

  11. iHome iW1 Speaker Tweeter Replacement: paso 11, imagen 1 de 3 iHome iW1 Speaker Tweeter Replacement: paso 11, imagen 2 de 3 iHome iW1 Speaker Tweeter Replacement: paso 11, imagen 3 de 3
    • Remove the ribbon cable by pulling the black clip towards the cable, then gently pull the ribbon cable to fully separate the mesh frame and plastic frame.

    • The black locking clip will only move about 2mm out.

  12. iHome iW1 Speaker Tweeter Replacement: paso 12, imagen 1 de 3 iHome iW1 Speaker Tweeter Replacement: paso 12, imagen 2 de 3 iHome iW1 Speaker Tweeter Replacement: paso 12, imagen 3 de 3
    • Remove the second ribbon cable that is connected to the main circuit board and the WiFi adapter.

    • The black locking clip will only move about 2mm out.

  13. iHome iW1 Speaker Tweeter Replacement: paso 13, imagen 1 de 3 iHome iW1 Speaker Tweeter Replacement: paso 13, imagen 2 de 3 iHome iW1 Speaker Tweeter Replacement: paso 13, imagen 3 de 3
    • Unscrew the five 11 mm Philips #1 screws found on the outside of the circuit board.

  14. iHome iW1 Speaker Tweeter Replacement: paso 14, imagen 1 de 2 iHome iW1 Speaker Tweeter Replacement: paso 14, imagen 2 de 2
    • Lift the circuit board to expose the wifi antenna wire.

  15. iHome iW1 Speaker Tweeter Replacement: paso 15, imagen 1 de 3 iHome iW1 Speaker Tweeter Replacement: paso 15, imagen 2 de 3 iHome iW1 Speaker Tweeter Replacement: paso 15, imagen 3 de 3
    • Pry the glue and unclip the wifi antenna plug from the circuit board.

  16. iHome iW1 Speaker Tweeter Replacement, Woofer: paso 16, imagen 1 de 3 iHome iW1 Speaker Tweeter Replacement, Woofer: paso 16, imagen 2 de 3 iHome iW1 Speaker Tweeter Replacement, Woofer: paso 16, imagen 3 de 3
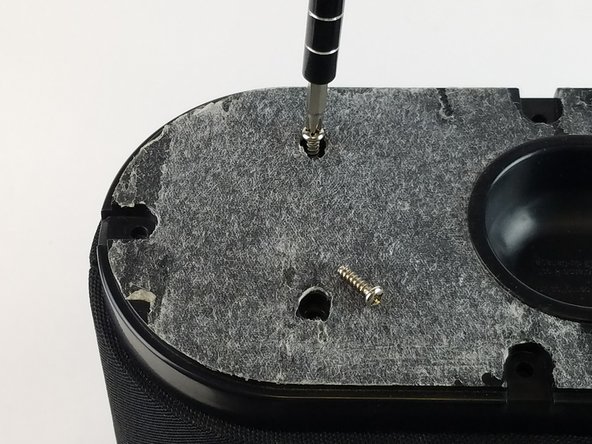
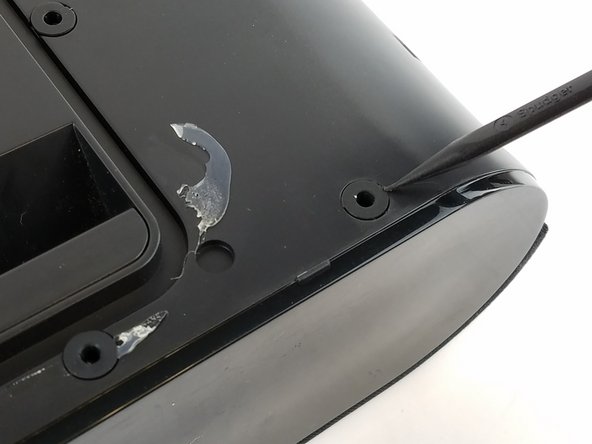
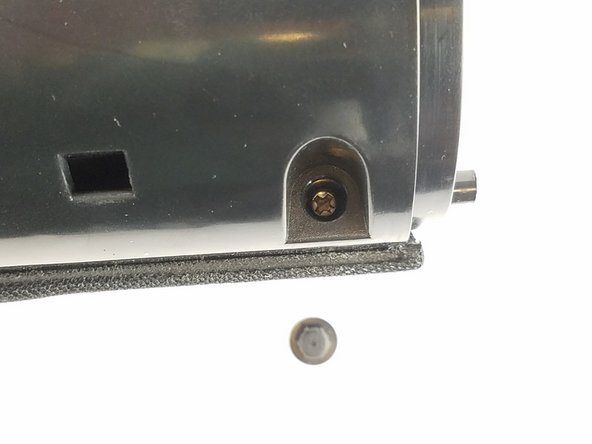
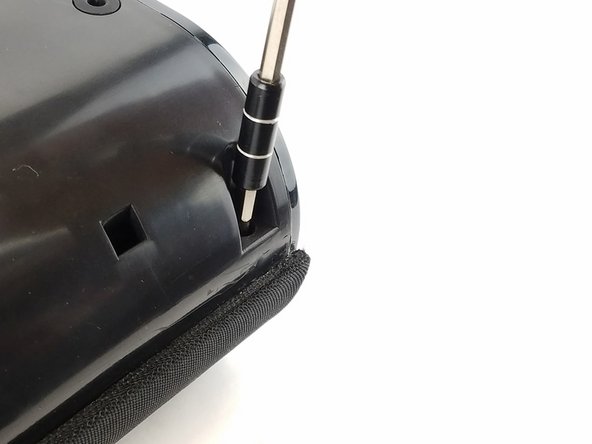
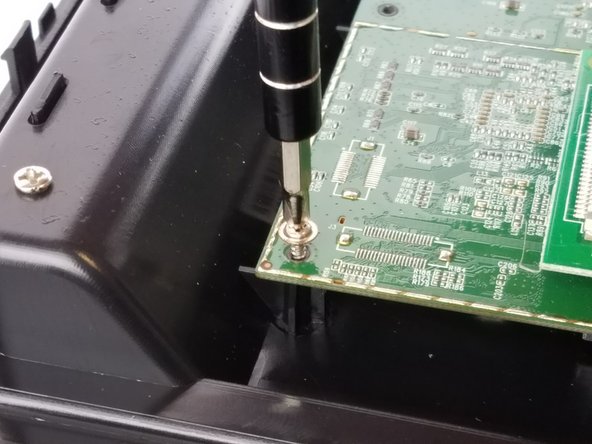
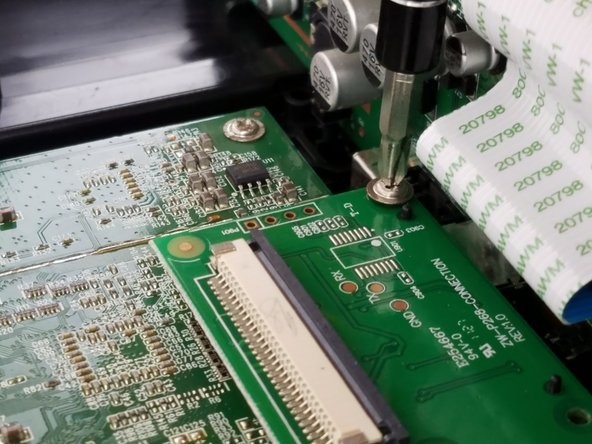
    • Remove the thirteen 11 mm Philips #1 screws from the perimeter of the plastic case.

    • Remove the screws from the center of the plastic case as well.

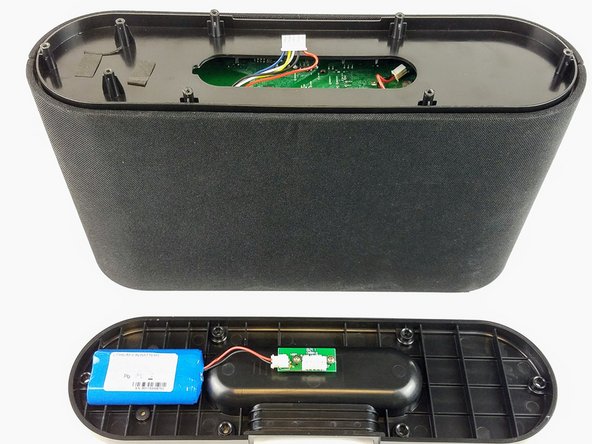
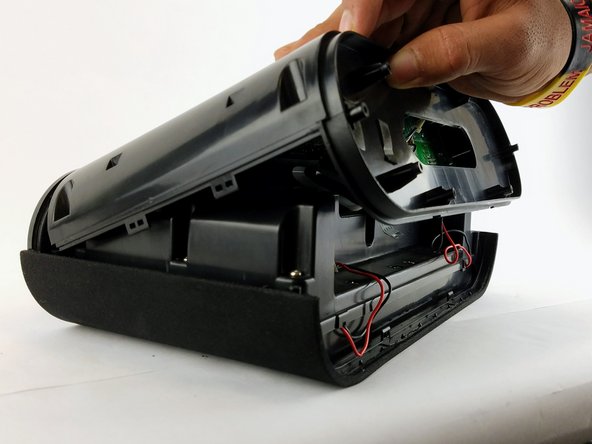
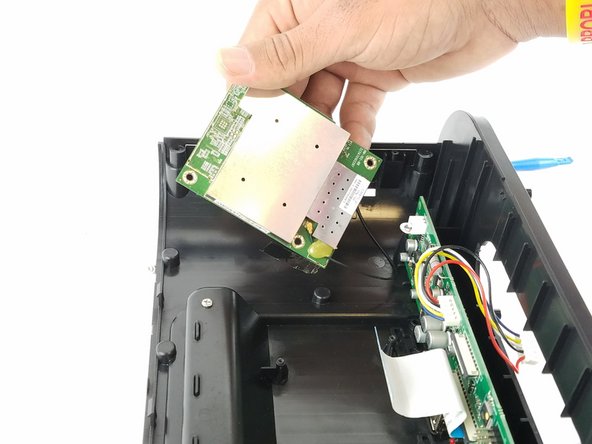
    • Lift the case up to expose the Woofer, Tweeter, and filter.

  17. iHome iW1 Speaker Tweeter Replacement: paso 17, imagen 1 de 2 iHome iW1 Speaker Tweeter Replacement: paso 17, imagen 2 de 2
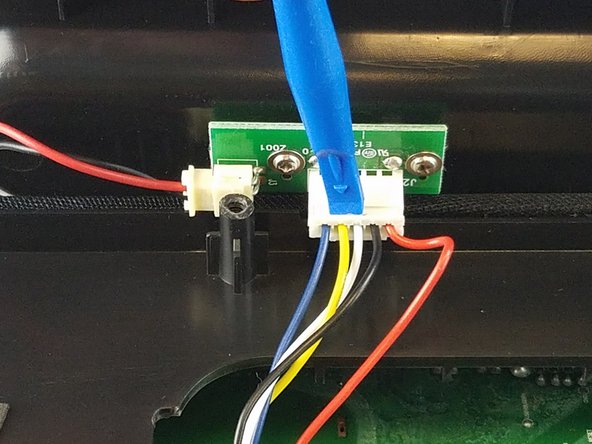
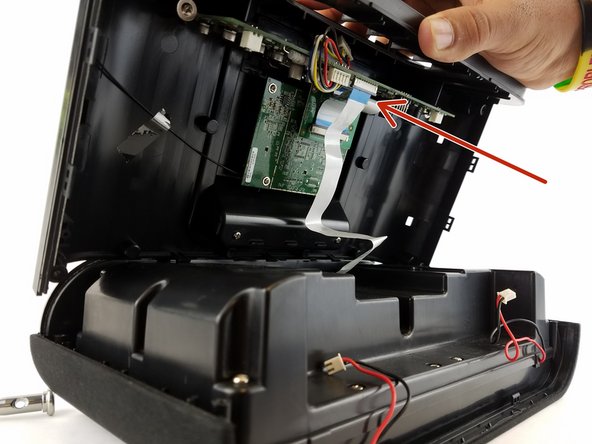
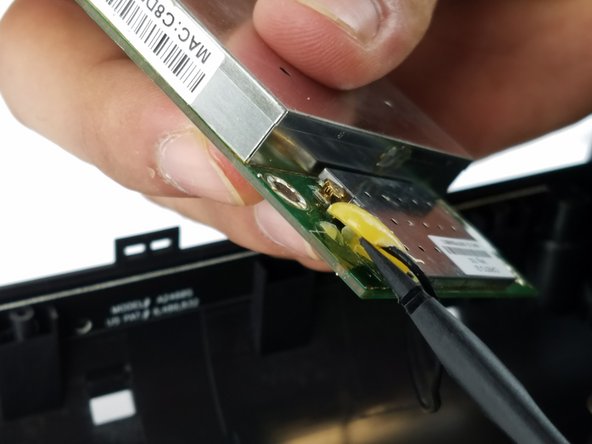
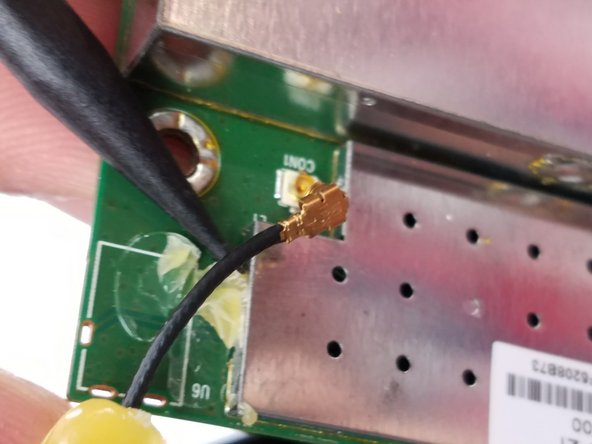
    • Desolder the wires going from the woofer to the filter.

    • Some tips on soldering can be found by clicking this link. Cómo soldar y desoldar conexiones

    • Make sure to remember the orientation and color coding of the wires before desoldering.

  18. iHome iW1 Speaker Tweeter Replacement: paso 18, imagen 1 de 1
    • Remove the two 11 mm Philips #1 screws holding the filter to move it out of the way.

  19. iHome iW1 Speaker Tweeter Replacement: paso 19, imagen 1 de 3 iHome iW1 Speaker Tweeter Replacement: paso 19, imagen 2 de 3 iHome iW1 Speaker Tweeter Replacement: paso 19, imagen 3 de 3
    • Remove the six 11 mm Philips #1 screws from the perimeter of the woofer.

    • Gently lift the woofer from the plastic frame.

  20. iHome iW1 Speaker Tweeter Replacement, Tweeter: paso 20, imagen 1 de 2 iHome iW1 Speaker Tweeter Replacement, Tweeter: paso 20, imagen 2 de 2
    • Remove the two 11 mm Philips #1 screws holding the tweeter bracket using a PH1 bit and screwdriver.

    • Pry the tweeter from the plastic housing.

  21. iHome iW1 Speaker Tweeter Replacement: paso 21, imagen 1 de 1
    • Desolder the two wires leading to the tweeter.

    • Some tips on soldering can be found by clicking this link. Cómo soldar y desoldar conexiones

    • Don't forget to remember the color code and location of the wires!

Conclusión

To reassemble your device, follow these instructions in reverse order.

Victor Germino

Miembro Desde 02/14/17

828 Reputación

8 Guías creadas

Equipo

USF Tampa, Team 20-6, Remmell Spring 2017 Miembro de USF Tampa, Team 20-6, Remmell Spring 2017

USFT-REMMELL-S17S20G6

4 Miembros

9 Guías creadas

0 comentarios

Agregar Comentario

Ver Estadísticas:

Ultimas 24 horas: 0

Ultimos 7 días: 0

Ultimos 30 días: 1

Todo El Tiempo: 266