Saltar al contenido principal

iHome iP1 Buttons Replacement

Qué necesitas

  1. iHome iP1 Buttons Replacement, Dock Cover: paso 1, imagen 1 de 1
    • Orient the iHome upside down with the speakers facing you.

  2. iHome iP1 Buttons Replacement: paso 2, imagen 1 de 1
    • Remove the two 9.5 mm Phillips #1 screws from the dock cover.

  3. iHome iP1 Buttons Replacement: paso 3, imagen 1 de 3 iHome iP1 Buttons Replacement: paso 3, imagen 2 de 3 iHome iP1 Buttons Replacement: paso 3, imagen 3 de 3
    • Remove the dock cover by grabbing its sides and pulling it up and away from the faceplate.

  4. iHome iP1 Buttons Replacement, Buttons: paso 4, imagen 1 de 2 iHome iP1 Buttons Replacement, Buttons: paso 4, imagen 2 de 2
    • Disconnect the silver ribbon cable on the left-hand side by pulling away from the command buttons.

  5. iHome iP1 Buttons Replacement: paso 5, imagen 1 de 3 iHome iP1 Buttons Replacement: paso 5, imagen 2 de 3 iHome iP1 Buttons Replacement: paso 5, imagen 3 de 3
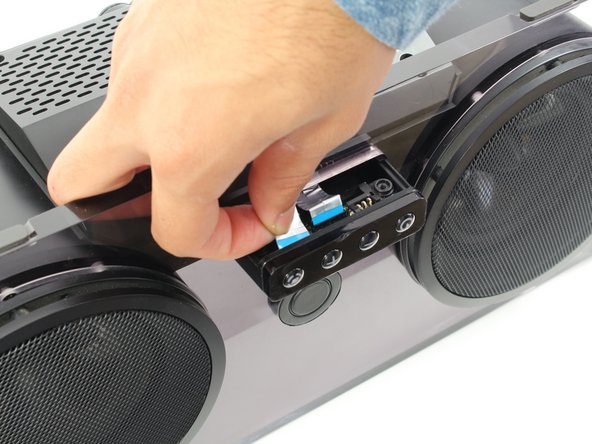
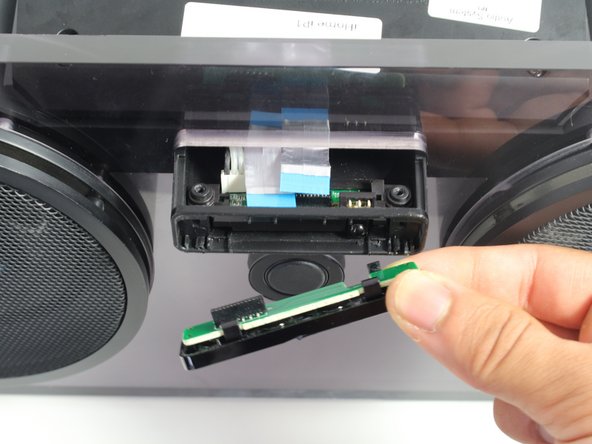
    • Remove the command buttons by pulling the small black panel containing them downward and away from the faceplate.

Conclusión

To reassemble your device, follow these instructions in reverse order.

Una persona más ha completado esta guía.

Wen Sullivan

Miembro Desde 10/06/16

518 Reputación

4 Guías creadas

Equipo

Cal Poly, Team 20-1, Livingston Fall 2016 Miembro de Cal Poly, Team 20-1, Livingston Fall 2016

CPSU-LIVINGSTON-F16S20G1

4 Miembros

7 Guías creadas

Un comentario

Where can I buy the button PCB

David Ivar - Contestar

Agregar Comentario

Ver Estadísticas:

Ultimas 24 horas: 0

Ultimos 7 días: 2

Ultimos 30 días: 2

Todo El Tiempo: 520