Saltar al contenido principal

iHome iBT230 Motherboard Replacement

Qué necesitas

  1. iHome iBT230 Motherboard  Replacement, Motherboard: paso 1, imagen 1 de 1
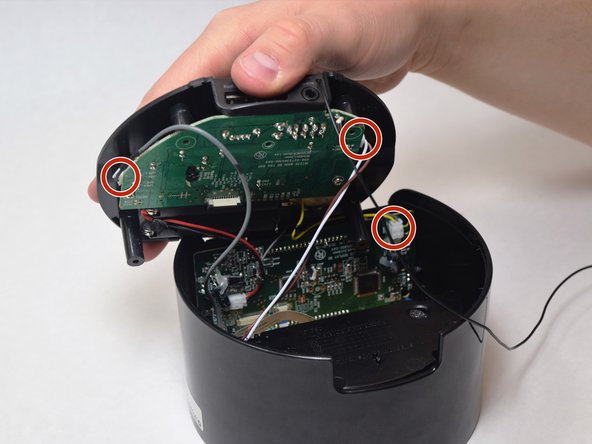
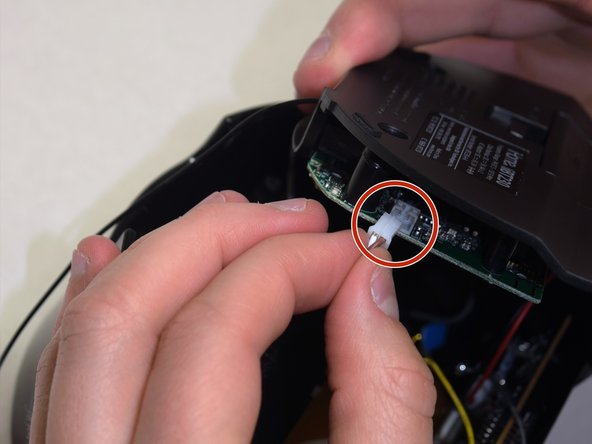
    • Remove the four 5.5 mm Phillips Head #00 screws from the bottom palate of the iBT230.

  2. iHome iBT230 Motherboard  Replacement: paso 2, imagen 1 de 2 iHome iBT230 Motherboard  Replacement: paso 2, imagen 2 de 2
    • Grip the top of the iBT230 by placing your thumb on the back portion, where the USB port is located. Pull up, and you should notice various different colored wires, connected to the Main Motherboard.

  3. iHome iBT230 Motherboard  Replacement: paso 3, imagen 1 de 3 iHome iBT230 Motherboard  Replacement: paso 3, imagen 2 de 3 iHome iBT230 Motherboard  Replacement: paso 3, imagen 3 de 3
    • Unplug the connectors from all sides of the iBT230, and unplug the wire connected to the screen.

    • Make sure to note which wire goes where, you don't want to re-solder the wires into the incorrect ports!

  4. iHome iBT230 Motherboard  Replacement: paso 4, imagen 1 de 2 iHome iBT230 Motherboard  Replacement: paso 4, imagen 2 de 2
    • On the bottom component where the green Main Motherboard is located, remove the two 5.5 mm Phillips #00 screws.

    • The old Motherboard will come free from the bottom of the iBT230.

Conclusión

To reassemble your device, follow these instructions in reverse order.

2 personas más completaron esta guía.

Bilal Siddiqui

Miembro Desde 04/10/17

376 Reputación

3 Guías creadas

Equipo

UW Tacoma, Team S3-G6, Liner Spring 2017 Miembro de UW Tacoma, Team S3-G6, Liner Spring 2017

UWT-LINER-S17S3G6

4 Miembros

3 Guías creadas

0 comentarios

Agregar Comentario

Ver Estadísticas:

Ultimas 24 horas: 1

Ultimos 7 días: 8

Ultimos 30 días: 11

Todo El Tiempo: 626