Saltar al contenido principal

Esta guía ha sufrido modificaciones. Revisa la última versión sin revisar.

iBook G4 14" 1.42 GHz Rear Display Bezel Replacement

Sólo Prerrequisito
Esta guía solo debería usarse como prerrequisito para otras guías. Por tanto, estará incompleta.

Qué necesitas

  1. iBook G4 14" 1.42 GHz Rear Display Bezel Replacement, Rear Display Bezel: paso 1, imagen 1 de 1
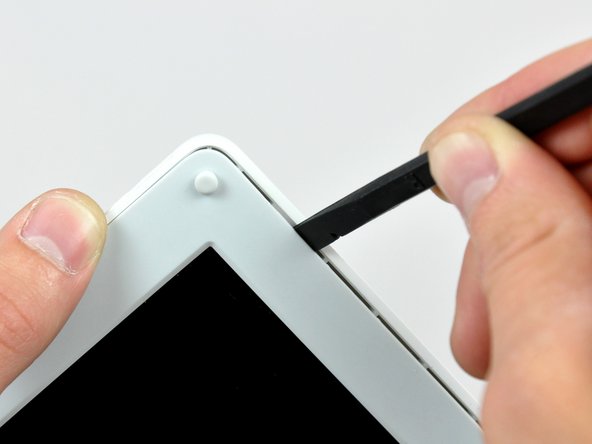
    • Use a 1.5 mm hex screwdriver to remove the two hex screws on either side of the display (four screws total).

    • If you don't have a 1.5 mm hex driver, you can probably get these screws out with a T6 Torx screwdriver. However, if you use a T6 Torx driver you'll be more likely to strip the screws.

  2. iBook G4 14" 1.42 GHz Rear Display Bezel Replacement: paso 2, imagen 1 de 1
    • Use your thumbs to slightly separate the rear bezel from the front bezel.

    • It is helpful to hold the opposing corner of the display stationary to aid in flexing the rear bezel away from the display.

  3. iBook G4 14" 1.42 GHz Rear Display Bezel Replacement: paso 3, imagen 1 de 3 iBook G4 14" 1.42 GHz Rear Display Bezel Replacement: paso 3, imagen 2 de 3 iBook G4 14" 1.42 GHz Rear Display Bezel Replacement: paso 3, imagen 3 de 3
    • Insert the flat end of a spudger into the gap between the front and rear bezels.

    • Rotate your spudger until it is parallel to the front face of the display.

    • Run the spudger around the perimeter of the display to separate the rear bezel from its retaining clips.

  4. iBook G4 14" 1.42 GHz Rear Display Bezel Replacement: paso 4, imagen 1 de 1
    • Lift the rear bezel off the display.

Conclusión

To reassemble your device, follow these instructions in reverse order.

0 comentarios

Agregar Comentario

Ver Estadísticas:

Ultimas 24 horas: 0

Ultimos 7 días: 0

Ultimos 30 días: 0

Todo El Tiempo: 252