Saltar al contenido principal

ZTE Maven 3 Screen Replacement

Qué necesitas

  1. ZTE Maven 3 Screen Replacement, Back Cover: paso 1, imagen 1 de 3 ZTE Maven 3 Screen Replacement, Back Cover: paso 1, imagen 2 de 3 ZTE Maven 3 Screen Replacement, Back Cover: paso 1, imagen 3 de 3
    • Locate the small indent on the back right bottom corner of the phone.

    • Put the pry tool or your fingertip inside the small gap on the bottom right of the back of the phone and pop up the cover.

    • Continue to go around the phone until the cover is completely off the back of the pull and put it aside.

  2. ZTE Maven 3 Screen Replacement, Battery: paso 2, imagen 1 de 3 ZTE Maven 3 Screen Replacement, Battery: paso 2, imagen 2 de 3 ZTE Maven 3 Screen Replacement, Battery: paso 2, imagen 3 de 3
    • Locate the battery in the middle of the back of the phone.

    • Push in and up on the battery to remove it from its slot.

    • Put the battery aside.

  3. ZTE Maven 3 Screen Replacement, Midframe: paso 3, imagen 1 de 1
    • Use a Phillips #00 screwdriver to remove twelve 2 mm screws along the back outer edges of the phone.

  4. ZTE Maven 3 Screen Replacement: paso 4, imagen 1 de 1
    • There’s a 13th 2 mm screw with a lock sticker over it on the bottom right corner. Insert the #00 Phillips screwdriver in the middle, breaking the sticker, and take the screw out.

  5. ZTE Maven 3 Screen Replacement: paso 5, imagen 1 de 2 ZTE Maven 3 Screen Replacement: paso 5, imagen 2 de 2
    • Slide the pry tool into the middle of the connection between the screen and the back of the phone.

    • Once in, slide the pry tool around the phone, separating the screen and the back of the phone.

    • The detached piece is the midframe, and you can place it aside when detached.

  6. ZTE Maven 3 Screen Replacement, Motherboard: paso 6, imagen 1 de 1
    • Use the Phillips #00 screwdriver and remove the four 2 mm screws that are located around the edges.

  7. ZTE Maven 3 Screen Replacement: paso 7, imagen 1 de 1
    Herramienta utilizada en este paso:
    Tweezers
    $4.99
    Comprar
    • Please locate the black wire that’s attached to gold plates on the left side of the device.

    • Using a pair of tweezers, carefully grab the black wire and detach it, then remove it.

  8. ZTE Maven 3 Screen Replacement: paso 8, imagen 1 de 2 ZTE Maven 3 Screen Replacement: paso 8, imagen 2 de 2
    • Using the tweezers, carefully detach the six ribbon cables also located along the edges.

    • 2 adhesive ribbon cables (green circles).

    • One ribbon cable that slides out (orange circles).

    • Three ribbon cables that pop in and out (yellow circles).

  9. ZTE Maven 3 Screen Replacement: paso 9, imagen 1 de 3 ZTE Maven 3 Screen Replacement: paso 9, imagen 2 de 3 ZTE Maven 3 Screen Replacement: paso 9, imagen 3 de 3
    • You will also have to detach the two cameras by detaching the ribbon cable using the tweezers as well. Put those off to the side.

  10. ZTE Maven 3 Screen Replacement: paso 10, imagen 1 de 2 ZTE Maven 3 Screen Replacement: paso 10, imagen 2 de 2
    • Grab the opening pick and work it into the edges of the motherboard.

    • Make sure you are firmly pushing the pick to loosen the motherboard since it is placed with adhesive.

    • Remove the motherboard and put it aside.

  11. ZTE Maven 3 Screen Replacement, Daughterboard/Charging Port: paso 11, imagen 1 de 2 ZTE Maven 3 Screen Replacement, Daughterboard/Charging Port: paso 11, imagen 2 de 2
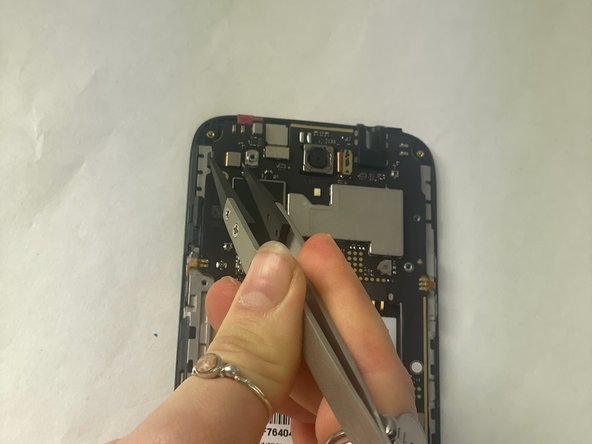
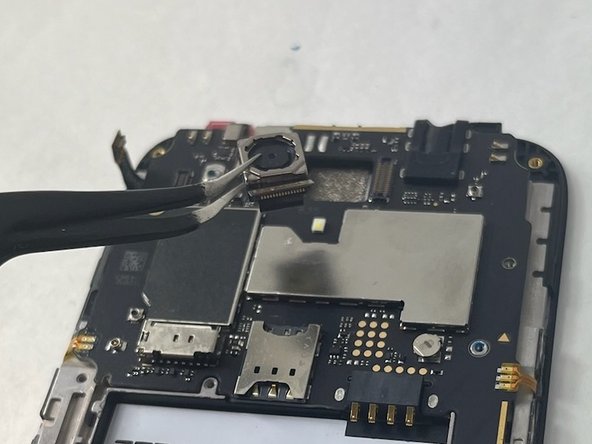
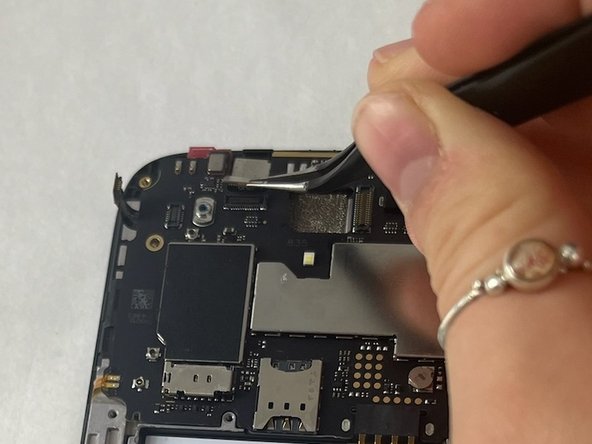
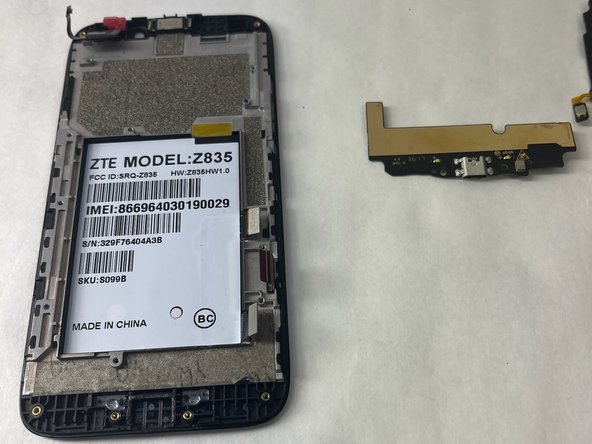
    • Use your fingertips or pry gently with a plastic tool to remove the daughterboard.

  12. ZTE Maven 3 Screen Replacement, Screen: paso 12, imagen 1 de 1
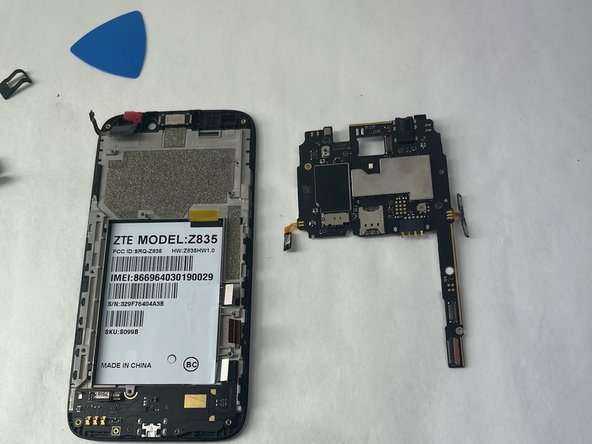
    • What is left in your hand is now the screen, and any replacement screen will be just as what is in your hand.

Conclusión

To reassemble your device, follow these instructions in reverse order.

Emma Thiboutot

Miembro Desde 10/30/23

699 Reputación

8 Guías creadas

Equipo

UMass Dartmouth, Team 3-1, Konn Fall 2023 Miembro de UMass Dartmouth, Team 3-1, Konn Fall 2023

UMASSD-KONN-F23S3G1

3 Miembros

10 Guías creadas

0 comentarios

Agregar Comentario

Ver Estadísticas:

Ultimas 24 horas: 0

Ultimos 7 días: 1

Ultimos 30 días: 3

Todo El Tiempo: 40