Introducción
Lo llevamos diciendo durante años: Cualquier producto que "pueda" tener componentes electrónicos incorporados, "tendrá" (eventualmente) componentes electrónicos incorporados. Hoy tenemos un nuevo cyborg golpeando nuestra mesa de desmontaje: la Xiaomi MiJia QiCycle Bicicleta Eléctrica Plegable. Este es el primer vehículo en nuestra mesa de disección, por eso estamos emocionados de sumergirlos en una clase completamente nueva de dispositivo. ¿Ha logrado Xiaomi hacer una bicicleta inteligente completamente reparable sin volver una pesadilla los retoques propios? Comencemos este desmontaje y averigüémoslo.
Si quieres mantenerte al día con las noticias tecnológicas, no te esfuerces, solo síguenos en Instagram, Twitter, and Facebook!
Qué necesitas
-
-
Mírate, pequeña amiga. Bastante estilosa por fuera, echemos un vistazo a las especificaciones:
-
motor de alta velocidad M108RL 250 W, 36 V de Ananda
-
Batería de 0.21 kWh (con 20 NCR18650PF celdas de Li-ion )
-
45 km autonomía con una sola carga
-
Caja de cambio Shimano Nexus 3 Velocidades
-
Un sensor de torque ajusta la potencia en base al pedaleo
-
Una computadora de viaje combinada con un controlador para proveer estadísticas en tiempo real de velocidad, distancia, potencia, etc.
-
-
-
Para aquellos que no están familiarizados con bicicletas eléctricas plegables, acá hay otra, la clásica, aún análoga bicicleta plegable Brompton, para comparar. (Es un poco más macro que nuestras comparaciones habituales.)
-
La QiCycle tiene una menor distancia entre ejes (870 mm) con llantas más pequeñas (16"). El manubrio fijo y el sillín también se pueden bajar (malas noticias para los ciclistas sobre 5'6"/170 cm).
-
El computador incorporado de la bicicleta puede alternar entre cuatro tipos de alimentación y mostrar datos de conducción en tiempo real. (Y la aplicación para teléfono entrega un montón de información, también).
-
-
Este paso está sin traducir. Ayuda a traducirlo
-
Enough talk, lets strip this vehicle down starting with the easiest part: the saddle. Two quick-release clamps later it's free!
-
The seat post locks the rear rocker arm in place, so once removed the bike can fold up.
-
Next unscrew the fancy folding pedals. This mechanism reduces the overall width of the bike when folded.
-
-
Este paso está sin traducir. Ayuda a traducirlo
-
The chain runs outside the rear rocker swing, and has a handy rear chain stretcher, making removal pretty simple.
-
The chainring has 52 sprockets whereas the rear hub gear counts 14 sprockets. That gives us a ratio of 1:2.7 in first gear, 1:3.7 in second gear and 1:5 in third gear.
-
The chain itself has 96 links. There's no master link for opening the chain but a standard chain tool can pop out any link.
-
-
Este paso está sin traducir. Ayuda a traducirlo
-
Taking the crank arms off takes a little preparation, a cover must be removed before you can fit the crank puller on. But after that it pops out like any other bike's crank.
-
The next piece of the power conveyance puzzle is the bottom bracket.
-
Again we need a standard bike tool—the cartridge bottom bracket tool—to loosen this piece of hardware.
-
-
Este paso está sin traducir. Ayuda a traducirlo
-
A nice feature for the QiCycle is this Shimano Nexus 3-speed hub. We easily dismount the bellcrank and take out the bolt which runs to the inside of the hub.
-
At the opposite end of the bike, we pull off the rubber handle and remove the shifter grip.
-
-
Este paso está sin traducir. Ayuda a traducirlo
-
The rear wheel has a hub roller brake, a style of drum brake. It is operated by hand brake lever so you can backpedal freely.
-
We start to fish out the brake cable, but it looks like it's riveted to the hub assembly, and will stay attached at that end.
-
So we loosen the bolt holding the hub to the frame and lift out the 16" wheel with its 28 spokes, 3-gear hub and roller brake, and its trailing brake cable...
-
-
Este paso está sin traducir. Ayuda a traducirlo
-
Of course we wouldn't be tearing this bike down if it weren't a smart bike. So it's about time we check out the speed sensor.
-
The cable connects under the seat then runs along the frame to the (modular) dropout.
-
We're able to peel the cable out, and free the sensor assembly.
-
-
-
Este paso está sin traducir. Ayuda a traducirlo
-
Pushing out the small circuit board, we get to the meat of this miracle measurer:
-
A Micronas HAL1820A programmable linear hall sensor
-
The three wire system is connected with a simple JST connector, not solder. Now that's what we call modular.
-
-
Este paso está sin traducir. Ayuda a traducirlo
-
Back to something more mechanical we unmount the front brake—a standard dual-pivot side-pull caliper brake.
-
To find more electronic components we aim for the front wheel with its hub gear motor.
-
A simple tug disconnects the hub motor cable so we can finally take out the front wheel.
-
-
Este paso está sin traducir. Ayuda a traducirlo
-
With the cover lid unscrewed we can push out the source of rotary motion and discover a small circular board behind the rear cover of the motor.
-
Besides distributing power it also has three sensors (every fourth coil) for measuring the speed.
-
The three gears on the flip side are made of plastic to keep abrasion to a minimum.
-
-
Este paso está sin traducir. Ayuda a traducirlo
-
And now, welcome to the middle of the teardown.
-
We stripped the QiCycle of most of its bike parts. The aluminum skeleton we are left with weighs 5.5 kg which is over a third of the overall weight.
-
We go ahead and pull the main plug from the top tube, enabling us to extract the nervous system linking all the electronic components.
-
-
Este paso está sin traducir. Ayuda a traducirlo
-
Only 4 Torx screws hold the cover of the bike computer and the 160×128 pixel TFT screen is attached with a simple ZIF connector.
-
On the flip side of the board we find the following chips:
-
MediaTek MT6261A ARM processor
-
Microchip PIC16LF1518-I/MV PIC controller
-
CSR 1010D A05U bluetooth smart IC for lighting
-
Texas Instruments TPS259240 eFuse with over voltage protection
-
Winbond 25Q128FV 128 Mb serial flash memory
-
STMicroelectronics accelerometer
-
-
Este paso está sin traducir. Ayuda a traducirlo
-
We saved the best, or at least the most power-ful, for last—the battery tube!
-
The tube can be removed single-handedly, with just the push of a button, and can be charged in 3 hours with the 5-pin connection on the side.
-
A good amount of the bike's weight is this battery—it weighs 1.46 kg, fully charged of course. ;)
-
The bike's battery capacity measures in at 5800mAh (208.8Wh). For your pointless comparison of the day, that's more than 5 iPad Pro 12.9"!
-
-
Este paso está sin traducir. Ayuda a traducirlo
-
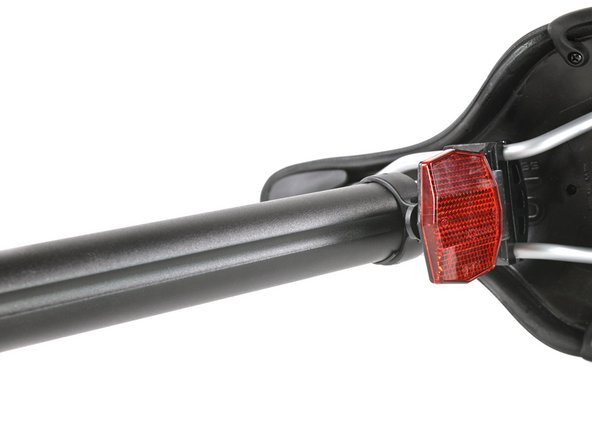
We begin to pry out the rear light, a cable keeps it in place, but it does give us access to some hidden screws. This in turn grants us access to the internals.
-
This massive umbilical leads from the charging port to the batteries and the BMS (Battery Management System) at the other end, and an LED board behind the rear light.
-
We peel out said circuit board and discover some secrets. This guy controls the rear LED array, as well as some status LEDs along the top of the tube (probably to indicate battery activity).
-
-
Este paso está sin traducir. Ayuda a traducirlo
-
The main battery compartment is a tough nut to crack. Five screws (hidden by some hard to pry off covers) aren't all that hold this case together.
-
As we finally succeed with some gentle heating and "good vibrations" we snap open the case, breaking one-time-use clips in the process. Bad news for battery cell replacements.
-
We finally reach the prize: 20 Panasonic NCR18650PF Li-Ion batteries! Panasonic is a good (safe) brand, so recharging should be a breeze, even if individual replacement won't be.
-
The battery pack also has a battery management system (BMS) circuit board.
-
-
Este paso está sin traducir. Ayuda a traducirlo
-
The board is packed with lots of resistors. What sticks out are these components:
-
An ATMEL MEGA 328P Battery Management MCU
-
Ablic (formerly Seiko Instruments) S-1142B33H-E6T2U 200 mA LDO regulator
-
FL12.000 12 MHz quartz crystal oscillator
-
On the flip side we find these:
-
Magnachip MDU1931 single n-channel trench MOSFET (x4)
-
RS2M rectifier
-
-
Este paso está sin traducir. Ayuda a traducirlo
-
We return to the bike's body to do a bit more disassembly before tackling the final electronics.
-
The bike's main hinge—the rear swing fork—is held to the top tube with a simple Allen bolt.
-
When detached from the frame we can clearly see the tilted asymmetric hinge.
-
-
Este paso está sin traducir. Ayuda a traducirlo
-
The second important compact-ifier is the foldable handle bar and stem. The mechanism itself is cool, and comes easily apart with the pull of a pin.
-
To take the front fork off the hinge, we make use of the uncommon, but essential, 10 mm allen key, an essential for bike repairs.
-
-
Este paso está sin traducir. Ayuda a traducirlo
-
What's left is the top tube, complete with the headlight and the brain (more on that later).
-
With a firm twist of the hand we can unlock the headlight and take it out of its recess.
-
A single cable with a simple connector keeps this high-powered LED well... powered.
-
-
Este paso está sin traducir. Ayuda a traducirlo
-
The
braincontrol unit is mounted to a handy handle that attaches to the frame with two simple screws. -
Having removed the screws, we can grab the controller unit by the guide rail and slide it right out.
-
This bike's brain is a single unit electric bike controller by Ananda, a manufacturer of many electric bike components.
-
-
Este paso está sin traducir. Ayuda a traducirlo
-
Of course "single unit" doesn't mean much to us, we dive in past some standard Phillips screws, and work on prying the stubborn casing open.
-
We grab a Jimmy and iFixit Opening Tools and try to negotiate–without any success, even when heated.
-
We turn our efforts to the side panel, and what we found inside will shock you (people always fall for that, right?)
-
Three boards—bridged by an army of pins—are drowned in gobs of yellowish transparent rubber.
-
-
Este paso está sin traducir. Ayuda a traducirlo
-
Most of the important components live on the battery pin board, we spy:
-
STMicroelectronics STM32100C8 micro controller with an ARM Cortex-M3 32-bit RISC core
-
Microchip MCP2003 LIN J2602 Transceiver
-
Diodes Incorporated AS358M low-power dual operational amplifiers
-
GH17M transistor
-
The rest of the goop-covered boards mostly carry capacitors and other passive components.
-
-
Este paso está sin traducir. Ayuda a traducirlo
-
And with that, this bike has been folded, unfolded, and torn totally down.
-
- Standard bicycle components and tools are used throughout, making repair more accessible.
- The battery assembly can be removed and replaced with ease.
- The electronic components can be removed without compromising the bike, extending its life and making recycling easier.
- The seatpost, frame, and front hub motor are nonstandard, making a replacement a bit more difficult when the manufacturer does not offer them.
- The battery pack is a complex assembly that makes for wasteful replacement when individual components fail.


Consideraciones Finales
Calificación de Reparabilidad


(10 es lo más fácil de reparar)
Un agradecimiento especial a estos traductores:
15%

Estos traductores nos están ayudando a reparar el mundo! ¿Quieres contribuir?
Empezar a traducir ›

Equipo

128 comentarios
My axiomi qicycle seat post keeps slipping down despite locking d 2 release clamps tightly. Caused a fall from d bike as d seat post slipped and hit d ground jamming d moving bike. How to tighten d 2 clamps to ensure no slippage especially cycling at a higher speed?
Thanks
The quick release clamps can be adjusted by using the bolt on the opposite side of the handle and tightened by closing the handle. The QiCycle is constructed for max 100kg weight. You may also try cleaning the seat post for a better grip (maybe it got a little greasy during the assembly).
I am wondering if the two saddle clamps can be replaced. And if so where to find them? Help very much appreciated :).
The saddle clamps should be replaceable with standard quick release clamps of the correct size. Depending on the design the handle might not be curved like the original one and therefore stand off a little bit.