Saltar al contenido principal

Xiaomi Mi Note Micro USB/Microphone/Virtual Keys light/Vibrator Replacement

Qué necesitas

  1. Xiaomi Mi Note Micro USB/Microphone/Virtual Keys light/Vibrator Replacement, Battery: paso 1, imagen 1 de 2 Xiaomi Mi Note Micro USB/Microphone/Virtual Keys light/Vibrator Replacement, Battery: paso 1, imagen 2 de 2
    • Use your suction cup to grip the back of the phone. Once the suction cup is secure, pull back with moderate force and the back plate should snap free.

    There is no lock on screen side so when you force pulling with sucker you only lift the phone so?

    Eddie Ng - Contestar

  2. Xiaomi Mi Note Micro USB/Microphone/Virtual Keys light/Vibrator Replacement: paso 2, imagen 1 de 3 Xiaomi Mi Note Micro USB/Microphone/Virtual Keys light/Vibrator Replacement: paso 2, imagen 2 de 3 Xiaomi Mi Note Micro USB/Microphone/Virtual Keys light/Vibrator Replacement: paso 2, imagen 3 de 3
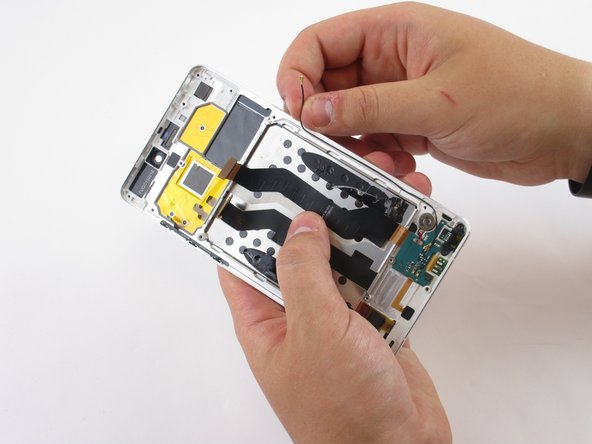
    • Once the back plate is off you will need to detach the frames that hold in the battery. Locate and remove the screws (Screws are marked in the image). You can then pull the frame off with ease once the screws have been removed.

    • Remove the six 3.5mm Phillips #000 black screws using a securing part of the back panels.

    • Remove the seven 2.5mm Phillips #000 black screws securing part of the back panels.

    • Remove the five 2mm Phillips #000 silver screws securing the remaining back panels.

    No need to remove the lower part.

    Cyril Maman - Contestar

    The position of the screw is wrong

    Shi Chang - Contestar

  3. Xiaomi Mi Note Micro USB/Microphone/Virtual Keys light/Vibrator Replacement: paso 3, imagen 1 de 1
    • Use a nylon spudger to pry upwards to detach the ribbon that's connecting the battery to the motherboard.

  4. Xiaomi Mi Note Micro USB/Microphone/Virtual Keys light/Vibrator Replacement: paso 4, imagen 1 de 2 Xiaomi Mi Note Micro USB/Microphone/Virtual Keys light/Vibrator Replacement: paso 4, imagen 2 de 2
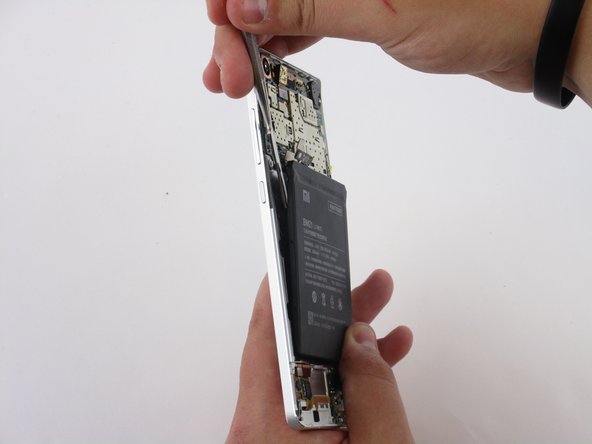
    • Insert a nylon or metal spudger underneath the battery at any point. Then slide the spudger around all the edges to loosen it. The battery can now be easily lifted out of the frame.

    • Glue will be holding down the backside of the battery.

    Be careful not to turntoo much the top left screw, next to the lens. It's close to the white film of the screen , you may hurt it (i did)

    Cyril Maman - Contestar

    Before removing the battery, it is better to hold the phone in a warm place, so that the adhesive tape is easier to remove.

    Dmitry - Contestar

  5. Xiaomi Mi Note Micro USB/Microphone/Virtual Keys light/Vibrator Replacement, Micro USB/Microphone/Virtual Keys light/Vibrator: paso 5, imagen 1 de 2 Xiaomi Mi Note Micro USB/Microphone/Virtual Keys light/Vibrator Replacement, Micro USB/Microphone/Virtual Keys light/Vibrator: paso 5, imagen 2 de 2
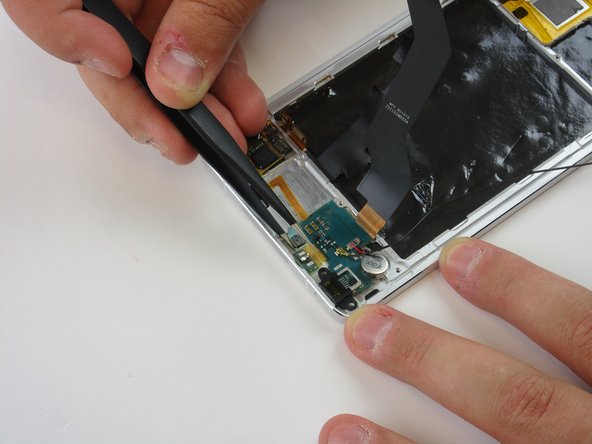
    • Use tweezers to pull upwards and detach the microphone wire that connects the motherboard to the dock connector.

  6. Xiaomi Mi Note Micro USB/Microphone/Virtual Keys light/Vibrator Replacement: paso 6, imagen 1 de 1
    • Peel back the ribbon that is adhered to the metal surface as shown.

  7. Xiaomi Mi Note Micro USB/Microphone/Virtual Keys light/Vibrator Replacement: paso 7, imagen 1 de 3 Xiaomi Mi Note Micro USB/Microphone/Virtual Keys light/Vibrator Replacement: paso 7, imagen 2 de 3 Xiaomi Mi Note Micro USB/Microphone/Virtual Keys light/Vibrator Replacement: paso 7, imagen 3 de 3
    • The dock connector is firmly adhered to the frame below it. To prevent damage to the phone use minimal force when removing.

    • Using tweezers slowly start prying upwards at the locations shown in the images. After carefully prying around the edges of the dock connector, it can now lifted upwards out of the frame.

Conclusión

To reassemble your device, follow these instructions in reverse order.

9 personas más completaron esta guía.

Mark Sears

Miembro Desde 08/27/15

1,231 Reputación

4 Guías creadas

Equipo

USF Tampa, Team 1-6, Sullivan Fall 2015 Miembro de USF Tampa, Team 1-6, Sullivan Fall 2015

USFT-SULLIVAN-F15S1G6

4 Miembros

6 Guías creadas

Un comentario

Très difficile de retirer le pcb avec le prise mini USB et impossible de des souder directement bien sur. Le buzzer est justement mal placé et gène horriblement. Environ 1h pose/dépose.

Christophe C - Contestar

Agregar Comentario

Ver Estadísticas:

Ultimas 24 horas: 0

Ultimos 7 días: 5

Ultimos 30 días: 14

Todo El Tiempo: 4,597