Esta traducción podría no reflejar los cambios más recientes añadidos a la guía de referencia. Ayúdanos a actualizar la traducción o revisa la guía original.
Qué necesitas
-
-
Este paso está sin traducir. Ayuda a traducirlo
-
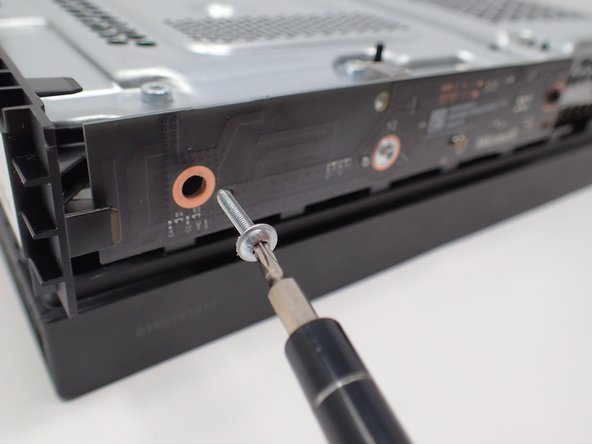
Using a T9 Torx screwdriver, remove the two 15mm silver screws that are holding a circuit board/panel to the side of the interior metal casing.
-
Using the same screwdriver, remove the 9mm black screw located farther to the right on the same circuit board/panel.
-
-
Este paso está sin traducir. Ayuda a traducirlo
-
Remove the unscrewed panel from the side of the device by pulling it toward you.
-
-
Este paso está sin traducir. Ayuda a traducirlo
-
Pull the upper edge of the white clip down, and then remove the white connector from the dislocated panel using precision tweezers.
-
-
Este paso está sin traducir. Ayuda a traducirlo
-
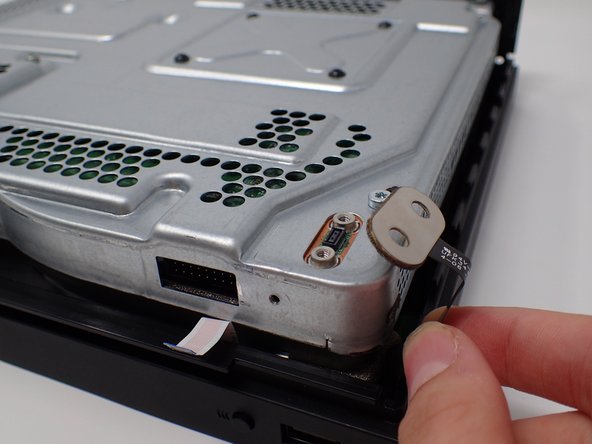
On the top of the device in the corner directly above the white connector, there is an oval plate held in place by two screws.
-
Remove both of these 7mm screws with a Torx T9 screwdriver.
-
Lift the detached plate off to the side.
-
-
Este paso está sin traducir. Ayuda a traducirlo
-
Use a Torx T9 screwdriver to remove the six 47mm long screws, which attach the bottom side of the outer case.
-
-
Este paso está sin traducir. Ayuda a traducirlo
-
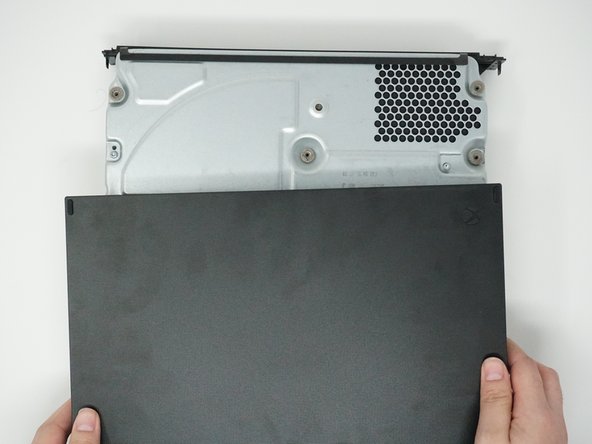
Turn the Xbox over, so that the bottom of the case is on top.
-
Lift the bottom of the case off of the Xbox by pulling it up and toward you.
-


Cancelar: No complete esta guía.
7 personas más completaron esta guía.
Un agradecimiento especial a estos traductores:
23%

¡ Gaby Varela nos está ayudando a reparar el mundo! ¿Quieres contribuir?
Empezar a traducir ›
Equipo

Cal Poly, Team S2-G6, Livingston Winter 2018 Miembro de Cal Poly, Team S2-G6, Livingston Winter 2018
CPSU-LIVINGSTON-W18S2G6
4 Miembros
23 Guías creadas
2 comentarios
Where do you get the outer case from? And if I only want to replace the outer case could I just follow the first 3 steps?
Following. I need a replacement project Scorpio case. the system I got it from was from Mercari and the guy did a poor job in taking care of the case and I need a top Scorpio case.