Esta versión puede contener ediciones incorrectas. Cambiar a la última instantánea verificada.
Qué necesitas
-
Este paso está sin traducir. Ayuda a traducirlo
-
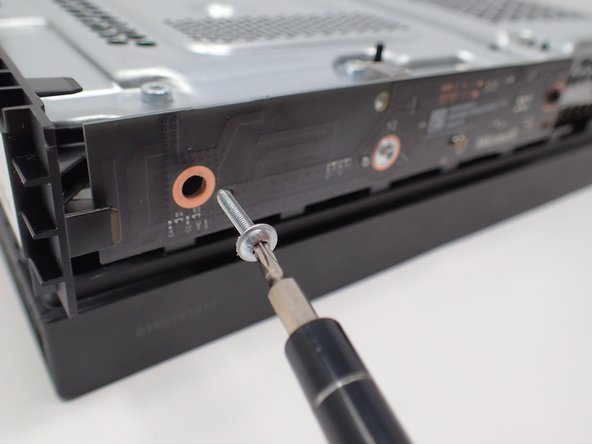
Using a T9 Torx screwdriver, remove the two 15mm silver screws that are holding a circuit board/panel to the side of the interior metal casing.
-
Using the same screwdriver, remove the 9mm black screw located farther to the right on the same circuit board/panel.
-
-
Este paso está sin traducir. Ayuda a traducirlo
-
Remove the unscrewed panel from the side of the device by pulling it toward you.
-
-
Este paso está sin traducir. Ayuda a traducirlo
-
Pull the upper edge of the white clip down, and then remove the white connector from the dislocated panel using precision tweezers.
-
-
Este paso está sin traducir. Ayuda a traducirlo
-
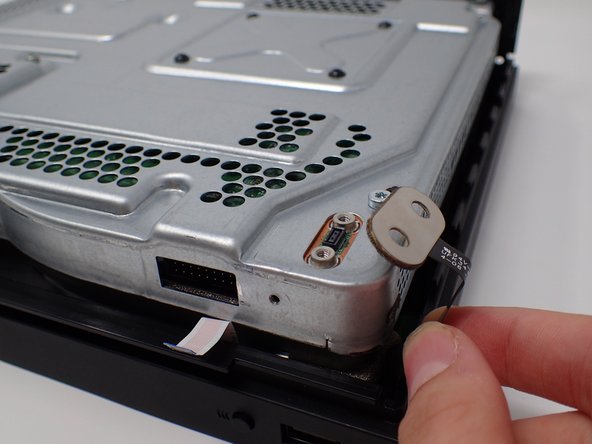
On the top of the device in the corner directly above the white connector, there is an oval plate held in place by two screws.
-
Remove both of these 7mm screws with a Torx T9 screwdriver.
-
Lift the detached plate off to the side.
-
-
Este paso está sin traducir. Ayuda a traducirlo
-
Use a Torx T9 screwdriver to remove the six 47mm long screws, which attach the bottom side of the outer case.
-
-
Este paso está sin traducir. Ayuda a traducirlo
-
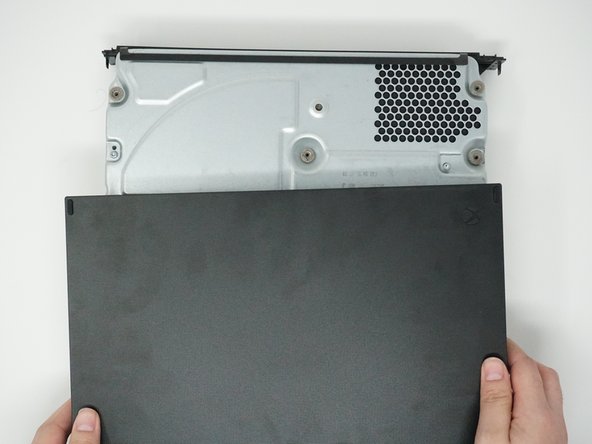
Turn the Xbox over, so that the bottom of the case is on top.
-
Lift the bottom of the case off of the Xbox by pulling it up and toward you.
-
-
-
Este paso está sin traducir. Ayuda a traducirlo
-
Flip over the device again, so that the top is facing upwards.
-
Remove the 4 smaller 11mm screws in the lower left corner on the metal casing using a Torx T9 screwdriver.
-
-
Este paso está sin traducir. Ayuda a traducirlo
-
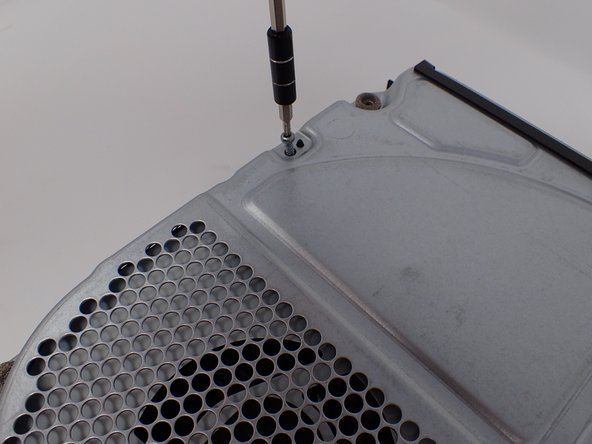
Flip over the device again, so that the bottom is facing upwards.
-
Using a Torx T10 screwdriver, remove the two screws located on opposite sides of the metal casing. One is near the fan vent, and the other is near the power supply vent.
-
-
Este paso está sin traducir. Ayuda a traducirlo
-
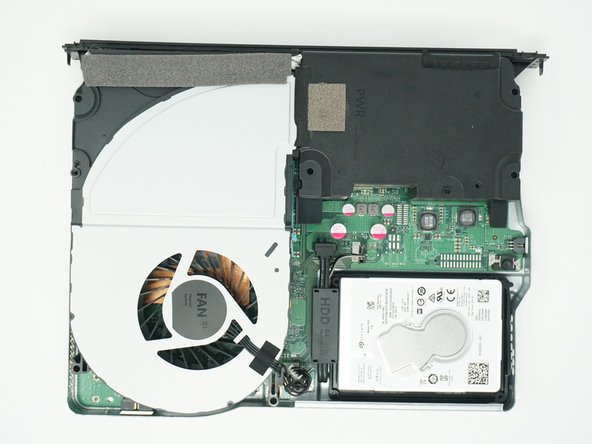
Remove the metal casing by pulling it upward, revealing the interior components of the device.
-
-
Este paso está sin traducir. Ayuda a traducirlo
-
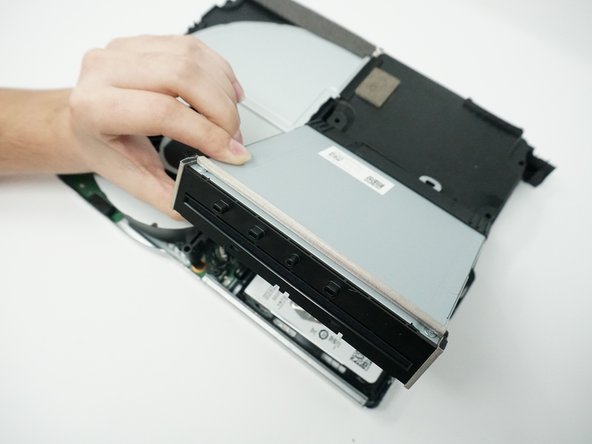
Lift and rotate the BD drive to reveal the wires that connect it to the motherboard.
-
-
Este paso está sin traducir. Ayuda a traducirlo
-
Using your fingers, gently unplug the two sets of wires connecting the drive to the motherboard.
-
Alternatively, you can disconnect the wires from the drive-side sockets. This is much easier if you have not removed the power supply.
-
The BD drive should now be completely detached from the rest of the device, and it can be set aside.
-
-
-
Pon la consola boca abajo
-
Usa un destornillador T10 Torx para quitar los cuatro tornillos de 11.4 mm que fijan el disco duro a la carcasa metálica superior.
-
-
-
Vuelve a girar la consola, recordando que el disco duro está suelto.
-
Levanta el disco duro para que la pestaña metálica se suelte de la fuente de energía.
-
Gira el disco duro (como si pasaras una hoja de un libro) y colócalo sobre la fuente de energía. El disco duro debería acabar mirando en la dirección opuesta a la inicial.
-
-
-
Desenchufa el conector con cables agrupados que conecta el disco duro y la placa base, tirando del mismo hacia arriba.
-
-
-
Desenchufa el cable SATA que conecta el disco duro con la placa base, tirando también de él hacia arriba.
-
-
-
Dale la vuelta al disco duro, de forma que la pieza de montaje quede mirando hacia arriba.
-
Usa un destornillador T10 Torx para quitar los 4 tornillos de 8.6 mm que unen el disco duro a la pieza de montaje.
-
-
-
Quita el conector del disco duro tirando de él en la dirección longitudinal del mismo.
-
-
Este paso está sin traducir. Ayuda a traducirlo
-
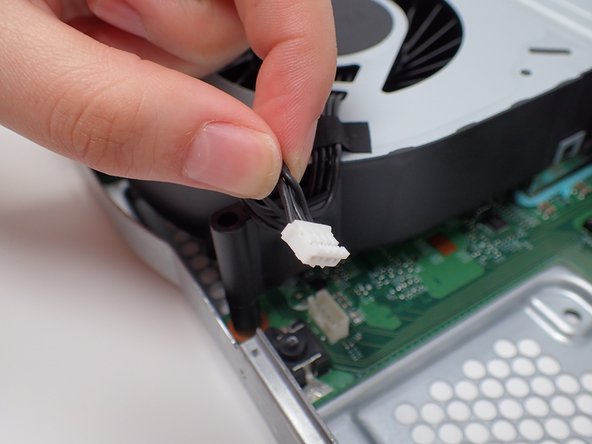
Disconnect the plastic wire connector from the motherboard.
-
-
Este paso está sin traducir. Ayuda a traducirlo
-
Remove the piece of foam by gently peeling it off the cooling system.
-
-
Este paso está sin traducir. Ayuda a traducirlo
-
Remove the power supply by lifting it off the motherboard, while leaving its cord attached.
-
Set the power supply outside of the case so that the cord is no longer over the cooling system.
-
-
Este paso está sin traducir. Ayuda a traducirlo
-
Remove the cooling system by lifting it vertically off of the motherboard.
-


Cancelar: No complete esta guía.
2 personas más completaron esta guía.
Equipo

Cal Poly, Team S2-G6, Livingston Winter 2018 Miembro de Cal Poly, Team S2-G6, Livingston Winter 2018
CPSU-LIVINGSTON-W18S2G6
4 Miembros
23 Guías creadas
2 comentarios
Is there anywhere I can purchase the fan part? or will any fan work as a replacement?
I dont see the need to remove the mounting bracket for the HDD. Once the power supply is removed, you can easily unplug the fan and remove that as well. Many of the OEM replacement fans seem to come in the proper storage casing for easy plug-in-and-go.