Saltar al contenido principal

Xbox One Hard Drive Replacement

Guía Archivada
Esta guía se mantiene únicamente para fines históricos. Utiliza la última versión de la guía para llevar a cabo tu reparación.

Qué necesitas

  1. Xbox One Hard Drive Replacement, Side Vent: paso 1, imagen 1 de 3 Xbox One Hard Drive Replacement, Side Vent: paso 1, imagen 2 de 3 Xbox One Hard Drive Replacement, Side Vent: paso 1, imagen 3 de 3
    • With a plastic opening tool, pry the side vent from the console.

    • Start from the back edge and work towards the front of the console.

  2. Xbox One Hard Drive Replacement, Wi-Fi Board: paso 2, imagen 1 de 2 Xbox One Hard Drive Replacement, Wi-Fi Board: paso 2, imagen 2 de 2
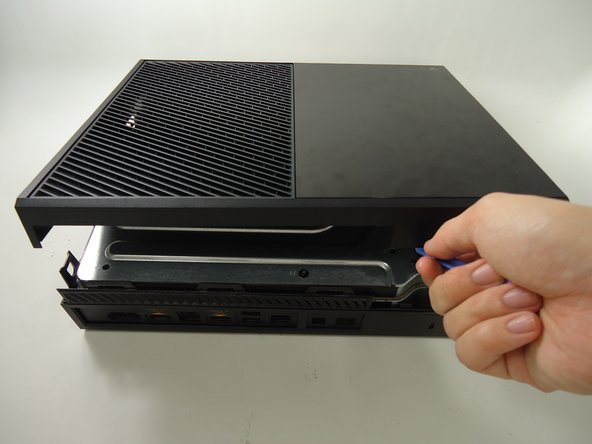
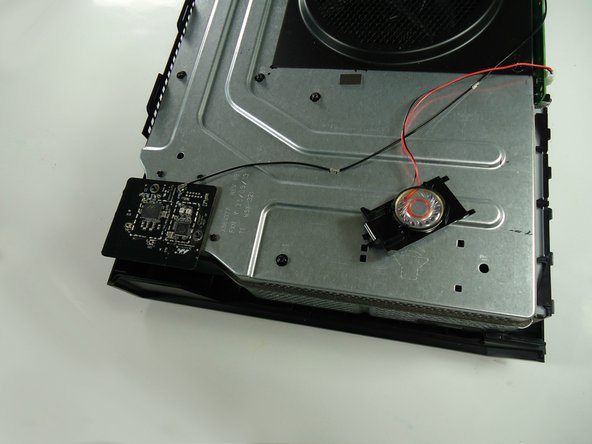
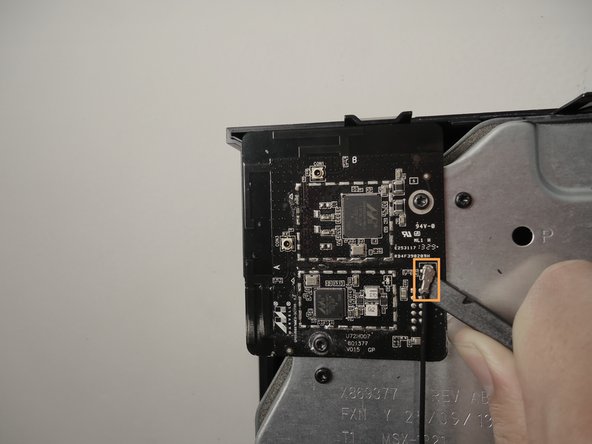
    • Slide the black angled tab behind the silver button toward the back of the console and set it aside.

  3. Xbox One Hard Drive Replacement: paso 3, imagen 1 de 3 Xbox One Hard Drive Replacement: paso 3, imagen 2 de 3 Xbox One Hard Drive Replacement: paso 3, imagen 3 de 3
    • Rotate the Xbox and remove the warranty sticker from the back. Removing this seal and opening the case of the Xbox voids your warranty with Microsoft.

    • Use a plastic opening tool on the back to pry the top of the case from the bottom. Use an up and out motion to dislodge the clips. There are multiple clips to release on the back and two on the sides.

    • This step may take up more time than the others, keep prying with the plastic opening tool and when you release one clip, wedge something underneath it so it doesn't close again.

  4. Xbox One Hard Drive Replacement: paso 4, imagen 1 de 2 Xbox One Hard Drive Replacement: paso 4, imagen 2 de 2
    • Carefully lift the top of the case, note that there is a wire connecting the front panel to the motherboard. Take care not to break this.

    • Using a spudger, release the ribbon wire from the front panel.

    • The top case is now free, set it aside.

  5. Xbox One Hard Drive Replacement: paso 5, imagen 1 de 3 Xbox One Hard Drive Replacement: paso 5, imagen 2 de 3 Xbox One Hard Drive Replacement: paso 5, imagen 3 de 3
    • Remove the speaker by squeezing the the tab on the black plastic mounting piece and lifting it up.

    • Carefully unplug the connector from the green front panel board.

    • The speaker is now free, set it aside.

  6. Xbox One Hard Drive Replacement: paso 6, imagen 1 de 2 Xbox One Hard Drive Replacement: paso 6, imagen 2 de 2
    • Unscrew the two 8.2mm T-9 screws securing the Wi-Fi board to the chassis.

    • Using the spudger, gently lift the antenna connector from the Wi-Fi board.

  7. Xbox One Hard Drive Replacement: paso 7, imagen 1 de 2 Xbox One Hard Drive Replacement: paso 7, imagen 2 de 2
    • Using a spudger and a motion similar to the previous step, gently lift the antenna connector from the green board on the front.

    • Carefully pull out the clips securing the antenna wire to the chassis, releasing the wire.

  8. Xbox One Hard Drive Replacement: paso 8, imagen 1 de 1
    • Carefully pull the Wi-Fi board straight up to release it from the chassis. The Wi-Fi board is now free.

  9. Xbox One Hard Drive Replacement, Optical/Disc Drive: paso 9, imagen 1 de 2 Xbox One Hard Drive Replacement, Optical/Disc Drive: paso 9, imagen 2 de 2
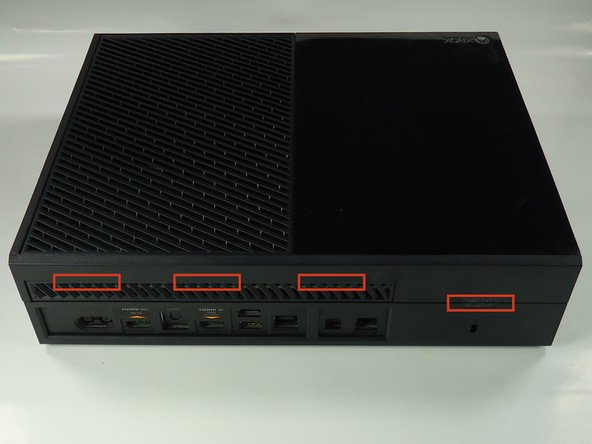
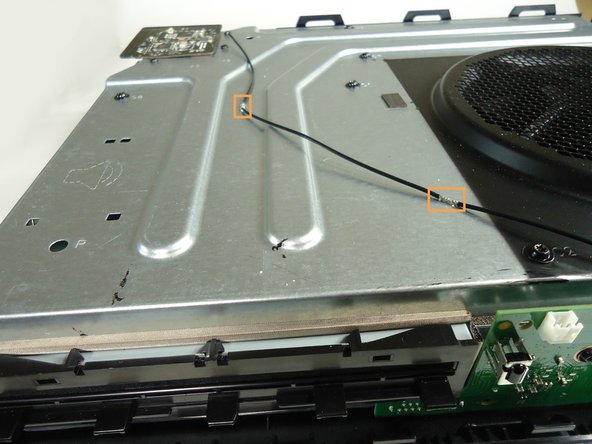
    • Remove all eight of the 64.0 mm, T-9 screws labeled C1 through C8 securing the chassis top to the motherboard.

  10. Xbox One Hard Drive Replacement: paso 10, imagen 1 de 3 Xbox One Hard Drive Replacement: paso 10, imagen 2 de 3 Xbox One Hard Drive Replacement: paso 10, imagen 3 de 3
    • Lift the chassis top, being careful not to break the wire connecting the chassis top to the motherboard.

    • Unplug the connector labeled 3 on the motherboard by gently pulling up.

    • The chassis top is now free, set it aside.

  11. Xbox One Hard Drive Replacement: paso 11, imagen 1 de 3 Xbox One Hard Drive Replacement: paso 11, imagen 2 de 3 Xbox One Hard Drive Replacement: paso 11, imagen 3 de 3
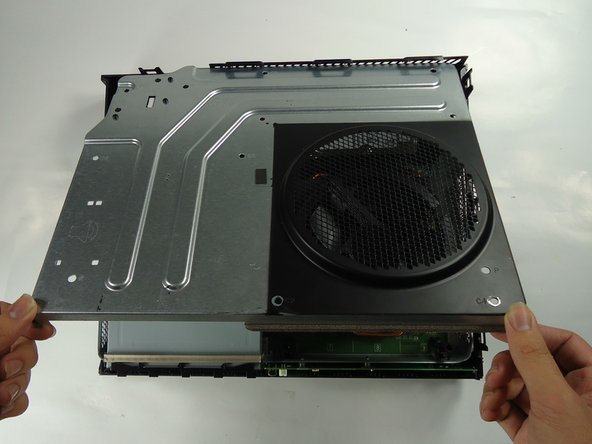
    • Lift the bottom half of the chassis (motherboard and all) from the bottom half of the black case.

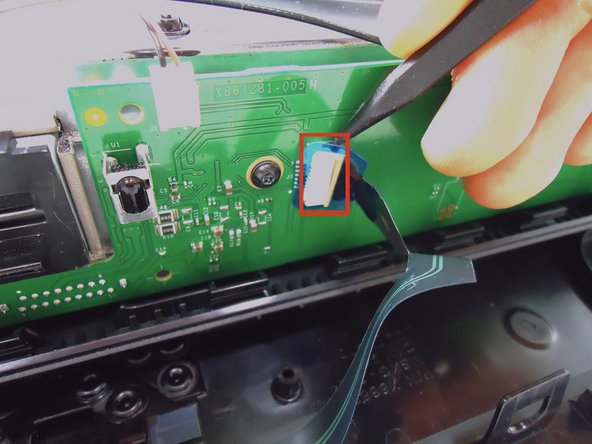
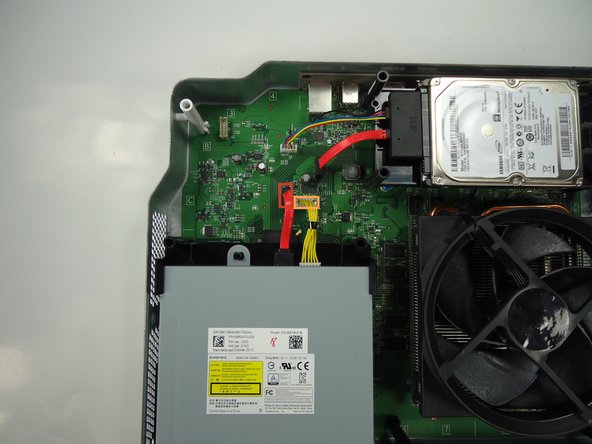
    • Unplug the red wire connecting the optical drive to the motherboard from its connector on the motherboard.

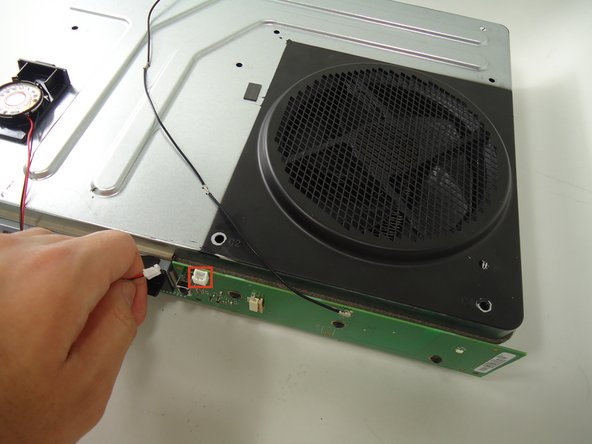
    • Unplug the yellow wire connecting the optical drive to the motherboard from its connector on the motherboard.

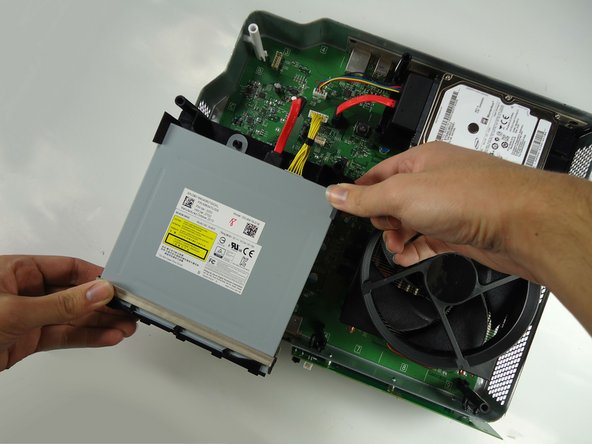
    • The optical drive is now free, lift it from the chassis and set it aside.

  12. Xbox One Hard Drive Replacement, Hard Drive: paso 12, imagen 1 de 2 Xbox One Hard Drive Replacement, Hard Drive: paso 12, imagen 2 de 2
    • Unplug the red wire connecting the hard drive to the motherboard from its connector on the motherboard.

    • Unplug the multi-colored wire connecting the hard drive to the motherboard from its connector on the motherboard.

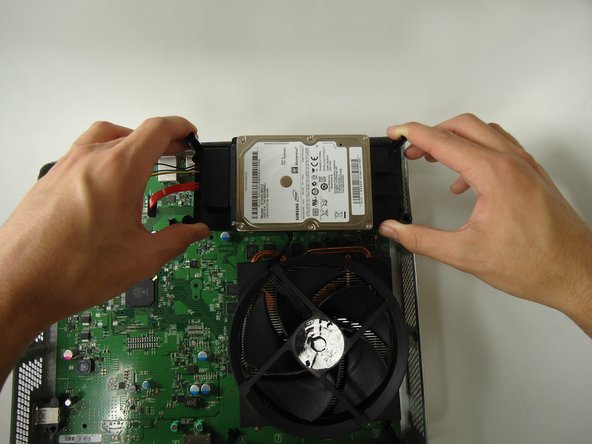
    • The hard drive is now free, remove it from the chassis by lifting straight up. Set it aside.

Conclusión

To reassemble your device, follow these instructions in reverse order.

12 personas más completaron esta guía.

Gwendolyn Church

Miembro Desde 01/27/14

1,500 Reputación

6 Guías creadas

Equipo

Cal Poly, Team 6-22, Maness Winter 2014 Miembro de Cal Poly, Team 6-22, Maness Winter 2014

CPSU-MANESS-W14S6G22

4 Miembros

11 Guías creadas

Un comentario

Do you possibly have a list of the relevant files that should be on the new hard drive? I put mine back it, did the whole plug in ethernet and let it sit, nothing. tried flashing update, nothing. factory reset file, E200 so i pulled it back apart and am looking at the file set up on my desktop trying to determine if there are any missing files. any help is appreciated.

Jeremy Murphy - Contestar

Agregar Comentario

Ver Estadísticas:

Ultimas 24 horas: 0

Ultimos 7 días: 3

Ultimos 30 días: 3

Todo El Tiempo: 6,700