Introducción
Seguir esta guía involucra abrir el Xbox 360 E y para algunos involucra más que reemplazar otras partes del Xbox.
Qué necesitas
-
-
Introduce el puntero entre el panel superior y la parte inferior que incluye patas de goma.
-
Retrocede con el puntero, manteniendo la presión constantemente en el hueco.
-
-
-
Remueve el tornillo de 11 mm a la izquierda de la tarjeta verde de Wi-Fi usando la punta de atornilla Torx T9.
-
-
-
Firmemente tome la tarjeta verde de Wi-Fi y jálela fuera del Xbox.
On that wifi card there is a little port that you can plug and old router antena into. Any idea what its called?
-
-
-
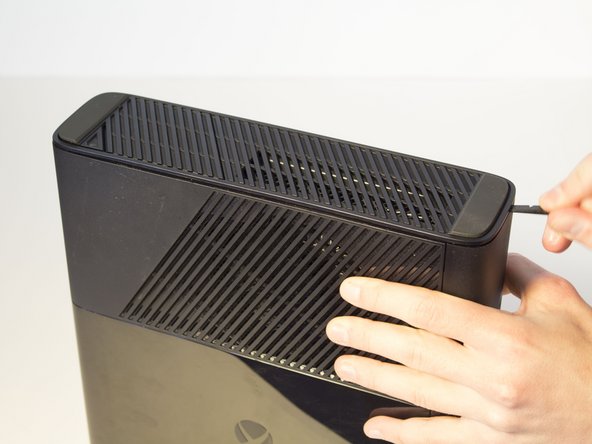
Empuja la espátula en la hendidura entre la reja de la cara derecha y el cuerpo superior del Xbox. Es más fácil empezar lejos de la ventilación.
-
Tira de la espátula como una palanca, manteniéndola presionada firmemente en la hendidura.
-
-
-
-
Remueve los cinco tornillos de 55 mm de largo marcados C2-5 y C7 con un desarmador Torx T9.
-
Cuidadosamente levanta el dispositivo y jala el cuerpo levantando la sección de metal que esta unida al plástico exterior.
Missing some steps here…. Where are the clips holding the sides together? To go straight from “Remove bottom cover” to “Device is apart” is a bit… lacking.
Yes, Aksel Barnes is correct. There are missing pictures and steps showing the removal of the plastic exterior from the metal section.
another "manual" missing the hardest steps
-
-
-
Orienta la Xbox para que el cuerpo inferior quede hacia arriba. Asegúrate de ver las patas de goma para saber que tienes el lado correcto del dispositivo.
-
Levanta el cuerpo inferior ligeramente lejos del núcleo en un ángulo de 45 grados.
-
-
-
Usa tus dedos para desconectar el cable de cinta azul de la unidad del CD.
Note: The ribbon cable connected to the CD drive can be in the color red (as it was on my board). Just make sure the other end is connected to the motherboard to be sure.
Como destrava a gaveta do cd
-
-
-
Levanta la parte delantera de la unidad CD y retírala.
Just note that you will have to swap the PCB inside the disc drive. If you do not go through with this the game will not start.
You do also require some soldering skills as the wires for the motor and sensor for the disc tray are soldered to the PSB.
-


Para reensamblar tu dispositivo, sigue estas instrucciones en orden inverso.
Para reensamblar tu dispositivo, sigue estas instrucciones en orden inverso.
Cancelar: No complete esta guía.
22 personas más completaron esta guía.
Un agradecimiento especial a estos traductores:
100%

¡ Fernando Salazar Garcia nos está ayudando a reparar el mundo! ¿Quieres contribuir?
Empezar a traducir ›
Equipo

Cal Poly, Team 2-11, Amido Winter 2014 Miembro de Cal Poly, Team 2-11, Amido Winter 2014
CPSU-AMIDO-W14S2G11
4 Miembros
43 Guías creadas
11 comentarios
screws are actually C1- C5 one is incorrectly labelled - C7 = C1 also in step 8.5 there are 3 clips holding back edge of bottom cover to top one. one on each end and one just to right of I/O area. can get 2 of them with a spudger (ends) and the middle one with a isesamo.
Several steps missing between 8 and 9
Like remove wifi adaptor.
There is some consistency errors in this guide. Step 9 seems to blast ahead beyond where we should be at this point of the guide.
Yeah, most definitely it jumps from removing the side grills to have completely disassembled the entire console case...
All the videos I watch tell me to take the drive apart and use the old motherboard on the new drive, so it's the same old motherboard. But mine is broke so can I just use the same motherboard from the new drive?
No must change the board over or it will not work.Gregory Lansberry.
Did you not mention the fact that the drives won’t work unless programmed?
I have had the need to replace the cd assembly on a few 360 e-models. The problem I run into occasionally is the new cd assembly will sometimes only play music discs. I'm not sure if there is a software lock on the assembly or not as installing a 2nd new drive fixes the problem. Are some 360 drive assemblies not compatible with certain mobo revisions? Also, once you get the sides off, a very long screwdriver does the trick on the clips to get it open.